Learn how to install GlassFish Server on RHEL 8 with this step-by-step guide. Set up a robust Java EE application server on your Red Hat Enterprise Linux system efficiently. #centlinux #linux #glassfish
Table of Contents
What is GlassFish Server?
GlassFish Server is an open-source application server that is designed for deploying and managing Java EE (Enterprise Edition) applications. It is developed by the Eclipse Foundation and was originally created by Sun Microsystems. GlassFish provides a robust and scalable platform for building enterprise-level applications, offering a variety of features that support the full Java EE specification. (GlassFish Official Website)
Key Features of GlassFish Server
- Java EE Compliance: GlassFish fully supports the Java EE standards, providing implementations of Java EE technologies such as Servlets, JSP, EJB, JPA, and more.
- Modularity: Built on a modular architecture using the OSGi framework, GlassFish allows you to install and use only the components you need, making it lightweight and customizable.
- Administration Console: GlassFish includes an easy-to-use web-based administration console for managing and configuring the server and deployed applications.
- Developer-Friendly: It integrates well with popular IDEs like Eclipse and NetBeans, facilitating a smoother development and deployment process for Java developers.
- High Availability and Clustering: GlassFish supports clustering and high availability features, ensuring that applications remain available and scalable.
- Performance Monitoring and Management: It provides tools for monitoring server performance and managing resources efficiently.
- Community and Commercial Support: While GlassFish has an active open-source community, Oracle also offers commercial support through its Oracle GlassFish Server version.
GlassFish Server is widely used in enterprise environments for hosting large-scale, mission-critical applications due to its compliance with Java EE standards, rich feature set, and scalability.
Glassfish Server vs Tomcat
GlassFish Server and Apache Tomcat are both popular choices for Java application deployment, but they serve different purposes and offer distinct features. Here’s a comparison to help you understand their differences and choose the right one for your needs:
GlassFish Server
Overview:
- GlassFish is a full-fledged Java EE (Enterprise Edition) application server.
- Developed by the Eclipse Foundation (originally by Sun Microsystems and later Oracle).
Key Features:
- Full Java EE Support: Implements the entire Java EE specification, including EJB, JPA, JMS, and more.
- Modularity: Uses a modular architecture based on OSGi, allowing for a customizable installation.
- Administration Console: Provides a comprehensive web-based administration console for easy server and application management.
- High Availability and Clustering: Supports clustering and high availability configurations for robust enterprise applications.
- Advanced Features: Includes additional enterprise features like JTA (Java Transaction API), JAX-WS (Java API for XML Web Services), and more.
- Developer Tools: Integrates well with IDEs such as NetBeans and Eclipse, offering tools for easier development and deployment.
Use Cases:
- Ideal for enterprise applications requiring full Java EE support.
- Suitable for applications needing advanced features like distributed transactions and messaging.
Apache Tomcat
Overview:
- Tomcat is a lightweight servlet container and web server.
- Developed and maintained by the Apache Software Foundation.
Key Features:
- Servlet/JSP Container: Primarily implements the Java Servlet and JavaServer Pages (JSP) specifications.
- Lightweight: Smaller footprint compared to full-fledged application servers, making it faster and easier to set up.
- Ease of Use: Simple to configure and manage, often used for smaller applications and development purposes.
- Performance: High performance for web applications, with efficient handling of servlets and JSP.
- Community Support: Strong community support and extensive documentation.
Use Cases:
- Best for web applications that only require Servlet and JSP support.
- Suitable for smaller applications or development environments where a full Java EE server is not necessary.
- Preferred for microservices and RESTful services due to its lightweight nature.
Summary
Choosing Between GlassFish and Tomcat:
- GlassFish: Opt for GlassFish if you need comprehensive Java EE support, advanced enterprise features, and robust clustering capabilities. It is well-suited for large-scale, mission-critical enterprise applications.
- Tomcat: Choose Tomcat if your application primarily uses Servlets and JSP, and you prefer a lightweight, easy-to-manage solution. Tomcat is ideal for smaller web applications, development environments, and situations where a quick setup is beneficial.
In essence, the choice between GlassFish and Tomcat depends on the specific needs of your application and the level of Java EE support required.
Read Also: How to install Payara Server on CentOS 7
Environment Specification
We are using a minimal RHEL 8 virtual machine with following specifications.
- CPU – 3.4 Ghz (2 cores)
- Memory – 2 GB
- Storage – 20 GB
- Operating System – Red Hat Enterprise Linux 8.5
- Hostname – glassfish-01.centlinux.com
- IP Address – 192.168.116.243 /24
For an ideal home lab setup to experiment with GlassFish Server on RHEL 8, using either a Mini PC or a VPS can provide a flexible and cost-effective environment. A Mini PC offers dedicated hardware resources with easy physical access, perfect for hands-on server management and local network testing.
[Power Your Projects with the Best Mini PC – Shop Now!]
Alternatively, a VPS from a reliable provider like Rose Hosting allows you to deploy and scale your Linux server remotely with excellent uptime and performance.
[Launch Your Own VPS with Rose Hosting – Click to Get Started!]
Both options are excellent for learning, testing, and running GlassFish in a real-world setting without impacting your main workstation. If you’re interested, check out the Mini PCs and VPS packages linked above that I personally recommend for Linux server experimentation and home lab projects.
Disclaimer: Some of the links above are affiliate links, which means I may earn a small commission at no additional cost to you if you choose to purchase through them. This helps support the blog and allows me to continue creating valuable Linux tutorials.
Update Linux Software Packages
By using a SSH client, connect with glassfish-01.centlinux.com as root user.
Build cache of your enabled yum repositories.
dnf makecacheExecute dnf package manager to update installed software packages in you Linux server.
dnf update -yIf the above command updates your Linux Kernel then you should reboot your Linux operating system with the new Kernel.
rebootAfter installation and reboot, verify the Linux operating system and Linux Kernel versions.
cat /etc/redhat-release
uname -r
Output:
Red Hat Enterprise Linux release 8.5 (Ootpa)
4.18.0-348.7.1.el8_5.x86_64
Install GlassFish Prerequisites
You are required wget and unzip commands to download and extract GlassFish installation files.
Therefore, install wget and unzip now by using dnf command.
dnf install -y wget unzipEclipse GlassFish Server 6.2 requires Java JDK 11.
You can either install Oracle JDK or use OpenJDK instead.
Both works fine for Eclipse GlassFish Server 6.2.
Here, we are installing OpenJDK 11 from default Red Hat repositories.
dnf install -y java-11-openjdkAfter successful installation of Java Development Kit (JDK), verify the version of Java by using following command.
java -versionOutput:
openjdk version "11.0.13" 2021-10-19 LTS
OpenJDK Runtime Environment 18.9 (build 11.0.13+8-LTS)
OpenJDK 64-Bit Server VM 18.9 (build 11.0.13+8-LTS, mixed mode, sharing)
Create Linux User and Group
Create a Linux user to own GlassFish software and processes.
useradd -s /sbin/nologin glassfishInstall GlassFish Server on RHEL 8
You can download GlassFish Server from their Official website.
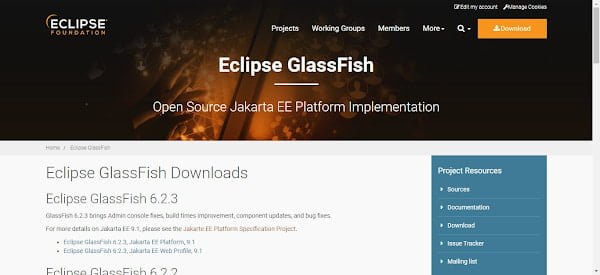
Copy the URL from the above download page and then execute following wget command at Linux CLI to download GlassFish software.
wget https://www.eclipse.org/downloads/download.php?file=/ee4j/glassfish/glassfish-6.2.3.zip -O ~/glassfish-6.2.3.zipAfter successful download, extract the downloaded file by using unzip command.
unzip -d /opt/ glassfish-6.2.3.zipChange the ownership of GlassFish software by executing following Linux command.
chown -R glassfish:glassfish /opt/glassfish6/Read Also: How to upgrade RHEL 9 to RHEL 10
Create Systemd Service Unit
To configure autostart of Eclipse GlassFish server, you need to create a Systemd service unit.
Use vim text editor to create a Systemd service unit as follows.
vi /usr/lib/systemd/system/glassfish.serviceAdd following lines in this file.
[Unit]
Description = GlassFish Server v6.2
After = syslog.target network.target

[Service]
User = glassfish
ExecStart = /usr/bin/java -jar /opt/glassfish6/glassfish/lib/client/appserver-cli.jar start-domain
ExecStop = /usr/bin/java -jar /opt/glassfish6/glassfish/lib/client/appserver-cli.jar stop-domain
ExecReload = /usr/bin/java -jar /opt/glassfish6/glassfish/lib/client/appserver-cli.jar restart-domain
Type = forking

[Install]
WantedBy = multi-user.target
Enable and start GlassFish service.
systemctl enable --now glassfish.serviceVerify the status of GlassFish service.
systemctl status glassfish.serviceOutput:
● glassfish.service - GlassFish Server v6.2
   Loaded: loaded (/usr/lib/systemd/system/glassfish.service; enabled; vendor preset: disabled)
   Active: active (running) since Tue 2021-12-21 14:43:23 EST; 11s ago
  Process: 3149 ExecStart=/usr/bin/java -jar /opt/glassfish6/glassfish/lib/client/appserver-cli.jar start-domain (code=ex>
 Main PID: 3168 (java)
    Tasks: 100 (limit: 12267)
   Memory: 335.3M
   CGroup: /system.slice/glassfish.service
           └─3168 /usr/lib/jvm/java-11-openjdk-11.0.13.0.8-4.el8_5.x86_64/bin/java -cp /opt/glassfish6/glassfish/modules/>

Dec 21 14:43:12 glassfish-01.centlinux.com systemd[1]: Starting GlassFish Server v6.2...
Dec 21 14:43:22 glassfish-01.centlinux.com java[3149]: Waiting for domain1 to start .........
Dec 21 14:43:22 glassfish-01.centlinux.com java[3149]: Successfully started the domain : domain1
Dec 21 14:43:22 glassfish-01.centlinux.com java[3149]: domain  Location: /opt/glassfish6/glassfish/domains/domain1
Dec 21 14:43:22 glassfish-01.centlinux.com java[3149]: Log File: /opt/glassfish6/glassfish/domains/domain1/logs/server.log
Dec 21 14:43:22 glassfish-01.centlinux.com java[3149]: Admin Port: 4848
Dec 21 14:43:22 glassfish-01.centlinux.com java[3149]: Command start-domain executed successfully.
Dec 21 14:43:23 glassfish-01.centlinux.com systemd[1]: Started GlassFish Server v6.2.
Configure Linux Firewall
Eclipse GlassFish Server uses following service ports.
- 4848 – Administration Console
- 8080 – HTTP Service
- 8181 – HTTPS Service
Therefore, allow these ports in Linux Firewall to make GlassFish Server accessible across the network.
firewall-cmd --permanent --add-port={4848,8080,8181}/tcp
firewall-cmd --reload
Set GlassFish Admin Password
Add GlassFish binaries in PATH environment variable, to make them executable from any path.
sed -i 's/^PATH=*/PATH=/opt/glassfish6/bin:/g' ~/.bash_profile
source ~/.bash_profile
Note: Default password for admin user is blank.
Use asadmin command and set a password for GlassFish Admin user.
asadmin --port 4848 change-admin-passwordOutput:
Enter admin user name [default: admin]>
Enter the admin password>
Enter the new admin password>
Enter the new admin password again>
Command change-admin-password executed successfully.
Configure HTTPS for GlassFish Server
By default, Glassfish Admin Console is running as a clear text HTTP service. Run following command to enable secure administration console.
asadmin --host glassfish-01.centlinux.com --port 4848 enable-secure-adminOutput:
Enter admin user name>  admin
Enter admin password for user "admin">
You must restart all running servers for the change in secure admin to take effect.
Command enable-secure-admin executed successfully.
Restart GlassFish server to apply changes.
systemctl restart glassfish.serviceBrowse URL https://glassfish-01.centlinux.com:4848/ from a client’s browser. You have to ignore certificate warning and add exception in your browser.
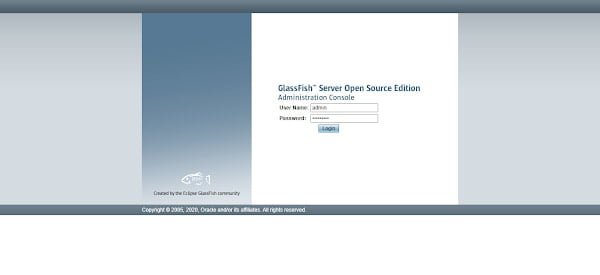
Login as Admin user with password, that we have set in previous steps.
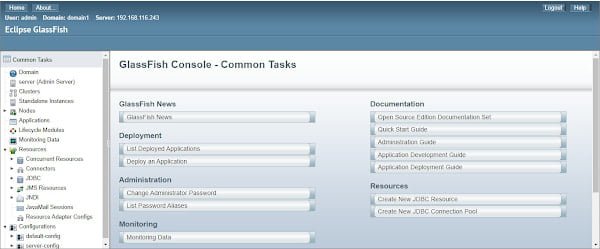
You have successfully login to Glassfish Admin Console.
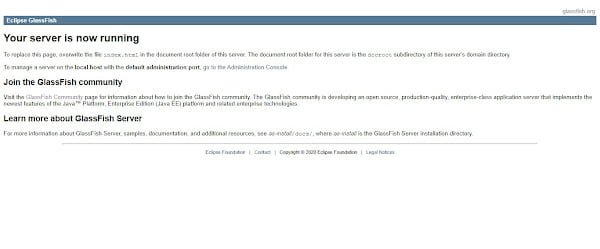
Now, Browse URLs http://glassfish-01.centlinux.com/ and https://glassfish-01.centlinux.com/ from a client’s browser.
Both URLs will bring you to the same page. The only difference is that, former will serve you a clear text HTTP version, however the later will serve an encrypted HTTPS version of the same web page.
Final Thoughts
Installing GlassFish Server on RHEL 8 can be straightforward if you follow the right steps. This guide provides a comprehensive approach to get your server up and running smoothly. However, if you encounter any issues or prefer professional assistance, I’m here to help.
Optimize your cloud infrastructure and secure your servers with my AWS and Linux administration services. Let’s ensure your systems run smoothly. Connect with me now! if you need any guidance or advice related to your Linux VPS.
FAQs
1. Can GlassFish Server run on minimal RHEL 8 installations without GUI?
Yes, GlassFish can run on RHEL 8 minimal installations because it is a Java EE application server and does not require a graphical environment.
2. How do I configure GlassFish to start automatically after a server reboot?
You can create a systemd service file for GlassFish and enable it with following command to start automatically on boot.
systemctl enable glassfish3. Is it necessary to install OpenJDK separately before installing GlassFish on RHEL 8?
Yes, GlassFish requires a Java Runtime Environment, so you must install OpenJDK or another JRE before installing GlassFish.
4. How can I secure the GlassFish admin console after installation?
You should change the default admin password and configure HTTPS for secure access to the admin console.
5. Can I run multiple instances of GlassFish on the same RHEL 8 server?
Yes, by configuring different ports and domains, you can run multiple GlassFish instances concurrently on the same machine.
Recommended Courses
If you’re serious about mastering Java in 2025, the Java Masterclass 2025: 130+ Hours of Expert Lessons by Tim Buchalka, Edwin Einsen, and Igor Popovic is a must-have resource. This comprehensive course takes you from beginner to advanced concepts with real-world coding exercises, practical projects, and deep insights from industry experts.
Whether you’re preparing for a programming career, upgrading your skills for the job market, or simply passionate about software development, this course offers everything you need in one place. Don’t miss out on the chance to future-proof your skills and stay ahead in the ever-evolving world of Java.
Disclaimer: This post contains affiliate links. If you purchase through these links, I may earn a small commission at no extra cost to you, which helps support the site and keeps valuable content coming your way.

Leave a Reply
You must be logged in to post a comment.