Learn how to install LibreNMS on CentOS 8 with this step-by-step guide. Monitor your network efficiently with this powerful, open-source monitoring tool. #centlinux #linux #libreNMS
Table of Contents
What is LibreNMS?
LibreNMS is an open-source network monitoring system that provides a comprehensive solution for network visibility and management. It is designed to be easy to use, flexible, and scalable, offering a wide range of features to monitor and manage network devices and services. Here are some key aspects of LibreNMS:
Features
Device Discovery and Management
- Automatically discovers and maps network devices.
- Supports a wide range of device types including routers, switches, firewalls, and servers.
Performance Monitoring
- Monitors network performance metrics such as bandwidth usage, latency, and packet loss.
- Collects data on CPU usage, memory utilization, and other critical system parameters.
Alerting and Notifications
- Provides customizable alerting and notification capabilities.
- Supports multiple notification channels including email, Slack, and other messaging platforms.
Graphs and Dashboards
- Offers rich graphical representations of network data.
- Allows users to create custom dashboards to visualize key performance indicators.
Multi-Tenant Support
- Supports multiple users with different levels of access and visibility.
- Suitable for managed service providers and large organizations.
Integration and APIs
- Integrates with other tools and platforms through APIs.
- Supports integration with ticketing systems, automation tools, and more.
Scalability
- Can scale from small networks to large, complex environments.
- Optimized for performance to handle large volumes of monitoring data.
Benefits
Cost-Effective
- Being open-source, LibreNMS is free to use, making it a cost-effective solution for network monitoring.
Community Support
- Backed by an active community of users and developers.
- Regular updates and contributions from the community ensure ongoing improvement and feature additions.
Flexibility
- Highly configurable to meet the specific needs of different environments.
- Supports a wide range of devices and protocols, ensuring broad compatibility.
Ease of Use
- User-friendly interface with straightforward setup and configuration processes.
- Extensive documentation and community resources to assist users.
Use Cases
- Enterprise Network Monitoring: Provides comprehensive visibility into the performance and health of enterprise networks.
- Data Centers: Monitors data center infrastructure, ensuring optimal performance and availability.
- Service Providers: Enables managed service providers to monitor client networks and ensure service quality.
- Educational Institutions: Assists in monitoring and managing campus networks effectively.
LibreNMS is an ideal choice for organizations seeking a powerful, flexible, and cost-effective network monitoring solution. Whether for small networks or large, complex environments, LibreNMS offers the tools needed to maintain network performance and reliability.
OpenNMS vs LibreNMS vs Zabbix
OpenNMS, LibreNMS, and Zabbix are all powerful open-source network monitoring tools, but they cater to different needs and preferences. Here’s a detailed comparison to help you understand their differences and determine which might be the best fit for your requirements:
OpenNMS
Overview: OpenNMS is an enterprise-grade network management platform that offers comprehensive monitoring, management, and alerting capabilities for large and complex networks.
Features:
- Scalability: Designed to scale to very large environments.
- Service Assurance: Monitors the availability and performance of network services.
- Event Management: Advanced event management and correlation capabilities.
- Fault Management: Detects and manages network faults.
- Performance Management: Extensive performance monitoring and reporting.
- Customizability: Highly customizable with extensive configuration options.
- Integration: Strong integration capabilities with other IT and network management tools.
Use Cases:
- Large enterprises with complex network environments.
- Organizations requiring extensive customization and scalability.
- Environments where advanced event and fault management are critical.
Pros:
- Highly scalable and customizable.
- Comprehensive feature set for enterprise needs.
- Strong community and commercial support.
Cons:
- Steeper learning curve.
- Requires more resources to set up and maintain.
LibreNMS
Overview: LibreNMS is a user-friendly and flexible network monitoring tool that provides automatic discovery and monitoring of network devices, along with alerting and performance graphing.
Features:
- Ease of Use: User-friendly interface and easy setup.
- Automatic Discovery: Automatically discovers and maps network devices.
- Performance Monitoring: Monitors various performance metrics.
- Alerting and Notifications: Customizable alerts and notifications.
- Graphs and Dashboards: Rich graphical representation of network data.
- Multi-Tenant Support: Supports multiple users and roles.
- Integration: API and integration with other tools.
Use Cases:
- Small to medium-sized networks.
- Organizations seeking a balance between ease of use and feature set.
- Environments needing quick deployment and straightforward monitoring.
Pros:
- Easy to set up and use.
- Active community support.
- Good balance of features for many network environments.
Cons:
- Less scalable for very large networks compared to OpenNMS.
- Not as customizable as OpenNMS.
Zabbix
Overview: Zabbix is a robust and highly configurable monitoring tool for networks, servers, and applications. It is known for its flexibility and extensive monitoring capabilities.
Features:
- Scalability: Can handle very large environments.
- Extensive Monitoring: Monitors network devices, servers, applications, and services.
- Customizable Alerts: Highly configurable alerting and notifications.
- Data Collection: Advanced data collection and processing.
- Visualization: Customizable dashboards and visualizations.
- Security: Strong focus on security and encryption.
- Integration: Extensive integration options with other systems and tools.
Use Cases:
- Enterprises needing detailed and customizable monitoring.
- Environments with diverse monitoring requirements (network, server, applications).
- Organizations looking for an all-in-one monitoring solution.
Pros:
- Highly configurable and flexible.
- Comprehensive monitoring capabilities.
- Scalable for large environments.
Cons:
- More complex setup and configuration.
- Steeper learning curve compared to LibreNMS.
Conclusion
- OpenNMS: Best suited for large enterprises needing extensive customization and scalability.
- LibreNMS: Ideal for small to medium-sized networks looking for an easy-to-use, flexible monitoring solution.
- Zabbix: A great choice for organizations requiring detailed and customizable monitoring across various types of infrastructure.
Each tool has its strengths and is designed to meet different needs. The best choice depends on your specific requirements, the size and complexity of your network, and your team’s expertise with network monitoring solutions.
Environment Specification
We are using a minimal CentOS 8 virtual machine with following specifications.
- CPU – 3.4 Ghz (2 cores)
- Memory – 2 GB
- Storage – 20 GB
- Operating System – CentOS Stream 8.0
- Hostname – librenms-01.centlinux.com
- IP Address – 192.168.116.230 /24
For experimenting with LibreNMS and other Linux server applications, using a dedicated Mini PC or a reliable VPS is highly recommended. Mini PCs offer a compact and energy-efficient hardware option perfect for a home lab setup, while VPS providers like Bluehost give you flexible, scalable cloud environments to run CentOS 8 remotely with excellent uptime.
[Grab a Mini PC for your Home Lab – Shop with Us!]
[Try Bluehost VPS Now – Perfect for Linux & DevOps Enthusiasts!]
Both options provide a convenient and cost-effective way to test and deploy LibreNMS without impacting your main workstation. If you’re interested, consider the Mini PC or Bluehost VPS links above to get started quickly with your own Linux server environment.
Disclaimer: This post includes affiliate links, which means we may earn a commission if you purchase through these links at no extra cost to you.
Update your Linux OS
You can use PuTTY (or another SSH tool) for connecting with librenms-01.centlinux.com as root user.
Build cache for installed yum repositories by using following Linux command.
dnf makecacheAfter updating yum cache, you can now update your Linux OS as follows.
dnf update -yVerify the Linux Kernel and Linux distro that we are using in this installation guide.
uname -r
cat /etc/redhat-release
Output:
4.18.0-269.el8.x86_64
CentOS Stream release 8
Install EPEL Yum Repository on CentOS 8
Some of the required software packages are not available in default yum repositories. Therefore you must add EPEL (Extra Packages for Enterprise Linux) yum repository before installing LibreNMS software.
dnf -y install epel-releaseInstall LibreNMS Prerequisites
Reset PHP module in yum repository to default stream.
dnf module reset phpOutput:
Extra Packages for Enterprise Linux Modular 8 -  65 kB/s | 537 kB     00:08
Extra Packages for Enterprise Linux 8 - x86_64  263 kB/s | 8.8 MB     00:34
Last metadata expiration check: 0:00:02 ago on Sun 31 Jan 2021 11:03:58 AM PKT.
Dependencies resolved.
Nothing to do.
Complete!
LibreNMS requires PHP 7.3, therefore, you should enable PHP 7.3 stream by using dnf command.
dnf module enable -y php:7.3Output:
Last metadata expiration check: 0:01:13 ago on Sun 31 Jan 2021 11:03:58 AM PKT.
Dependencies resolved.
================================================================================
 Package           Architecture     Version             Repository         Size
================================================================================
Enabling module streams:
 httpd                              2.4
 nginx                              1.14
 php                                7.3

Transaction Summary
================================================================================

Complete!
Now, execute the following dnf command to install all the prerequisite software packages, as required by LibreNMS networking monitoring tool.
dnf install -y bash-completion cronie fping git ImageMagick mariadb-server mtr net-snmp net-snmp-utils nginx nmap php-fpm php-cli php-common php-curl php-gd php-json php-mbstring php-process php-snmp php-xml php-zip php-mysqlnd python3 python3-PyMySQL python3-redis python3-memcached python3-pip rrdtool unzipCreate Linux User and Directory
Create a Linux user to own LibreNMS software files and processes.
useradd librenms -d /opt/librenms -M -r -s /bin/bashDownload LibreNMS Network Monitoring Tool
Now, clone the LibreNMS GitHub repository by using git command.
cd /opt
git clone https://github.com/librenms/librenms.git
Output:
Cloning into 'librenms'...
remote: Enumerating objects: 7, done.
remote: Counting objects: 100% (7/7), done.
remote: Compressing objects: 100% (7/7), done.
remote: Total 174397 (delta 0), reused 0 (delta 0), pack-reused 174390
Receiving objects: 100% (174397/174397), 183.77 MiB | 175.00 KiB/s, done.
Resolving deltas: 100% (122858/122858), done.
Updating files: 100% (11584/11584), done.
Adjust permissions on the cloned directory by executing following commands at Linux Bash prompt.
chown -R librenms:librenms /opt/librenms
chmod 771 /opt/librenms
setfacl -d -m g::rwx /opt/librenms/rrd /opt/librenms/logs /opt/librenms/bootstrap/cache/ /opt/librenms/storage/
setfacl -R -m g::rwx /opt/librenms/rrd /opt/librenms/logs /opt/librenms/bootstrap/cache/ /opt/librenms/storage/
Connect as librenms user.
su - librenmsInstall PHP libraries as required by the network monitoring software.
./scripts/composer_wrapper.php install --no-dev
exit
Output:
...
Discovered Package: darkghosthunter/larapoke
Discovered Package: fideloper/proxy
Discovered Package: fruitcake/laravel-cors
Discovered Package: laravel/tinker
Discovered Package: laravel/ui
Discovered Package: librenms/laravel-vue-i18n-generator
Discovered Package: nesbot/carbon
Discovered Package: oriceon/toastr-5-laravel
Discovered Package: tightenco/ziggy
Discovered Package: wpb/string-blade-compiler
Package manifest generated successfully.
55 packages you are using are looking for funding.
Use the `composer fund` command to find out more!
> LibreNMSComposerHelper::postInstall
setfacl -R -m g::rwx rrd/ logs/ storage/ bootstrap/cache/
setfacl -d -m g::rwx rrd/ logs/ storage/ bootstrap/cache/
> IlluminateFoundationComposerScripts::postInstall
> @php artisan vue-i18n:generate --multi-locales --format=umd
> @php artisan view:cache
Compiled views cleared!
Blade templates cached successfully!
> @php artisan optimize
Configuration cache cleared!
Configuration cached successfully!
Route cache cleared!
Routes cached successfully!
Files cached successfully!
> @php artisan config:clear
Configuration cache cleared!
> scripts/check_requirements.py || pip3 install --user -r requirements.txt || :

logout
Install Composer on CentOS 8
Install latest stable version of Composer on your Linux server.
wget https://getcomposer.org/composer-stable.pharRename the downloaded file and grant execution permissions on it.
mv composer-stable.phar /usr/bin/composer
chmod +x /usr/bin/composer
Configure Linux Server Timezone
You need to set a common timezone in PHP and Linux operating system.
First edit PHP configuration file.
vi /etc/php.iniFind and set following variable in PHP configuration file.
date.timezone = America/New_YorkNow, set the same timezone in Linux operating system. You can use the following Linux command for this purpose.
timedatectl set-timezone America/New_YorkConfigure MySQL Database Server
Open MySQL configuration file in vim editor.
vi /etc/my.cnf.d/mariadb-server.cnfAdd following directives under [mysqld] section.
innodb_file_per_table=1
lower_case_table_names=0
Enable and start MySQL database service.
systemctl enable --now mariadb.serviceConfigure MySQL database server for the first time by executing following command at Linux bash prompt.
mysql_secure_installationOutput:
NOTE: RUNNING ALL PARTS OF THIS SCRIPT IS RECOMMENDED FOR ALL MariaDB
      SERVERS IN PRODUCTION USE!  PLEASE READ EACH STEP CAREFULLY!

In order to log into MariaDB to secure it, we'll need the current
password for the root user.  If you've just installed MariaDB, and
you haven't set the root password yet, the password will be blank,
so you should just press enter here.

Enter current password for root (enter for none):
OK, successfully used password, moving on...

Setting the root password ensures that nobody can log into the MariaDB
root user without the proper authorisation.

Set root password? [Y/n] Y
New password:
Re-enter new password:
Password updated successfully!
Reloading privilege tables..
 ... Success!


By default, a MariaDB installation has an anonymous user, allowing anyone
to log into MariaDB without having to have a user account created for
them.  This is intended only for testing, and to make the installation
go a bit smoother.  You should remove them before moving into a
production environment.

Remove anonymous users? [Y/n] Y
 ... Success!

Normally, root should only be allowed to connect from 'localhost'.  This
ensures that someone cannot guess at the root password from the network.

Disallow root login remotely? [Y/n] Y
 ... Success!

By default, MariaDB comes with a database named 'test' that anyone can
access.  This is also intended only for testing, and should be removed
before moving into a production environment.

Remove test database and access to it? [Y/n] Y
 - Dropping test database...
 ... Success!
 - Removing privileges on test database...
 ... Success!

Reloading the privilege tables will ensure that all changes made so far
will take effect immediately.

Reload privilege tables now? [Y/n] Y
 ... Success!

Cleaning up...

All done!  If you've completed all of the above steps, your MariaDB
installation should now be secure.

Thanks for using MariaDB!
Login to MySQL shell as root user.
mysql -u root -pCreate a MySQL database for LibreNMS software. This database will be used by the network monitoring application as it’s backend repository.
CREATE DATABASE librenms CHARACTER SET utf8 COLLATE utf8_unicode_ci;Create a MySQL database user.
CREATE USER 'librenms'@'localhost' IDENTIFIED BY 'Str0ngPa55w0rd';Grant complete permissions on librenms database to librenms user.
GRANT ALL PRIVILEGES ON librenms.* TO 'librenms'@'localhost';Reload privileges tables and exit from MySQL shell.
FLUSH PRIVILEGES;
exit
Configure PHP-FPM Service
To configure php-fpm service for your network monitoring tool, create a copy of default configuration file and rename it as librenms.conf.
cp /etc/php-fpm.d/www.conf /etc/php-fpm.d/librenms.confEdit this file in Linux vim editor.
vi /etc/php-fpm.d/librenms.confLocate and Change [www] to [librenms]
Also set following directives therein.
user = librenms
group = librenms
listen = /run/php-fpm-librenms.sock
Configure Nginx Web Server
Create a Nginx configuration file for LibreNMS and edit it in vim text editor.
vi /etc/nginx/conf.d/librenms.confAdd following lines in this file.
server {
 listen      80;
 server_name librenms-01.centlinux.com;
 root        /opt/librenms/html;
 index       index.php;

 charset utf-8;
 gzip on;
 gzip_types text/css application/javascript text/javascript application/x-javascript image/svg+xml text/plain text/xsd text/xsl text/xml image/x-icon;
 location / {
  try_files $uri $uri/ /index.php?$query_string;
 }
 location ~ [^/].php(/|$) {
  fastcgi_pass unix:/run/php-fpm-librenms.sock;
  fastcgi_split_path_info ^(.+.php)(/.+)$;
  include fastcgi.conf;
 }
 location ~ /.(?!well-known).* {
  deny all;
 }
}
Edit Nginx default configuration file in Linux vim editor.
vi /etc/nginx/nginx.confFind and comment complete ‘Server’ section in this file.
Enable and start php-fpm and nginx services.
systemctl enable --now nginx.service php-fpm.serviceConfigure SELinux Policies
Since, we are using a minimal CentOS 8 Linux server. Therefore, to configure SELinux, you have to install SELinux tools as follows.
dnf install -y policycoreutils-python-utilsNow execute following command at Linux bash prompt to configure SELinux for LibreNMS network monitoring tool.
semanage fcontext -a -t httpd_sys_content_t '/opt/librenms/html(/.*)?'
semanage fcontext -a -t httpd_sys_rw_content_t '/opt/librenms/(logs|rrd|storage)(/.*)?'
restorecon -RF /opt/librenms
setsebool -P httpd_can_sendmail=1
setsebool -P httpd_execmem 1
chcon -t httpd_sys_rw_content_t /opt/librenms/.env
Create a SELinux policy to allow fping by httpd_t context types.
cd
vi http_fping.tt
Add following lines therein.
module http_fping 1.0;

require {
type httpd_t;
class capability net_raw;
class rawip_socket { getopt create setopt write read };
}

#============= httpd_t ==============
allow httpd_t self:capability net_raw;
allow httpd_t self:rawip_socket { getopt create setopt write read };
Load and apply this SELinux policy on your Linux server.
checkmodule -M -m -o http_fping.mod http_fping.tt
semodule_package -o http_fping.pp -m http_fping.mod
semodule -i http_fping.pp
Configure Linux Firewall
LibreNMS uses default HTTP ports for its web service. Therefore, execute following commands to allow these ports in Linux Firewall.
firewall-cmd --zone public --add-service http --add-service https
firewall-cmd --permanent --zone public --add-service http --add-service https
Configure Bash Completion for LNMS Command
You can enable bash completion for lnms command, just as you would with other Linux commands.
Execute following commands to configure bash completion for lnms command.
ln -s /opt/librenms/lnms /usr/bin/lnms
cp /opt/librenms/misc/lnms-completion.bash /etc/bash_completion.d/
Configure SNMPD on your Linux Server
An snmp sample configuration is provided with LibreNMS networking monitoring software. Create a copy of this sample file and then edit it in a Linux text editor.
cp /opt/librenms/snmpd.conf.example /etc/snmp/snmpd.conf
vi /etc/snmp/snmpd.conf
Edit the text which says RANDOMSTRINGGOESHERE and set your own community string.
Download snmp configuration script and place it in /usr/bin directory.
curl -o /usr/bin/distro https://raw.githubusercontent.com/librenms/librenms-agent/master/snmp/distroGrant execution privileges to download file.
chmod +x /usr/bin/distroEnable and start SNMPD service.
systemctl enable --now snmpd.serviceSetup LibreNMS Cron Jobs
LibreNMS network monitoring software also provides a crontab file. Just copy it in crontab directory to setup required cron jobs.
cp /opt/librenms/librenms.nonroot.cron /etc/cron.d/librenmsConfigure Logrotate for LibreNMS
Similarly copy the logrotate configuration file at logrotate directory. This file is also provide in LibreNMS software.
cp /opt/librenms/misc/librenms.logrotate /etc/logrotate.d/librenmsInstall LibreNMS on CentOS 8 – Web Installer
Open URL http://librenms-01.centlinux.com/install in Google chrome (or another web browser).
The web installer might prompt you to create a config.php file in your LibreNMS install location manually, copying the content displayed on-screen to the file. You are also required to set the ownership of this file.
vi /opt/librenms/config.php
chown librenms:librenms /opt/librenms/config.php
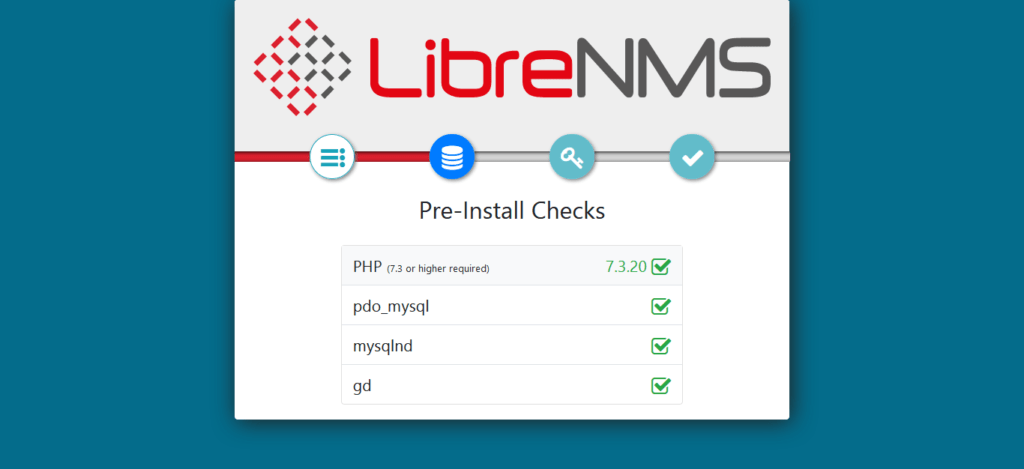
The web installer perform a prerequisite check. It won’t show any warning if you have followed the above steps correctly.
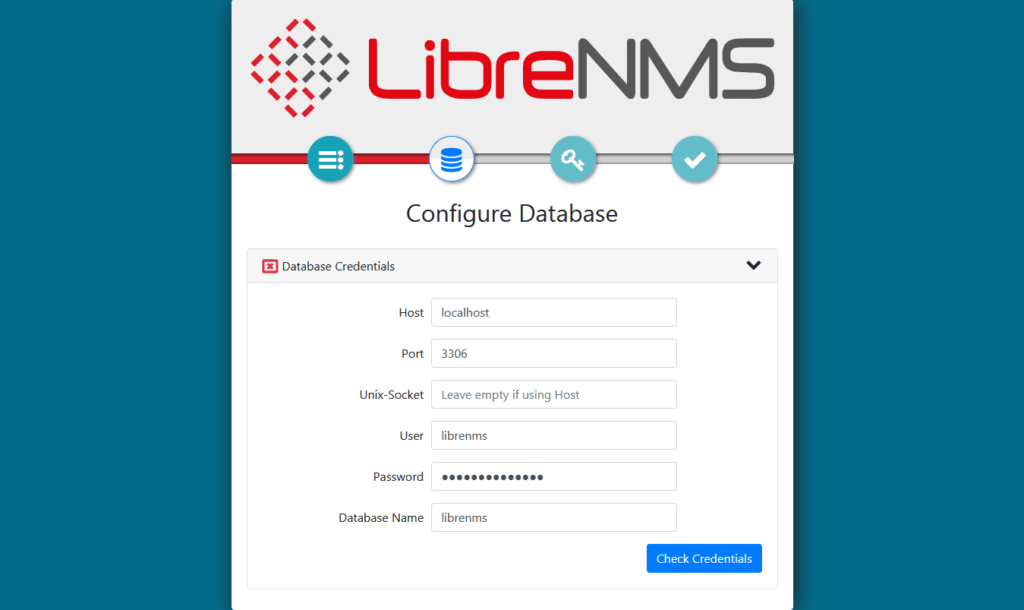
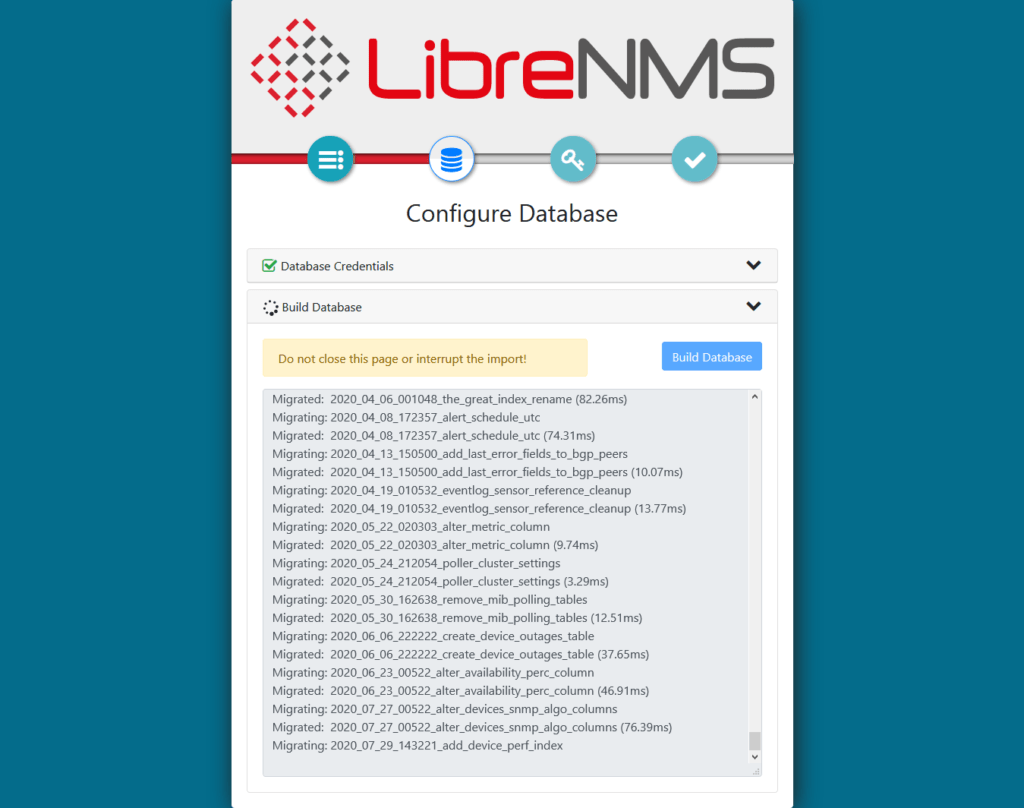
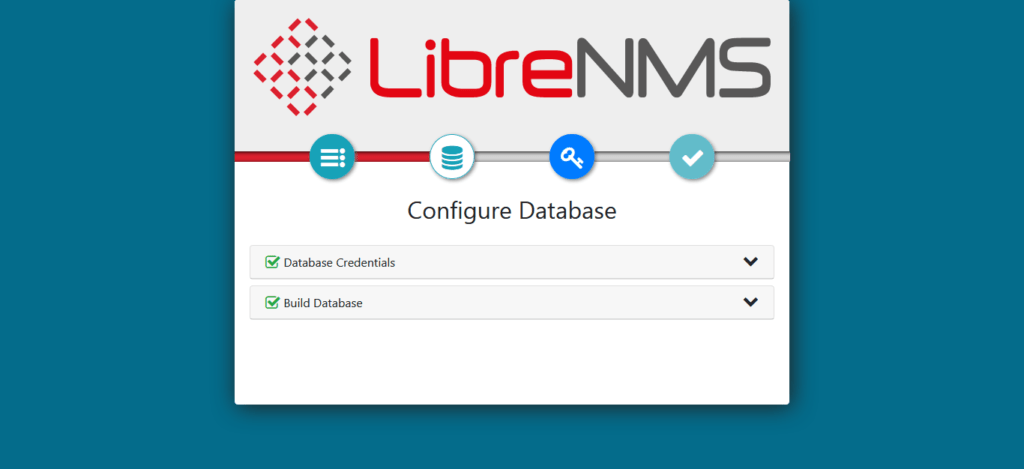
Provide MySQL server connection details and build a database for LibreNMS network monitoring software.
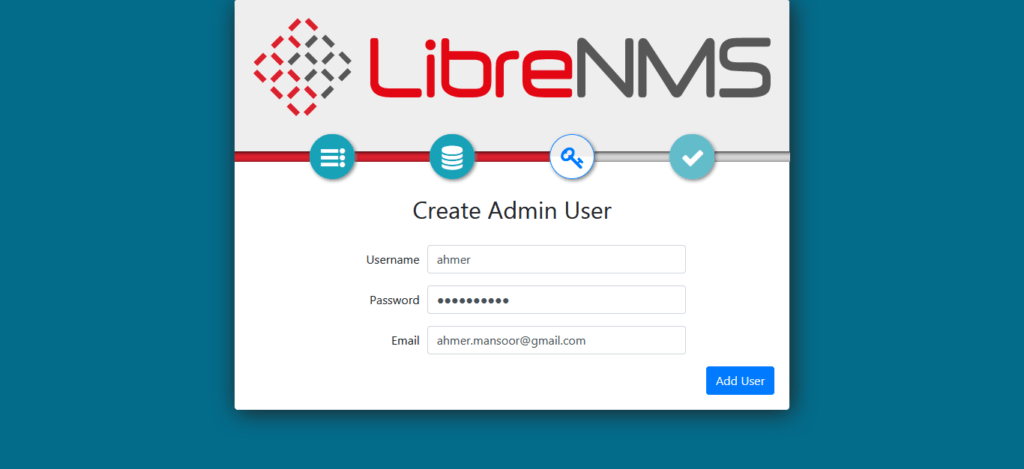
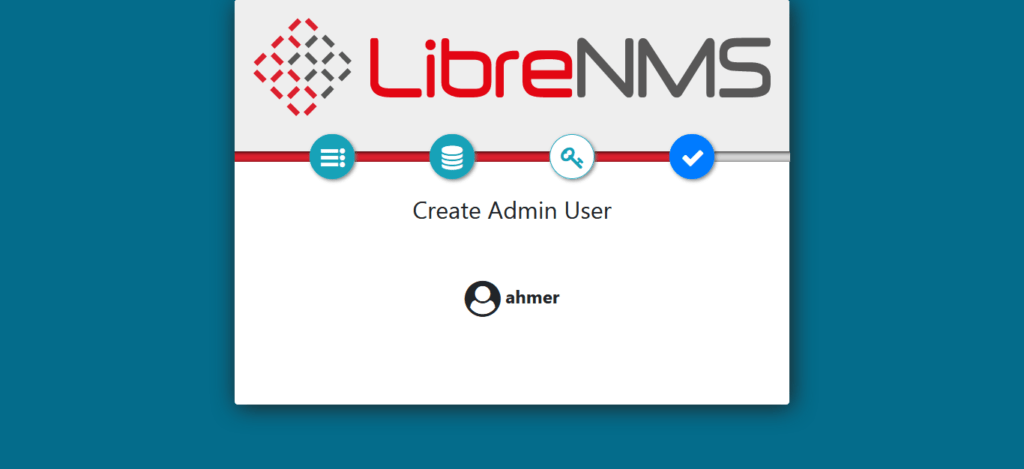
Create an admin user for LibreNMS software.
LibreNMS installation is completed successfully.
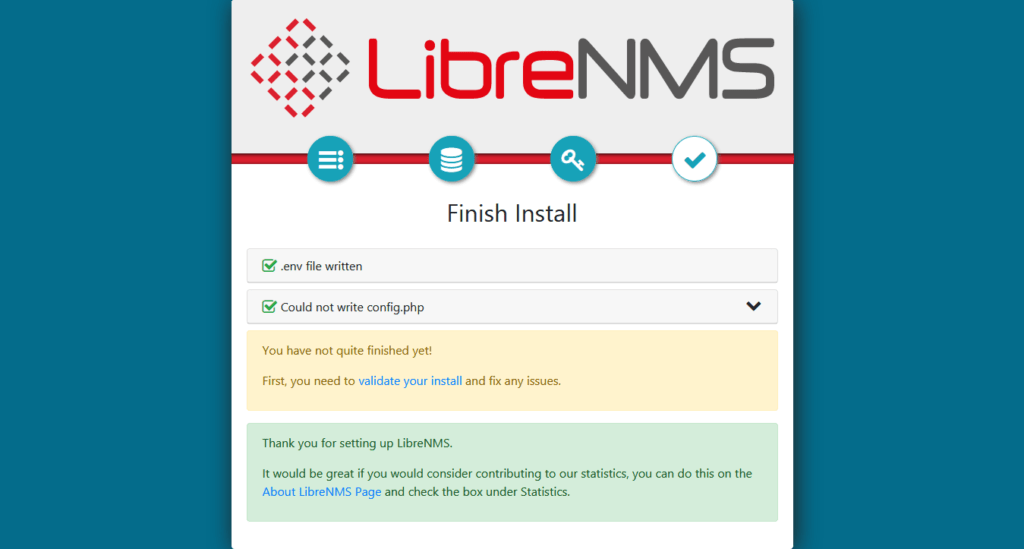
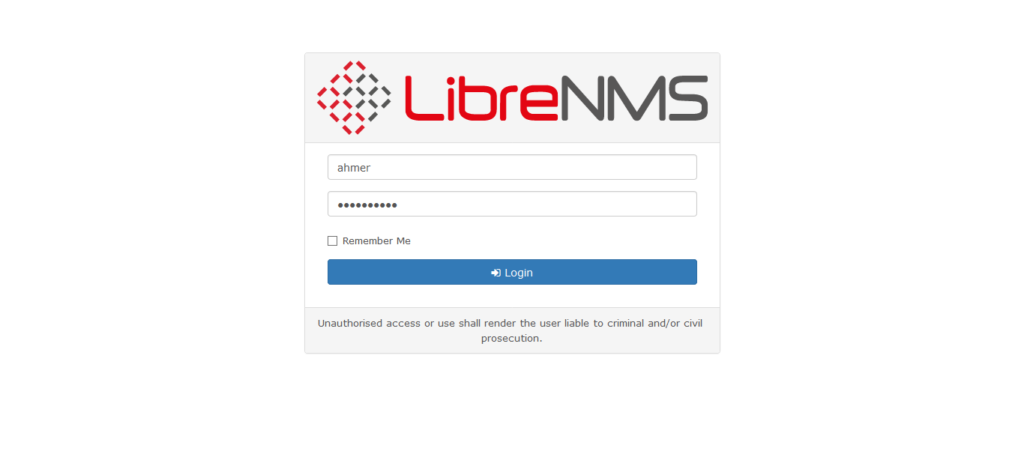
Use admin user to login to LibreNMS web UI.
Validate LibreNMS Installation
After installation and configuration of LibreNMS network monitoring software, you can execute validate.php script to check for any issues therein.
First switch to librenms user.
su - librenmsExecute validate.php script.
./validate.phpOutput:
====================================
Component | Version
--------- | -------
LibreNMS  | 1.70.1-70-g17f5a3f23
DB Schema | 2020_11_02_164331_add_powerstate_enum_to_vminfo (191)
PHP       | 7.3.20
Python    | 3.6.8
MySQL     | 10.3.27-MariaDB
RRDTool   | 1.7.0
SNMP      | NET-SNMP 5.8
====================================

[OK]    Composer Version: 2.0.9
[OK]    Dependencies up-to-date.
[WARN]  You have no devices.
        [FIX]:
        Consider adding a device such as localhost: /addhost
[OK]    Database connection successful
[OK]    Database schema correct
Our LibreNMS network monitoring server has no issues at all.
Read Also: LibreNMS Oxidized Integration Guide
Final Thoughts
In conclusion, installing LibreNMS on CentOS 8 is a great way to enhance your network monitoring capabilities with a powerful, open-source tool. By following a structured installation process, you can ensure your network is efficiently monitored and managed.
Struggling with Linux server management? I offer professional support to ensure your servers are secure, optimized, and always available. Visit my Freelancer profile to learn more!
I offer professional installation services to help you set up LibreNMS smoothly and effectively, tailored to your specific network requirements. Enhance your network monitoring with expert support today!
FAQs
Q1: Can LibreNMS run on CentOS 8 Stream or just CentOS 8?
LibreNMS works on both CentOS 8 and CentOS 8 Stream, but CentOS 8 Stream may require extra dependency checks due to its rolling-release nature.
Q2: Is it necessary to disable SELinux when installing LibreNMS?
Disabling SELinux is not mandatory but is recommended during installation to avoid permission issues; alternatively, configure SELinux policies properly.
Q3: How much system resource does LibreNMS typically need on CentOS 8?
A minimal LibreNMS setup requires around 2GB RAM and 2 CPU cores, but larger networks need proportionally more resources for smooth monitoring.
Q4: Can I install LibreNMS using Docker on CentOS 8?
Yes, Docker installation is possible but this guide focuses on native install; Docker requires separate setup and network configuration.
Q5: How often should I update LibreNMS on CentOS 8 for security?
Regular updates are recommended, ideally weekly or monthly, to keep security patches and features current without disrupting monitoring services.
Recommended Courses
If you’re serious about mastering IT infrastructure monitoring, I highly recommend the online course “Zabbix Application and Network Monitoring“ by Sean Bradley. This hands-on training is perfect for system administrators, DevOps engineers, and IT professionals who want to efficiently monitor applications, servers, and networks using Zabbix. With real-world examples and step-by-step guidance, you’ll gain practical skills that can immediately improve your monitoring workflows and career prospects.
Disclaimer: Some of the links in this post are affiliate links. This means if you click on them and make a purchase, I may earn a small commission at no extra cost to you. This helps support my work and allows me to keep creating helpful content.

Leave a Reply
You must be logged in to post a comment.