Learn the step-by-step process of how to install Odoo 16 on Rocky Linux 9 with our comprehensive guide. Get your business management software up and running smoothly on this powerful Linux distribution, unlocking the potential for seamless operations and efficient workflow management. #centlinux #linux #odoo
Table of Contents
What is Odoo?
Odoo is a Belgian suite of business management software tools including, for example, CRM, e-commerce, billing, accounting, manufacturing, warehouse, project management, and inventory management.
During Odoo experience which took place in Belgium in October 2022, Fabien Pinckaers announced that moving forward Odoo will make all applications available for free in enterprise edition, making Odoo an unparalleled suite of 70+ integrated business apps.
The Community version is a libre software, licensed under the GNU LGPLv3. The Enterprise version has proprietary extra features and services. The source code for the framework and core ERP modules is curated by the Belgium-based Odoo S.A. Odoo CRM is available for both on-premises and ready to use SaaS environment. The source code for the OpenObject framework and the core ERP modules are provided by Belgium-based Odoo S.A. (Source: Wikipedia)

Read Also: How to install Odoo 13 on CentOS 7
Environment Specification
We are using a minimally installed Rocky Linux 9 operating system with following specifications.
- CPU – 3.4 Ghz (2 cores)
- Memory – 2 GB
- Storage – 20 GB
- Operating System – Rocky Linux release 9.1 (Blue Onyx)
- Hostname – odoo-01.centlinux.com
- IP Address – 192.168.88.128/24
Recommended Training: Mastering Odoo Development – Technical Fundamentals from Odoo Class Videos

Prepare your Rocky Linux Server
By using a ssh client, login to your Rocky Linux server as root user.
Set a hostname and local dns resolution for your Linux machine by executing following commands.
hostnamectl set-hostname odoo-01.centlinux.com
echo "192.168.88.128 odoo-01 odoo-01.centlinux.com" >> /etc/hosts
As per best practice, you should update software packages in your Linux distribution before installing a new software.
Execute following dnf command at bash prompt to update your software packages.
dnf update -yIf the above command updates software packages related to Linux kernel, then reboot your operating system before moving forward in this Linux tutorial.
rebootAfter reboot, verify the versions of software that are being used in this configuration guide.
cat /etc/rocky-release
uname -r
python -V
Output:
Rocky Linux release 9.1 (Blue Onyx)
5.14.0-162.18.1.el9_1.x86_64
Python 3.9.14
Install Odoo 16 Prerequisites
During the installation of Odoo, several additional software packages are required to ensure its proper functioning. These supporting packages are readily available in the standard yum repositories of your Linux distribution. To install them, you can use the versatile dnf command, which streamlines the process of fetching and setting up these dependencies.
These packages include essential tools, libraries, and utilities that Odoo relies on for optimal performance and compatibility with your system. By installing these dependencies beforehand, you can avoid potential issues during the Odoo setup and ensure a smooth and successful installation process.
dnf install -y wget tar gcc git libpq-devel python-devel openldap-develAcer Aspire 3 A315-24P-R7VH Slim Laptop | 15.6″ Full HD IPS Display | AMD Ryzen 3 7320U Quad-Core Processor | AMD Radeon Graphics | 8GB LPDDR5 | 128GB NVMe SSD | Wi-Fi 6 | Windows 11 Home in S Mode
$299.99 (as of April 22, 2025 16:07 GMT +00:00 – More infoProduct prices and availability are accurate as of the date/time indicated and are subject to change. Any price and availability information displayed on [relevant Amazon Site(s), as applicable] at the time of purchase will apply to the purchase of this product.)Install PostgreSQL on Rocky Linux
Odoo ERP uses PostgreSQL database as it’s backend data store.
If you have already setup a PostgreSQL database server, then you can use the same here. Otherwise, you may also install PostgreSQL on the same Rocky Linux 9 server.
PostgreSQL server is available in standard yum repositories. Therefore, execute dnf command to install it.
dnf install -y postgresql-serverExecute following Linux command to initialize PostgreSQL database server.
postgresql-setup --initdb --unit postgresqlOutput:
 * Initializing database in '/var/lib/pgsql/data'
 * Initialized, logs are in /var/lib/pgsql/initdb_postgresql.log
Enable and start PostgreSQL database service.
systemctl enable --now postgresqlCreate a database user for Odoo business suite.
su - postgres -c "createuser -s odoo"Install WKHTMLTOX on Linux
wkhtmltox is a powerful, free, and open-source command-line tool designed for converting HTML documents into PDF or other widely used formats. One of its key advantages is that it operates in a fully headless mode, meaning it does not require a graphical display or display-related services to function. This makes it an excellent choice for server environments where GUI dependencies are undesirable or unavailable.
To get started, you can either download the prebuilt RPM package for wkhtmltox from their official download page or obtain the source code by cloning the official wkhtmltox repository on GitHub. Both options provide flexibility depending on your system requirements and installation preferences.
To download the wkhtmltox RPM package quickly and efficiently, execute the following commands on your Linux terminal. This method ensures you have the correct version tailored to your operating system.
cd /tmp
wget https://github.com/wkhtmltopdf/packaging/releases/download/0.12.6.1-2/wkhtmltox-0.12.6.1-2.almalinux9.x86_64.rpm
wkhtmltox RPM has been downloaded. Now use dnf command to install WKHTMLTOPDF on Linux operating system.
dnf localinstall -y wkhtmltox-0.12.6.1-2.almalinux9.x86_64.rpmSENZER X100 Wireless Gaming Headset with Mic for PC PS4 PS5 Nintendo Switch Wired for Xbox One, Bluetooth, 40+ Hrs Stereo Sound, Comfortable Gaming Headphones, Customized Side Plates
$33.99 (as of April 22, 2025 16:11 GMT +00:00 – More infoProduct prices and availability are accurate as of the date/time indicated and are subject to change. Any price and availability information displayed on [relevant Amazon Site(s), as applicable] at the time of purchase will apply to the purchase of this product.)Install Odoo 16 on Rocky Linux 9
Create a dedicated Linux user specifically for managing the Odoo business suite. This user will not be used for authentication purposes within the Odoo software itself, meaning it won’t have any login capabilities for accessing the Odoo application.
Instead, the primary role of this user is to own and manage the Odoo software files and processes, ensuring that the system runs with proper permissions and security. By assigning the ownership of Odoo files to this separate user, you help isolate the Odoo environment from other system users, which enhances security and simplifies system administration.
useradd -r -m -U -s /bin/bash -d /opt/odoo odooSwitch to odoo user and clone the odoo repository from GitHub. Here, we are using “–branch 16.0” because Odoo 16 is the latest version at the time of this writing. You can use a different numbers if you wish to install other versions of Odoo.
su - odooCreate a clone of oddo repository.
git clone https://www.github.com/odoo/odoo \
--depth 1 \
--branch 16.0 \
/opt/odoo/odoo
Output:
Cloning into '/opt/odoo/odoo'...
warning: redirecting to https://github.com/odoo/odoo.git/
remote: Enumerating objects: 38697, done.
remote: Counting objects: 100% (38697/38697), done.
remote: Compressing objects: 100% (30045/30045), done.
remote: Total 38697 (delta 11040), reused 25777 (delta 7432), pack-reused 0
Receiving objects: 100% (38697/38697), 149.72 MiB | 480.00 KiB/s, done.
Resolving deltas: 100% (11040/11040), done.
Updating files: 100% (33941/33941), done.
Create and activate a Python virtual environment for Odoo software.
cd ~
python -m venv venv
source venv/bin/activate
Now within the virtual environment, upgrade pip (Python Package Manager) by using following command.
pip install --upgrade pipOutput:
Requirement already satisfied: pip in ./venv/lib/python3.9/site-packages (21.2.3)
Collecting pip
  Using cached pip-23.0.1-py3-none-any.whl (2.1 MB)
Installing collected packages: pip
  Attempting uninstall: pip
    Found existing installation: pip 21.2.3
    Uninstalling pip-21.2.3:
      Successfully uninstalled pip-21.2.3
Successfully installed pip-23.0.1
All of the required Python libraries are listed in a requirements.txt file within Odoo software directory. You can use this file with pip command to install all these libraries in one shot.
pip install -r /opt/odoo/odoo/requirements.txtAfter sucessful installation of Odoo requirements, deactivate Python virtual environment.
deactivatePost Installation Configuration
Create a directory for installation of Odoo addons.
mkdir /opt/odoo/odoo-custom-addonsExit from odoo user shell.
exitCreate a log file for Odoo CRM and adjust file permissions.
mkdir /var/log/odoo
touch /var/log/odoo/odoo.log
chown -R odoo: /var/log/odoo/
Create odoo configuration file in /etc directory by using vim editor.
vi /etc/odoo.confAdd following directives in this file.
[options]
; This is the password that allows database operations:
admin_passwd = Str0ngPa$word
db_host = False
db_port = False
db_user = odoo
db_password = False
xmlrpc_port = 8069
logfile = /var/log/odoo/odoo.log
logrotate = True
addons_path = /opt/odoo/odoo/addons,/opt/odoo/odoo-custom-addons
Building a Debugger: Write a Native x64 Debugger From Scratch
$59.99 (as of April 22, 2025 16:07 GMT +00:00 – More infoProduct prices and availability are accurate as of the date/time indicated and are subject to change. Any price and availability information displayed on [relevant Amazon Site(s), as applicable] at the time of purchase will apply to the purchase of this product.)Create a Systemd Service Unit
To enable autostart of Odoo server during system startup, you are required to create a Systemd service unit.
vi /etc/systemd/system/odoo.serviceAdd following directives in this file.
[Unit]
Description=Odoo
Requires=postgresql.service
After=network.target postgresql.service

[Service]
Type=simple
SyslogIdentifier=odoo
PermissionsStartOnly=true
User=odoo
Group=odoo
ExecStart=/opt/odoo/venv/bin/python3 /opt/odoo/odoo/odoo-bin -c /etc/odoo.conf
StandardOutput=journal+console

[Install]
WantedBy=multi-user.target
Enable and start Odoo service.
systemctl enable --now odoo.serviceConfigure Linux Firewall
Odoo business suite uses default service port 8069/tcp. You have to allow this service port in Linux firewall, so that incoming traffic can access odoo service.
firewall-cmd --permanent --add-port=8069/tcp
firewall-cmd --reload
Access Odoo CRM
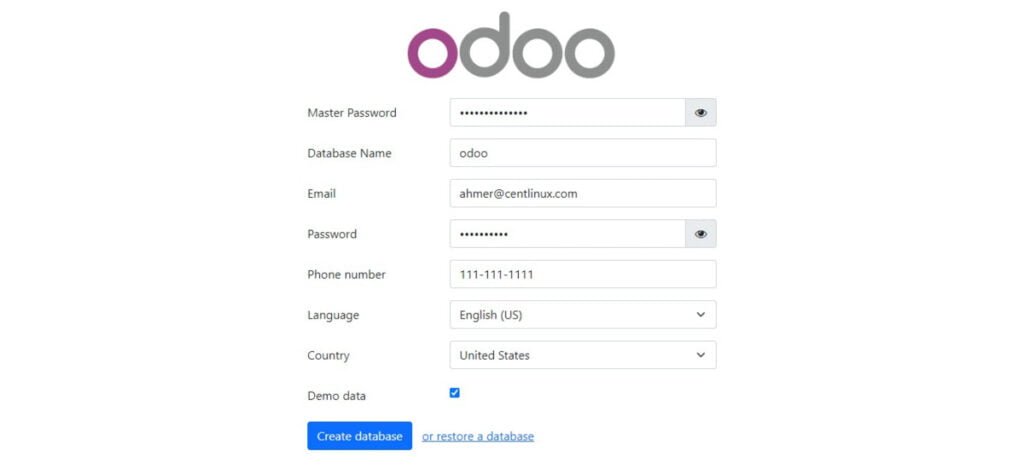
Open URL http://odoo-01.centlinux.com:8069/ in a web browser to access Odoo ERP.

Fill the required information as shown in above screenshot and press ‘Create Database’ button.

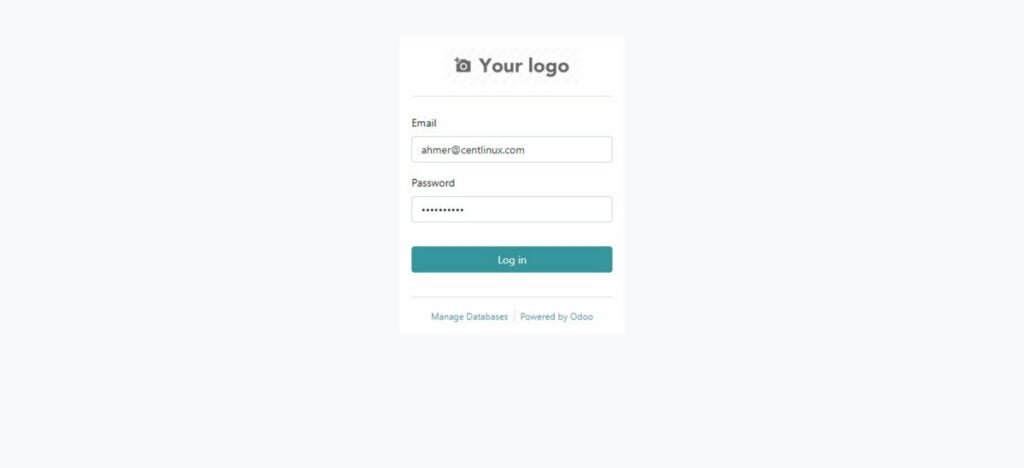
Login as credentials, that you have entered in previous step.

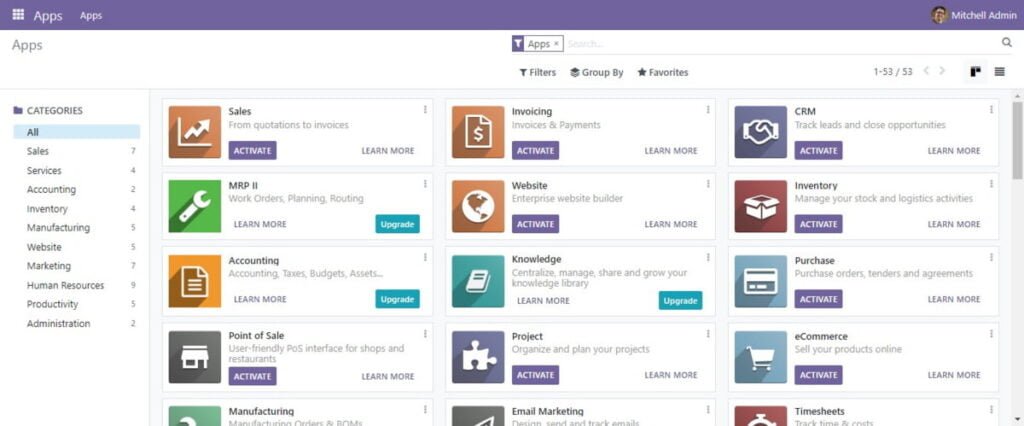
You have reached at the Odoo Apps page.
Video Tutorial
Frequently Asked Questions (FAQs)
1. How can I optimize Odoo performance for large databases?
- Use PostgreSQL tuning (e.g.,
shared_buffers,work_mem). - Enable
--workersin Odoo config for multi-processing. - Implement database archiving and indexing for frequently queried fields.
2. What’s the best way to customize Odoo without modifying core modules?
- Use inheritance (e.g.,
_inheritin Python, XPath in views). - Create custom modules to extend functionality.
- Leverage Odoo Studio for no-code adjustments (limited to Enterprise).
3. How can I implement multi-company and multi-currency setups effectively?
- Enable multi-company in
Settings → General Settings. - Configure Inter-Company Transactions rules.
- Set up currency exchange rates automatically via
Accounting → Configuration → Currencies.
4. What are Odoo’s options for high availability (HA) and scalability?
- Deploy Odoo behind a load balancer (e.g., Nginx, HAProxy).
- Use PostgreSQL replication for database HA.
- Containerize Odoo with Docker/Kubernetes for scalable cloud deployments.
5. How can I debug performance issues or errors in Odoo?
- Enable developer mode and check logs (
--log-level=debug). - Use Odoo’s profiling tool (
--profile) to identify slow methods. - Monitor with PgBadger (PostgreSQL) or APM tools (e.g., New Relic).
Final Thoughts
Master to install Odoo 16 on Rocky Linux 9 with our comprehensive guide. Empower your business with a robust ERP solution, tailored to your needs, and optimize your workflow for enhanced productivity and efficiency. Let this guide be your roadmap to unleashing the full potential of Odoo CRM on the Rocky Linux platform.
Whether you need cloud optimization, server management, or automation, I provide comprehensive AWS and Linux services. Hire me on Fiverr to elevate your systems.


Leave a Reply
You must be logged in to post a comment.