Learn how to install Keepalived on CentOS 7 for high availability and load balancing. Step-by-step guide included. #centlinux #linux #highavailability
Table of Contents
What is KeepAlived?
Keepalived is a routing software written in C. The main goal of this project is to provide simple and robust facilities for load-balancing and high-availability to Linux system and Linux based infrastructures. Loadbalancing framework relies on well-known and widely used Linux Virtual Server (IPVS) kernel module providing Layer4 load-balancing. Keepalived implements a set of checkers to dynamically and adaptively maintain and manage load-balanced server pool according their health. On the other hand high-availability is achieved by VRRP protocol. VRRP is a fundamental brick for router failover. In addition, Keepalived implements a set of hooks to the VRRP finite state machine providing low-level and high-speed protocol interactions. Keepalived frameworks can be used independently or all together to provide resilient infrastructures.

What is Floating IP Address?
Floating IP address is used to support failover in a high-availability cluster. The cluster is configured such that only the active member of the cluster “owns” or responds to that IP address at any given time. Should the active member fail, then “ownership” of the floating IP address would be transferred to a standby member to promote it as the new active member. Specifically, the member to be promoted issues a gratuitous ARP, announcing the new MAC address–to–IP address association.
KeepAlived performs well with haproxy load balancers. Have a look at our article on how to install haproxy on CentOS 7.
Recommended Training: Linux Administration: The Complete Linux Bootcamp in 2025 from Andrei Dumitrescu, Crystal Mind Academy

System Specification
We have two webservers webserver-01.centlinux.com and webserver-02.centlinux.com.
| Hostname | webserver-01.centlinux.com | webserver-02.centlinux.com |
| IP Address | 192.168.116.31/24 | 192.168.116.32/24 |
| Operating System | CentOS 7 | CentOS 7 |
| Web Server | Nginx | Nginx |
Floating IP Address: 192.168.116.50/24
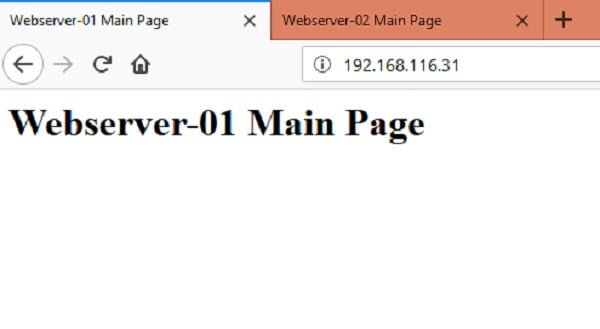
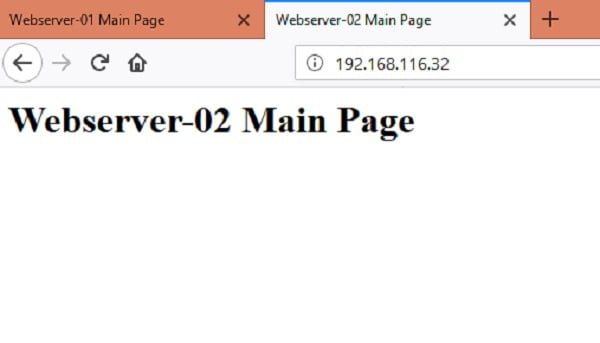
To ensure that our webservers are properly configured and browsable, open their URLs in a Browser.


I have set different index pages on both servers, to differentiate between servers, when we are accessing them via the Floating IP address.
Amazon Fire HD 10 Kids Pro tablet (newest model) ages 6-12 | Bright 10.1″ HD screen | Slim case for older kids, ad-free content, parental controls, 13-hr battery, 32 GB, Mint
$104.99 (as of July 7, 2025 20:55 GMT +00:00 – More infoProduct prices and availability are accurate as of the date/time indicated and are subject to change. Any price and availability information displayed on [relevant Amazon Site(s), as applicable] at the time of purchase will apply to the purchase of this product.)Configure KeepAlived on webserver-01
Connect to webserver-01.centlinux.com and install keepalived by using yum command.
yum install -y keepalivedSet Linux Kernel parameters as follows to support Floating IP.
echo "net.ipv4.ip_nonlocal_bind = 1" >> /etc/sysctl.conf
sysctl -p
Now configure keepalived settings.
cd /etc/keepalived/
mv keepalived.conf keepalived.conf.org
vi keepalived.conf
Add following directives and save.
! Configuration File for keepalived

global_defs {
   notification_email {
  root@webserver-01.centlinux.com
   }
   notification_email_from root@webserver-01.centlinux.com
   smtp_server 127.0.0.1
   smtp_connect_timeout 30
   router_id LVS_DEVEL
}

vrrp_instance VI_1 {
    state MASTER
    interface eno16777728
    virtual_router_id 51
    priority 101 #used in election, 101 for master & 100 for backup
    advert_int 1
    authentication {
        auth_type PASS
        auth_pass 1111
    }
    virtual_ipaddress {
        192.168.116.50/24
    }
}
Start and enable keepalived service.
systemctl start keepalived
systemctl enable keepalived
Check IP Address of the server.
ip addr | grep "inet" | grep "eno16777728"Output:
    inet 192.168.116.31/24 brd 192.168.116.255 scope global eno16777728
    inet 192.168.116.50/24 scope global secondary eno16777728
You might observe that the Floating IP: 192.168.116.50 has been assigned to the network interface.
Getting Started Becoming a Master Hacker: Hacking is the Most Important Skill Set of the 21st Century!
$39.99 (as of July 7, 2025 20:55 GMT +00:00 – More infoProduct prices and availability are accurate as of the date/time indicated and are subject to change. Any price and availability information displayed on [relevant Amazon Site(s), as applicable] at the time of purchase will apply to the purchase of this product.)Configure KeepAlived on webserver-02
Connect to webserver-02.centlinux.com and install keepalived by using yum command.
yum install -y keepalivedSet Linux Kernel parameters as follows to support Floating IP.
echo "net.ipv4.ip_nonlocal_bind = 1" >> /etc/sysctl.conf
sysctl -p
Now configure keepalived settings.
cd /etc/keepalived/
mv keepalived.conf keepalived.conf.org
vi keepalived.conf
Add following directives and save.
! Configuration File for keepalived

global_defs {
   notification_email {
  root@webserver-02.centlinux.com
   }
   notification_email_from root@webserver-02.centlinux.com
   smtp_server 127.0.0.1
   smtp_connect_timeout 30
   router_id LVS_DEVEL
}

vrrp_instance VI_1 {
    state BACKUP
    interface eno16777728
    virtual_router_id 51
    priority 100 #used in election, 101 for master & 100 for backup
    advert_int 1
    authentication {
        auth_type PASS
        auth_pass 1111
    }
    virtual_ipaddress {
        192.168.116.50/24
    }
}
Start and enable keepalived service.
systemctl start keepalived
systemctl enable keepalived
Check IP Address of the server.
ip addr | grep "inet" | grep "eno16777728"Output:
    inet 192.168.116.32/24 brd 192.168.116.255 scope global eno16777728
    inet 192.168.116.50/24 scope global secondary eno16777728
You might observe that the Floating IP: 192.168.116.50 has been assigned to the network interface.
Testing KeepAlived Configuration
Open the Floating IP Address http://192.168.116.50 in a browser.

Refresh webpage multiple times, and you will always get the result from same server i.e. webserver-01.centlinux.com.
Now, use nmcli command to make webserver-01.centlinux.com unavailable by disconnecting its network connection.
nmcli c down eno16777728Again Refresh your webpage.

You can see that, due to unavailability of webserver-01.centlinux.com the Floating IP is now moved to webserver-02.centlinux.com.
FLYDIGI Vader 4 Pro Controller Force Adjustment Lever Joystick, Hall & Micro Triggers, 1000Hz Report Rate, 4-Motor Stereo Vibration, 800mAh, Multi-Platform for PC/NS/Android/TV (No Xbox/PS)
$63.99 (as of July 8, 2025 20:04 GMT +00:00 – More infoProduct prices and availability are accurate as of the date/time indicated and are subject to change. Any price and availability information displayed on [relevant Amazon Site(s), as applicable] at the time of purchase will apply to the purchase of this product.)Conclusion
Installing and configuring Keepalived on CentOS 7 is a reliable way to achieve high availability and load balancing in your network infrastructure. By implementing Keepalived, you can ensure seamless failover and maintain service continuity, even during server downtime. With its robust features and straightforward configuration, Keepalived is an essential tool for any environment requiring minimal downtime and consistent performance.
From setting up scalable AWS solutions to managing complex Linux environments, I’ve got you covered. Visit my Fiverr profile to get started.


13 responses to “How to install KeepAlived on CentOS 7”
very useful thanks alot
small doubt after you moving the keepalived conf file from that path after that how you can open the .conf file from same path.
[root@webserver-02 ~]# cd /etc/keepalived/
[root@webserver-02 keepalived]# mv keepalived.conf keepalived.conf.org
[root@webserver-02 keepalived]# vi keepalived.conf (how can you open it from hear after .conf file is moved to keepa;ived.conf.org)
Great explanation sir. Thankyou
My pleasure.
Hi,
The vi command creates an empty file and then we are adding configurations in it.
Hope it clarifies your doubt.
Hello,
First of all, thank you for this valuable post.
I think you should change the parameter "state MASTER" in webserver-02 server to "state BACKUP"
Thanks for the correction.
The same has been updated above.
Hello, I am facing a problem with MASTER and BACKUP configuration. My MASTER interface in the "keealived.conf" is different than my BACKUP interface. Like your both MASTER and BACKUP interface name are same "interface eno16777728". So my setup is not working and browser not able to open page using Virtual IP. Any suggestion would be greatly appreciated.
By using nmcli, Rename your interfaces on the BACKUP system same as of MASTER.
I ran the command into MASTER: nmcli dev status
DEVICE TYPE STATE CONNECTION
ens192 ethernet connected ens192
I ran the command into BACKUP: nmcli dev status
DEVICE TYPE STATE CONNECTION
ens160 ethernet connected ens160
Could you please provide me the complete command as I am not expert on this. Thanks a lot!!
Execute following two commands.
# nmcli c del ens160
# nmcli c add conn-name ens192 ifname ens160 type ethernet autoconnect yes
Please discuss it with me on Facebook, if the problem stand still.
Thanks!! I was missing "echo "net.ipv4.ip_nonlocal_bind = 1" >> /etc/sysctl.conf" step. Now it's working and I understand how it works better.