Learn how to install Jenkins on CentOS 7 with our detailed guide. Follow step-by-step instructions to set up this powerful automation server on your system. #centlinux #linux #devops
Table of Contents
What is Jenkins?
Jenkins is a Java-based, open-source automation server. Jenkins is used to automate all sorts of tasks related to building, testing and delivering or deploying software. Jenkins is a fork of Project Hudson and it is maintained by the original Hudson developers since the Hudson had been acquired by Oracle. However, Jenkins has been evolved very much since its inception from Hudson.
What is CI/CD Pipeline?
In DevOps, this automated process of building, testing and delivering is called CI/CD (Continuous Integration / Continuous Delivery) pipeline.
CI (Continuous integration) is a practice in which team members regularly commits their code changes to the version control repository (such as git or svn), after which automated builds and tests are performed using build tools (such as Apache Ant, Apache Maven, Gradle, Junit, etc).
CD (Continuous delivery) is a series of practices where code changes are automatically built, tested and deployed to production.

In this article, we will install Jenkins on CentOS 7 server. Although the same steps can be used to install Jenkins on Red Hat Enterprise Linux (RHEL) 7.
Read Also: How to install Jenkins on Rocky Linux 9
System Specification
We have provisioned a CentOS 7 virtual machine with following specification:
- Hostname – jenkins-01.recipes.com
- IP Address – 192.168.116.130/24
- Operating System – CentOS 7.6
Recommended Training: Jenkins: Jobs, Pipelines, CI/CD and DevOps for Beginners from Valentin Despa

Install OpenJDK on CentOS 7
Since, Jenkins is a Java application therefore it requires JVM (Java Virtual Machine) to execute. Jenkins 2 is the current major version and it requires Java 8.
Connect to jenkins-01.recipes.com using ssh and install OpenJDK from CentOS 7 yum repository.
yum install -y java-1.8.0-openjdk-develyum has installed OpenJDK and its dependent packages.
Java executables has been automatically added to PATH environment variable. Therefore, we are only required to set the JAVA_HOME environment variable.
echo "export JAVA_HOME=/usr/lib/jvm/java-1.8.0-openjdk-1.8.0.191.b12-1.el7_6.x86_64" >> /etc/profile
. /etc/profile
env | grep JAVA_HOME
Output:
JAVA_HOME=/usr/lib/jvm/java-1.8.0-openjdk-1.8.0.191.b12-1.el7_6.x86_64
Verify Java version.
java -versionOutput:
openjdk version "1.8.0_191"
OpenJDK Runtime Environment (build 1.8.0_191-b12)
OpenJDK 64-Bit Server VM (build 25.191-b12, mixed mode)
OpenJDK has been installed and configured successfully.
Redragon S101 Gaming Keyboard, M601 Mouse, RGB Backlit Gaming Keyboard, Programmable Backlit Mouse, Value Combo Set [New Version]
$31.99 (as of July 9, 2025 21:12 GMT +00:00 – More infoProduct prices and availability are accurate as of the date/time indicated and are subject to change. Any price and availability information displayed on [relevant Amazon Site(s), as applicable] at the time of purchase will apply to the purchase of this product.)Install Jenkins on CentOS 7
Jenkins is available to install in various forms.
- Individual RPM:
Individual RPMs are available for every version of Jenkins, but one has to resolve dependencies manually. - Jenkins yum Repository:
A Yum repository is provided for Jenkins packages. Here, dependent packages will be installed automatically. - Generic Web Archive:
This Java web archive requires to be executed either using java command or should be deployed on a Jave EE Server (e.g Apache Tomcat) to work.
We will use Jenkins yum repository, because, it is quite simple to understand and in this method dependencies will resolved automatically.
Jenkins can be downloaded from Jenkins download page. Jenkins website also provides commands to install Jenkins yum repository on CentOS 7.
Install jenkins yum repository using the following commands.
wget https://pkg.jenkins.io/redhat-stable/jenkins.repo -O /etc/yum.repos.d/jenkins.repo
rpm --import https://pkg.jenkins.io/redhat-stable/jenkins.io.key
Build yum cache for faster access to repositories.
yum makecacheInstall Jenkins on CentOS 7 using yum command.
yum install -y jenkinsStart and enable jenkins service.
systemctl start jenkins
systemctl enable jenkins
Configure Linux Firewall
Allow Service Port 8080/tcp in Linux Firewall.
firewall-cmd --permanent --add-port=8080/tcp
firewall-cmd --reload
Configure Jenkins Server
Browse URL http://jenkins-01.recipes.com:8080/jenkins using a client browser.
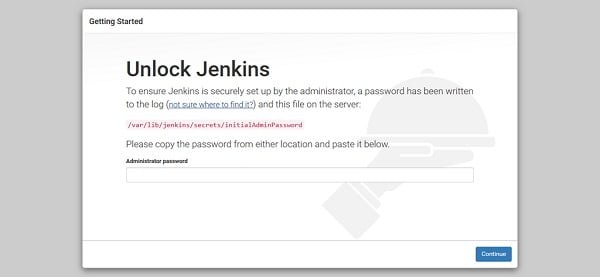
Obtain the autogenerated password from the given file.
cat /var/lib/jenkins/secrets/initialAdminPasswordOutput:
1f6a106d9af642909ad0ecc5abd8afec
Unlock Jenkins using this password.
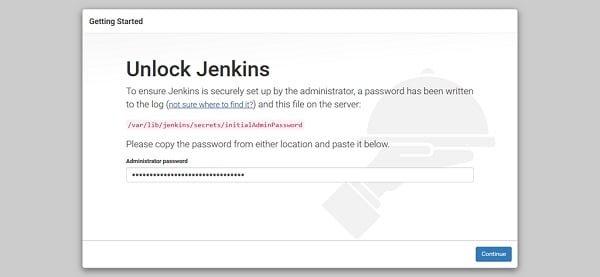
Click on continue.
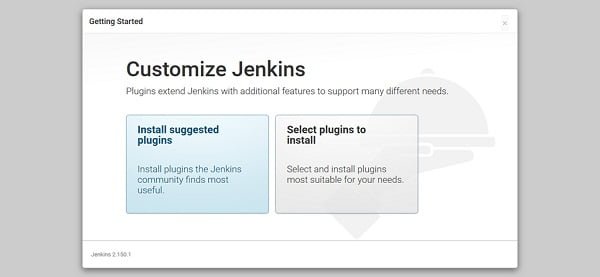
Click on Install Suggested Services.
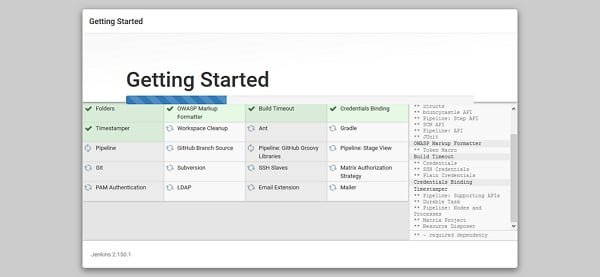
Jenkins will install most commonly used plugins such as Apache Ant, Gradle, Git, etc.
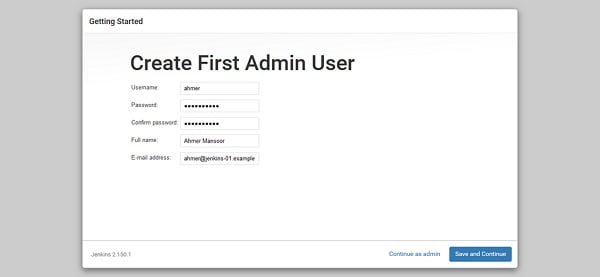
Create an Admin user here.
Click on Save and Continue.
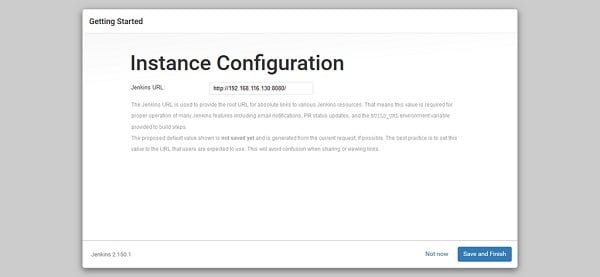
Jenkins provide a root URL here for accessing its various resources.
If you are happy with it then click on Save and Finish.
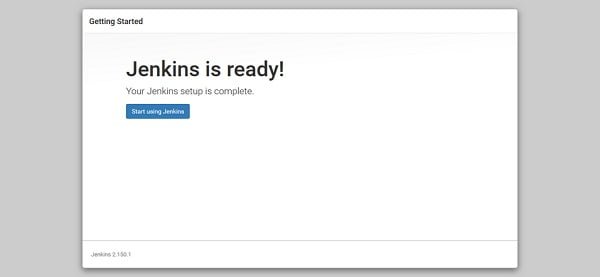
Jenkins has been successfully configured.
Click on Start using Jenkins.

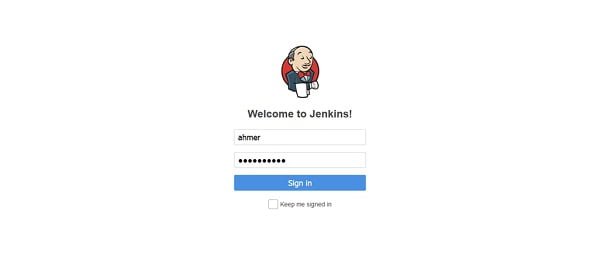
Login using the admin user ahmer that we have created with Jenkins Setup Wizard.
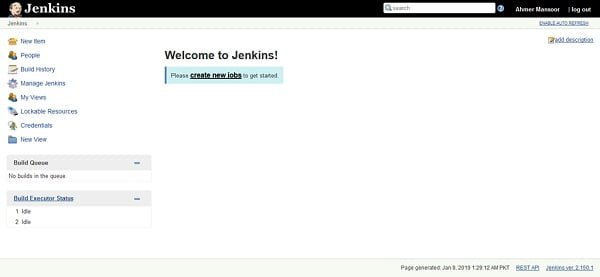
Installation of Jenkins 2 on CentOS 7 has been completed.
You can refer to Jenkins User Documentation to understand the workflow and getting start with Jenkins.
Frequently Asked Questions (FAQs)
1. What are the prerequisites for installing Jenkins on CentOS 7?
You need a CentOS 7 system with sudo privileges, Java (OpenJDK or Oracle JDK) installed, and stable internet access.
2. Which Java version is required for Jenkins?
Jenkins typically requires Java 8 or Java 11. OpenJDK is the recommended choice for CentOS 7.
3. How do I start and enable Jenkins after installation?
After installing, start Jenkins using systemctl, then enable it to launch automatically on system boot.
4. How do I access Jenkins for the first time?
Once installed, open a web browser and go to http://<your-server-IP>:8080. You’ll need the initial admin password from the server.
5. Where is the initial admin password stored?
The password is auto-generated and stored in a file under /var/lib/jenkins/secrets/initialAdminPassword. Use cat or sudo to view it.
The Ultimate Linux Shell Scripting Guide: Automate, Optimize, and Empower tasks with Linux Shell Scripting
$27.89 (as of July 10, 2025 21:22 GMT +00:00 – More infoProduct prices and availability are accurate as of the date/time indicated and are subject to change. Any price and availability information displayed on [relevant Amazon Site(s), as applicable] at the time of purchase will apply to the purchase of this product.)Final Thoughts
Installing Jenkins on CentOS 7 provides a robust foundation for automating your software development lifecycle through continuous integration and continuous delivery (CI/CD). By setting up the required Java environment, adding the Jenkins repository, installing the service, and configuring firewall rules, you’ve successfully deployed a powerful automation server.
With Jenkins up and running, you can now streamline build, test, and deployment processes, improving development efficiency and code quality. Regular updates, plugin management, and securing access are essential for maintaining a stable and secure Jenkins environment.
Need a dependable Linux system administrator? I specialize in managing, optimizing, and securing Linux servers to keep your operations running flawlessly. Check out my services on Fiverr!


Leave a Reply
You must be logged in to post a comment.