Discover how to install JFrog Artifactory on CentOS 7 with our comprehensive guide. Follow step-by-step instructions to set up your repository manager efficiently. #centlinux #linux #devops
Table of Contents
What is JFrog Artifactory?
Artifactory is a universal repository manager created by JFrog. A repository manager is software application designed to manage binary components related to an application. Being a universal repository manager, Artifactory supports all major packaging formats like Apache Maven, Gradle, Docker and many more.
In DevOps environments, Artifactory is used by build tools such as Apache Ant, Maven and Gradle to serve as the local repository for their respective artifacts. Although using Artifactory is not mandatory in DevOps environment, but it can be used to accelerate the CI/CD process.
JFrog Artifactory is a commercial product. However, there is an OSS (Open Source Software) version is available with limited features. We will use this OSS version in our article. We will install JFrog Artifactory on CentOS 7 and deploy and use MariaDB database as the backend database for Artifactory.
Read Also: How to install Artifactory on Rocky Linux 9
System Specification
For this article, we have utilized a CentOS 7 virtual machine configured with the following system specifications to ensure a stable and consistent environment for testing and demonstration purposes.
- Hostname – artifactory-01.example.com
- IP Address – 192.168.116.130/24
- Operating System – CentOS 7.6
Lenovo IdeaPad 1 Student Laptop, 15.6″ FHD Display, Intel Dual Core Processor, 12GB RAM, 512GB SSD + 128GB eMMC, 1 Year Office 365, Wi-Fi 6, Webcam, Bluetooth, SD Card Reader, Windows 11 Home, Grey
$286.99 (as of July 10, 2025 20:06 GMT +00:00 – More infoProduct prices and availability are accurate as of the date/time indicated and are subject to change. Any price and availability information displayed on [relevant Amazon Site(s), as applicable] at the time of purchase will apply to the purchase of this product.)Install Java Development Kit on CentOS 7
JFrog Artifactory requires Java Development Kit (JDK) 8 update 45 or above.
In CentOS 7, the OpenJDK (an open-source Java Development Kit) can be installed using yum command. However, if you are using a Red Hat Enterprise Linux (RHEL) 7 then you have to configure a Local yum Repository and then you will be able to install OpenJDK using yum command.
yum install -y java-1.8.0-openjdk-develSince, our server is minimal installed, therefore, yum has installed various dependent packages along with OpenJDK.
Set JAVA_HOME environment variable.
echo "export JAVA_HOME=/usr/lib/jvm/java-1.8.0-openjdk-1.8.0.191.b12-1.el7_6.x86_64" >> /etc/profile
. /etc/profile
env | grep JAVA
Output:
JAVA_HOME=/usr/lib/jvm/java-1.8.0-openjdk-1.8.0.191.b12-1.el7_6.x86_64
OpenJDK has been installed on CentOS 7.
Turtle Beach Recon 50 Xbox Gaming Headset – Xbox Series X, Xbox Series S, Xbox One, PS5, PS4, PlayStation, Mobile & PC with 3.5mm – Removable Mic, 40mm Speakers
$27.88 (as of July 10, 2025 23:32 GMT +00:00 – More infoProduct prices and availability are accurate as of the date/time indicated and are subject to change. Any price and availability information displayed on [relevant Amazon Site(s), as applicable] at the time of purchase will apply to the purchase of this product.)Install JFrog Artifactory on CentOS 7
Install preqrequisite packages using yum command.
yum install -y net-tools rsyncDownload latest JFrog Artifactory OSS RPM and copy it to the home directory of root user.
By using yum command, install Jfrog Artifactory on CentOS 7.
yum install -y jfrog-artifactory-oss-6.6.5.rpmSet ARTIFACTORY_HOME environment variable.
echo "export ARTIFACTORY_HOME=/opt/jfrog/artifactory" >> /etc/profile
. /etc/profile
env | grep ARTIFACTORY_HOME
Output:
ARTIFACTORY_HOME=/opt/jfrog/artifactory
JFrog Artifactory has been installed on CentOS 7.
Install MariaDB Database on CentOS 7
It is recommended to install JFrog Artifactory on CentOS 7 with an external database. Being a hardcore FOSS (Fan of Open Source Software), we selected MariaDB Database for this purpose.
Install MariaDB Server from CentOS yum repository.
yum install -y mariadb-serverStart and Enable MariaDB Service.
systemctl start mariadb.service
systemctl enable mariadb.service
Configure MariaDB database instance as follows.
mysql_secure_installationOutput:
NOTE: RUNNING ALL PARTS OF THIS SCRIPT IS RECOMMENDED FOR ALL MariaDB
      SERVERS IN PRODUCTION USE!  PLEASE READ EACH STEP CAREFULLY!

In order to log into MariaDB to secure it, we'll need the current
password for the root user.  If you've just installed MariaDB, and
you haven't set the root password yet, the password will be blank,
so you should just press enter here.

Enter current password for root (enter for none):
OK, successfully used password, moving on...

Setting the root password ensures that nobody can log into the MariaDB
root user without the proper authorisation.

Set root password? [Y/n] Y
New password:
Re-enter new password:
Password updated successfully!
Reloading privilege tables..
 ... Success!


By default, a MariaDB installation has an anonymous user, allowing anyone
to log into MariaDB without having to have a user account created for
them.  This is intended only for testing, and to make the installation
go a bit smoother.  You should remove them before moving into a
production environment.

Remove anonymous users? [Y/n] Y
 ... Success!

Normally, root should only be allowed to connect from 'localhost'.  This
ensures that someone cannot guess at the root password from the network.

Disallow root login remotely? [Y/n] Y
 ... Success!

By default, MariaDB comes with a database named 'test' that anyone can
access.  This is also intended only for testing, and should be removed
before moving into a production environment.

Remove test database and access to it? [Y/n] Y
 - Dropping test database...
 ... Success!
 - Removing privileges on test database...
 ... Success!

Reloading the privilege tables will ensure that all changes made so far
will take effect immediately.

Reload privilege tables now? [Y/n] Y
 ... Success!

Cleaning up...

All done!  If you've completed all of the above steps, your MariaDB
installation should now be secure.

Thanks for using MariaDB!
Recommended Training: The Linux Command Line Bootcamp: Beginner To Power User from Colt Steele

Create JFrog Artifactory Database
Create and configure Artifactory database.
/opt/jfrog/artifactory/bin/configure.mysql.shOutput:
########################################################
# Welcome to the Artifactory MySQL configuration tool! #
########################################################

Stopping the Artifactory service...

Please enter the MySQL server admin username [root]:

Please enter the MySQL server admin password:
Please enter the Artifactory database username [artifactory]:

Please enter the Artifactory database password [password]:
Creating the Artifactory MySQL user and database...

No MySQL JDBC connector found. Download or copy one needed.
Does the current server has access to the Internet? [Y/n]Y

Downloading mysql-connector-java-5.1.24.jar to /opt/jfrog/artifactory/tomcat/lib...

Configuration completed successfully!
You can now start up the Artifactory service to use Artifactory with MySQL.
Press enter to exit...
There is a known issue with PIDs in new versions of systemd, due to the more restricted handling of PID files by systemd. Therefore, you may encounter some PIDs error while starting artifactory.service.
systemctl start artifactory.serviceOutput:
Job for artifactory.service failed because the control process exited with error code. See "systemctl status artifactory.service" and "journalctl -xe" for details.
Artifactory service is not started, we need to edit service file to rectify this problem.
Edit artifactory.service and add the user and group who own the service.
vi /lib/systemd/system/artifactory.serviceAdd following directives under the [service] section.
User=artifactory
Group=artifactory
Set open file limits for the artifactory user.
echo "artifactory soft nofile 32000" >> /etc/security/limits.conf
echo "artifactory hard nofile 32000" >> /etc/security/limits.conf
Now edit the artifactoryManage.sh script.
vi /opt/jfrog/artifactory/bin/artifactoryManage.shFind and replace the following 4 lines of code with the given code.
#su -s "/bin/sh" ${ARTIFACTORY_USER} -c "${replicatorScript} start"
${replicatorScript} start

#su -s "/bin/sh" ${ARTIFACTORY_USER} -c "${replicatorScript} stop"
${replicatorScript} stop

#su -s "/bin/sh" ${ARTIFACTORY_USER} -c "export JAVA_HOME='$JAVA_HOME'; $TOMCAT_HOME/bin/startup.sh"
$TOMCAT_HOME/bin/startup.sh

#su -s "/bin/sh" ${ARTIFACTORY_USER} -c "export JAVA_HOME='$JAVA_HOME'; $TOMCAT_HOME/bin/shutdown.sh"
$TOMCAT_HOME/bin/shutdown.sh
Start and enable Artifactory service.
systemctl start artifactory.service
systemctl enable artifactory.service
Artifactory service has been started successfully.
Configure Linux Firewall
Now allow Artifactory service port to make it accessible from the network.
firewall-cmd --permanent --add-port=8081/tcp
firewall-cmd --reload
Configure JFrog Artifactory
Browse URL http://artifactory-01.example.com:8081 from a client browser.
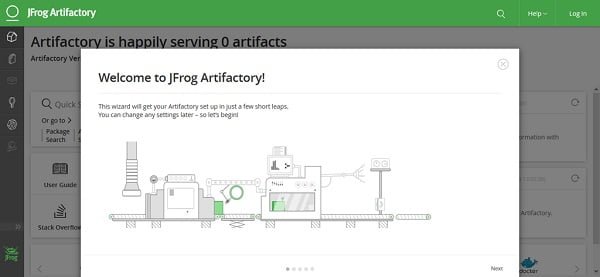
Click on Next.
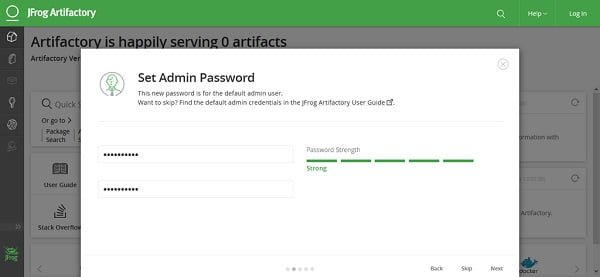
Set the password for default admin user of Artifactory and click on Next.
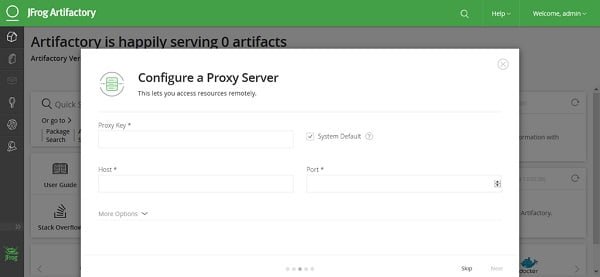
If this server access the Internet through a proxy, then configure it here or click on Skip.
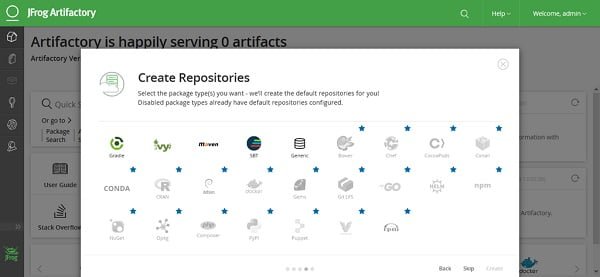
Select the package types for which you want to create repositories. The default repositories for the selected package types will be created by the Artifactory. Or click on Skip.
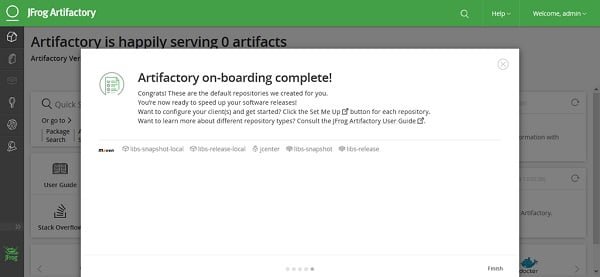
The initial configuration of Artifactory has been completed. Click on Finish.
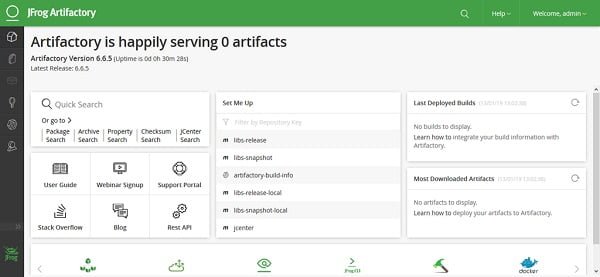
You have reached at the Dashboard of JFrog Artifactory Web UI. This dashboard is enriched with links to guides and documentation related to Artifactory. You can browse these links and start using Artifactory accordingly.
Frequently Asked Questions (FAQs)
What are the system requirements for installing JFrog Artifactory on CentOS 7?
Ensure your CentOS 7 system meets the minimum requirements: at least 4GB RAM, 2 CPU cores, and sufficient disk space (recommended 20GB+ for storage).
Do I need to install Java before setting up Artifactory?
Yes, Artifactory requires Java (OpenJDK or Oracle JDK) to run. Install a supported version (typically Java 8 or 11) before proceeding.
Which installation method is easiest for beginners?
The ZIP or RPM package installation is recommended for beginners, as it includes all dependencies and simplifies setup.
How do I start and stop Artifactory after installation?
Artifactory runs as a service—use systemctl commands (e.g., start, stop, restart) to manage it after installation.
How do I access Artifactory once it’s installed?
Open a web browser and navigate to http://<your-server-ip>:8081 (default port). The default credentials are admin/password—change them immediately after login.
Docker Deep Dive
$49.99 (as of July 10, 2025 21:22 GMT +00:00 – More infoProduct prices and availability are accurate as of the date/time indicated and are subject to change. Any price and availability information displayed on [relevant Amazon Site(s), as applicable] at the time of purchase will apply to the purchase of this product.)Final Thoughts
Installing JFrog Artifactory on CentOS 7 equips your development environment with a powerful artifact repository manager that supports multiple package formats and integrates seamlessly with CI/CD pipelines.
By setting up the required dependencies, configuring the repository, and securing the installation, you’ve laid the groundwork for efficient and reliable artifact storage and distribution. For optimal performance and security, regularly update Artifactory, monitor system resources, and back up your data to protect against potential failures.
Looking for a Linux server expert? I provide top-tier administration, performance tuning, and security solutions for your Linux systems. Explore my Fiverr profile for details!


Leave a Reply
You must be logged in to post a comment.