Learn how to install Magento 2 on CentOS 7 with this step-by-step guide. Follow our detailed instructions to set up and configure Magento 2 efficiently on your CentOS 7 system. #centlinux #linux #magento
Table of Contents
What is Magento?
Magento 2 is an open-source e-commerce platform that offers merchants a flexible shopping cart system, control over the look, content, and functionality of their online store, and a robust back-end management interface. It is the successor to Magento 1 and includes numerous improvements and new features to help online retailers create and manage their online stores more effectively. Key features of Magento 2 include:
- Enhanced Performance and Scalability: Magento 2 is designed to handle larger volumes of traffic and transactions more efficiently than its predecessor.
- Improved Admin Interface: The user-friendly admin panel in Magento 2 simplifies store management, making it more intuitive for non-technical users.
- Mobile-Friendly: Magento 2 comes with responsive design themes and built-in mobile optimization to ensure a seamless shopping experience across devices.
- Advanced SEO Features: Magento 2 includes tools for improving search engine visibility and driving more organic traffic to your store.
- Customizable: With a modular architecture, Magento 2 allows for extensive customization and the addition of new features through extensions and custom development.
- Enhanced Checkout Process: The streamlined checkout process in Magento 2 reduces cart abandonment and improves conversion rates.
- Security Improvements: Magento 2 has stronger security features to protect customer data and ensure safe transactions.
- Extensions and Integrations: There is a vast marketplace of extensions that allow for further customization and integration with third-party services.
Magento 2 is widely used by businesses of all sizes, from small retailers to large enterprises, due to its flexibility and comprehensive feature set.
Magento is a flexible and open-source platform empowers merchants to create innovative shopping experiences to attract new customers. Magento has a rich, out of the box feature set, combined with thousands of off-the-shelf extensions.
Recommended Training for You: Magento 2 Development (Adobe Commerce) Updated Version (V2)

Magento System Requirements
Visit Magento documentation for complete system requirements. Most common system requirements are copied below.
- Memory – 2 GB
- Web Server – Apache 2.2 or 2.4 or nginx 1.x
- Database – MySQL 5.6 or 5.7 or MariaDB 10.x
- PHP – 7.1.3 or 7.2.0
Environment Specification
In this article, we will install Magento 2 on CentOS 7. First, we will install all prerequisites to configure a working LAMP server, then we will deploy Magento eCommerce Platform on it.
We have provision a CentOS 7 virtual machine with following specification.
- Hostname – magento-01.example.com
- IP Address – 192.168.116.178 /24
- Operating System – CentOS 7.6
Install Apache Web Server on CentOS 7
Connect with magento-server-01.example.com using ssh as root user.
Install Apache web server using yum command.
# yum install -y httpd
Allow Apache web service in Linux Firewall.
# firewall-cmd --permanent --add-service=http
success
# firewall-cmd --reload
success
Enable and start Apache web service.
# systemctl enable httpd
Created symlink from /etc/systemd/system/multi-user.target.wants/httpd.service to /usr/lib/systemd/system/httpd.service.
# systemctl start httpd
Find and set directives for /var/www/html directory in /etc/httpd/conf/httpd.conf as follows.
<Directory /var/www/html>
    Options Indexes FollowSymLinks MultiViews
    AllowOverride All
    Require all granted
</Directory>
Install MariaDB Database Server on CentOS 7
Magento eCommerce Platform requires MariaDB 10.x, which is not available in default yum repositories.
Therefore, we are required to add MariaDB yum repository as follows.
# cat > /etc/yum.repos.d/mariadb.repo << EOF
> [mariadb]
> name=MariaDB
> baseurl=http://yum.mariadb.org/10.3/centos7-amd64
> gpgkey=https://yum.mariadb.org/RPM-GPG-KEY-MariaDB
> gpgcheck=1
> enabled=1
> EOF
Import GPG public key in CentOS 7.
# rpm --import https://yum.mariadb.org/RPM-GPG-KEY-MariaDB
Build yum cache for newly added repositories.
# yum makecache fast
Loaded plugins: fastestmirror
Loading mirror speeds from cached hostfile
 * base: mirrors.ges.net.pk
 * extras: mirrors.ges.net.pk
 * updates: mirrors.ges.net.pk
base                                                     | 3.6 kB     00:00
extras                                                   | 3.4 kB     00:00
mariadb                                                  | 2.9 kB     00:00
updates                                                  | 3.4 kB     00:00
mariadb/primary_db                                         |  53 kB   00:00
Metadata Cache Created
Install MariaDB 10.3.16 using yum command.
# yum install -y mariadb-server
Enable and start MariaDB service.
# systemctl enable mariadb.service
# systemctl start mariadb.service
Configure MariaDB database instance as follows.
# mysql_secure_installation

NOTE: RUNNING ALL PARTS OF THIS SCRIPT IS RECOMMENDED FOR ALL MariaDB
      SERVERS IN PRODUCTION USE!  PLEASE READ EACH STEP CAREFULLY!

In order to log into MariaDB to secure it, we'll need the current
password for the root user.  If you've just installed MariaDB, and
you haven't set the root password yet, the password will be blank,
so you should just press enter here.

Enter current password for root (enter for none):
OK, successfully used password, moving on...

Setting the root password ensures that nobody can log into the MariaDB
root user without the proper authorisation.

Set root password? [Y/n] Y
New password:
Re-enter new password:
Password updated successfully!
Reloading privilege tables..
 ... Success!


By default, a MariaDB installation has an anonymous user, allowing anyone
to log into MariaDB without having to have a user account created for
them.  This is intended only for testing, and to make the installation
go a bit smoother.  You should remove them before moving into a
production environment.

Remove anonymous users? [Y/n] Y
 ... Success!

Normally, root should only be allowed to connect from 'localhost'.  This
ensures that someone cannot guess at the root password from the network.

Disallow root login remotely? [Y/n] Y
 ... Success!

By default, MariaDB comes with a database named 'test' that anyone can
access.  This is also intended only for testing, and should be removed
before moving into a production environment.

Remove test database and access to it? [Y/n] Y
 - Dropping test database...
 ... Success!
 - Removing privileges on test database...
 ... Success!

Reloading the privilege tables will ensure that all changes made so far
will take effect immediately.

Reload privilege tables now? [Y/n] Y
 ... Success!

Cleaning up...

All done!  If you've completed all of the above steps, your MariaDB
installation should now be secure.

Thanks for using MariaDB!
Connect with MariaDB database instance.
# mysql -u root -p123
Welcome to the MariaDB monitor.  Commands end with ; or g.
Your MariaDB connection id is 8
Server version: 10.3.16-MariaDB MariaDB Server

Copyright (c) 2000, 2018, Oracle, MariaDB Corporation Ab and others.

Type 'help;' or 'h' for help. Type 'c' to clear the current input statement.

MariaDB [(none)]>
Create a user and database for Magento eCommerce Platform.
MariaDB [(none)]> create database magento;
Query OK, 1 row affected (0.026 sec)

MariaDB [(none)]> create user magento@localhost identified by '123';
Query OK, 0 rows affected (0.120 sec)

MariaDB [(none)]> grant all privileges on magento.* to magento@localhost identified by '123';
Query OK, 0 rows affected (0.035 sec)

MariaDB [(none)]> flush privileges;
Query OK, 0 rows affected (0.064 sec)

MariaDB [(none)]> exit
Bye
Install PHP Support on CentOS 7
Magento 2 installation requires PHP 7.3.1 or 7.2.0, which are not available in default yum repositories.
Therefore, we are installing Webtatic, a third party yum repository, to install PHP 7.2.
At first, we have to add EPEL (Extra Packages for Enterprise Linux) as a prerequisite of Webtatic yum repository.
# yum install -y epel-release
Install Webtatic yum repository as follows.
# rpm -Uvh https://mirror.webtatic.com/yum/el7/webtatic-release.rpm
Retrieving https://mirror.webtatic.com/yum/el7/webtatic-release.rpm
warning: /var/tmp/rpm-tmp.fN84oh: Header V4 RSA/SHA1 Signature, key ID 62e74ca5: NOKEY
Preparing...                          ################################# [100%]
Updating / installing...
   1:webtatic-release-7-3             ################################# [100%]
Build yum cache for webtatic repository.
# yum makecache fast
Install PHP 7.2 and required PHP extensions using yum command.
# yum install php72w php72w-bcmath php72w-ctype php72w-curl php72w-dom php72w-gd php72w-hash php72w-iconv php72w-intl php72w-mbstring php72w-openssl php72w-pdo_mysql php72w-simplexml php72w-soap php72w-spl php72w-xsl php72w-zip php72w-pecl libxml2
Configure PHP settings as required by Magento.
# vi /etc/php.ini
Find and update following parameters.
date.timezone = Asia/Karachi
memory_limit= 756M
max_input_time = 30
Restart Apache web service.
# systemctl restart httpd
Install Magento 2 on CentOS 7
Currently, Magento Open Source 2.3 is available on Magento download page.
You are required to create a User Account on Magento Site to download Magento software.
Once Magento Open Source 2.3 is downloaded, transfer it to our Linux Server and copy it into /tmp directory.
To install Magento 2, we need to extract the contents of Magento-CE-2.3.1_sample_data-2019-03-18-07-26-52.tar.bz2 file in /var/www/html/magento directory.
# cd /tmp
# mkdir /var/www/html/magento
# tar xf Magento-CE-2.3.1_sample_data-2019-03-18-07-26-52.tar -C /var/www/html/magento/
Grant file permissions of magento directory, as mentioned in Magento 2.3 documentation.
# cd /var/www/html/magento
# chown -R apache:apache .
# find var generated vendor pub/static pub/media app/etc -type f -exec chmod u+w {} +
# find var generated vendor pub/static pub/media app/etc -type d -exec chmod u+w {} +
# chmod u+x bin/magento
Adjust SELinux file contexts.
# semanage fcontext -a -t httpd_sys_rw_content_t '/var/www/html/magento/var(/.*)?'
# semanage fcontext -a -t httpd_sys_rw_content_t '/var/www/html/magento/generated(/.*)?'
# semanage fcontext -a -t httpd_sys_rw_content_t '/var/www/html/magento/vendor(/.*)?'
# semanage fcontext -a -t httpd_sys_rw_content_t '/var/www/html/magento/pub/static(/.*)?'
# semanage fcontext -a -t httpd_sys_rw_content_t '/var/www/html/magento/pub/media(/.*)?'
# semanage fcontext -a -t httpd_sys_rw_content_t '/var/www/html/magento/app/etc(/.*)?'
# restorecon -R .
If you do not have semanage command, then you have to install policycoreutils-python package.
Access Magento eCommerce Platform
Browse URL http://magento-01.example.com/ using a client’s browser.

We were redirected to the Magento License Agreement Page.
Click on Agree and Setup Magento.
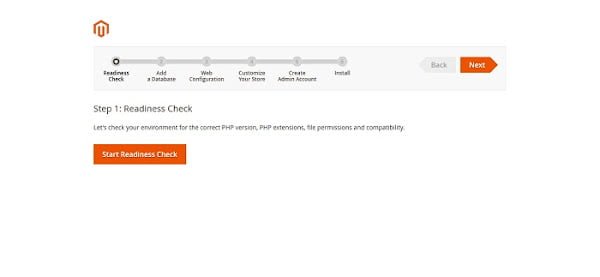
Click on Start Readiness Check.
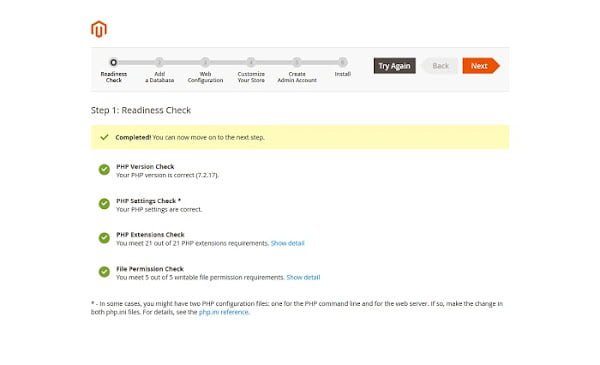
If any check fails then you have to rectify it before continuing.
For us, there are no failures. Therefore, click on Next.
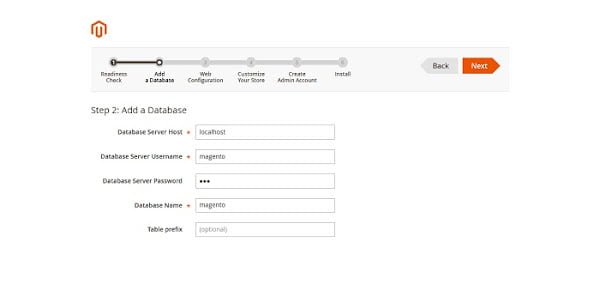
You are at the Add Database step. Add the database and user that we have created above and click on Next.
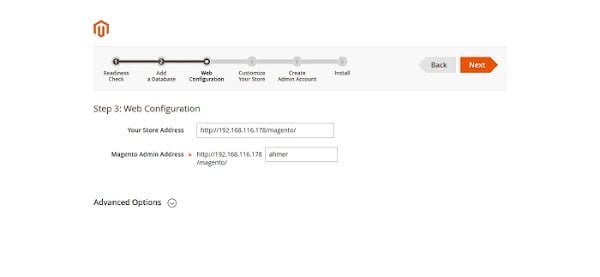
Adjust the settings as per the above screen-shot and click on Next.
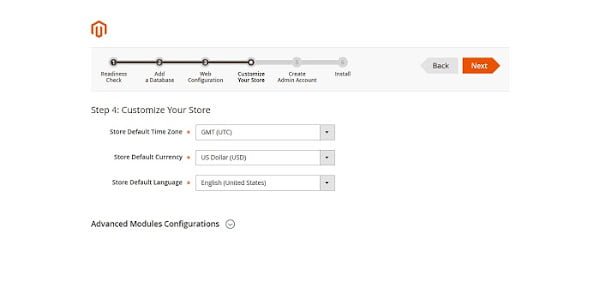
Set Timezone and Language here and click on Next.

Create a new Admin account and click on Next.
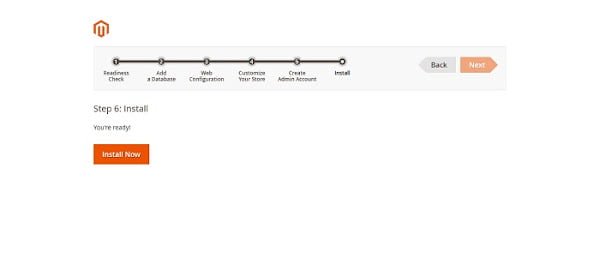
Click on Install Now.
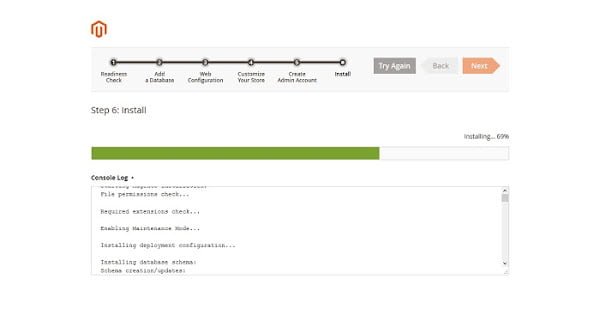
Installer takes a while to setup Magento on CentOS 7 server.
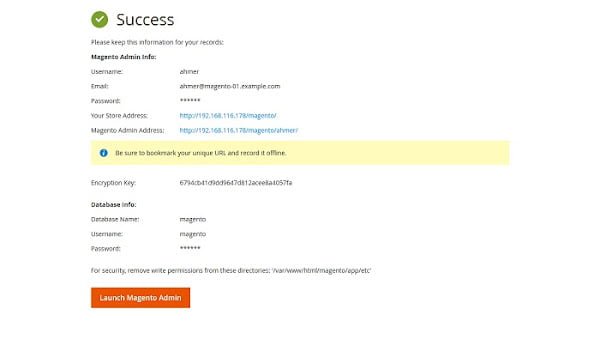
We have successfully install Magento 2 on CentOS 7.
Revoke write permissions from app/etc directory for security purpose.
# chmod -w /var/www/html/magento/app/etc
# semanage fcontext -d -t httpd_sys_rw_content_t '/app/etc(/.*)?'
# restorecon -R /var/www/html/magento/app/etc
Click on Launch Magento Admin.
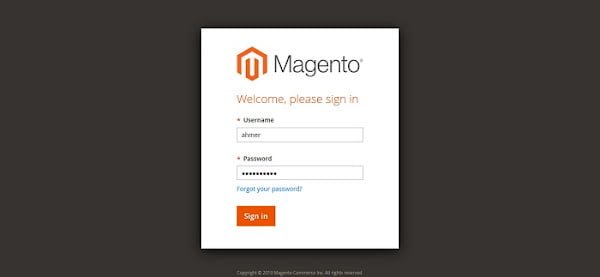
Login as ahmer user.

We have reached at the dashboard of ahmer user.
To start using Magento in true capacity, we suggest you to read Magento Beginner’s Guide Second Edition (PAID LINK) by Packt Publishing.
Final Thoughts
Installing Magento 2 on CentOS 7 can be a smooth process when you follow the right steps. This guide provides you with comprehensive instructions to set up and configure Magento 2 efficiently. If you encounter any challenges or need professional assistance, I offer expert services to help with your Magento 2 installation and configuration.
For personalized support, please check out my Fiverr gig: Linux Server Configuration. I provide comprehensive services to ensure your Magento 2 setup is optimized and running smoothly.
Thank you for following this guide, and I look forward to assisting you with your Magento 2 projects!
Hi! Good job! but can you explain how to install magento locally, please? Because i try to adapt your explanations but it seems to be more difficult. thx
Hi, Thanks for appreciation.
The above article is also good for local installation of Magento. However, if you are facing difficulties. You can share the problems with me on Linkedin.