Learn how to install mod_ssl on CentOS 7 with this detailed guide. Secure your Apache web server with SSL/TLS encryption for enhanced security. #centlinux #linux #ssl
Table of Contents
Why do we need SSL for websites?
Apache HTTP server runs its service on default port 80/tcp and serves the web pages to clients’ browsers in plain text using Hyper Text Transfer Protocol (HTTP). However, in case of private pages or data entry forms, communication in plain text mode is highly pron to Sniffing attacks.
HTTPS is the secured version of HTTP protocol. Apache HTTP server runs its service using HTTP on default port 443/tcp. In HTTPS, data is transported in encrypted form using a Public/Private key pair. Therefore, if a Sniffer gets your data, he cannot decrypt it.
Obviously, there is a little overhead of encryption and decryption is involved, but it is acceptable because of the security it offered.

Read Also: How to Add Nginx SSL Certificate in CentOS 8
What is mod_ssl?
mod_ssl is an Apache HTTP Server module that provides strong cryptography for the Apache web server via the Secure Sockets Layer (SSL) and Transport Layer Security (TLS) protocols. It enables encrypted communication between the web server and clients, enhancing security by ensuring data privacy, integrity, and authenticity. Here are some key features and benefits of mod_ssl:
- Encryption: Encrypts data transmitted between the server and clients, protecting sensitive information from eavesdropping and tampering.
- Authentication: Verifies the identity of the server to the clients, and optionally, the clients to the server, using SSL/TLS certificates.
- Data Integrity: Ensures that the data sent between the server and clients is not altered during transit.
- Compatibility: Supports various versions of SSL and TLS protocols, providing flexibility and compatibility with a wide range of clients.
- Configuration: Allows extensive configuration options to customize security settings, cipher suites, and certificate handling.
Using mod_ssl with Apache ensures that your web server can securely handle sensitive data, such as personal information, payment details, and login credentials, providing a safer browsing experience for users.
Recommended Training: Apache Web Server from Vipin Gupta

Linux Server Specification
In this article, we are installing a SSL certificate on Apache HTTP Server using mod_ssl in CentOS 7. The complete step by step configuration to install a SSL certificate on Apache HTTP server is provided in this article.
We have configured a CentOS 7 virtual machine with following specification.
- Hostname – lampserver.test.local
- IP Address – 192.168.116.67/24
- Operating System – CentOS 7.3
- Apache HTTP Server – Apache 2.4.6
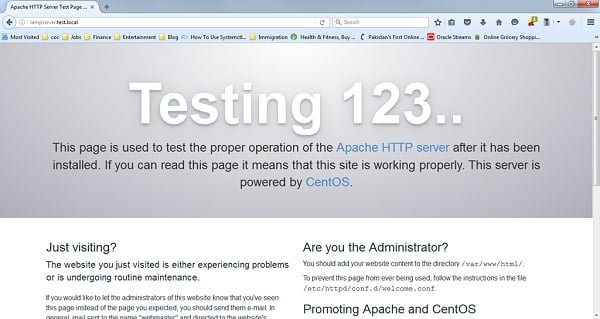
We have already installed Apache HTTP Server and configured a test website running on the default port 80/tcp of our Apache HTTP Server. Our objective is to migrate the same website to HTTPS port 443/tcp, without affecting the existing HTTP website.

Generating a SSL Certificate for Apache Website
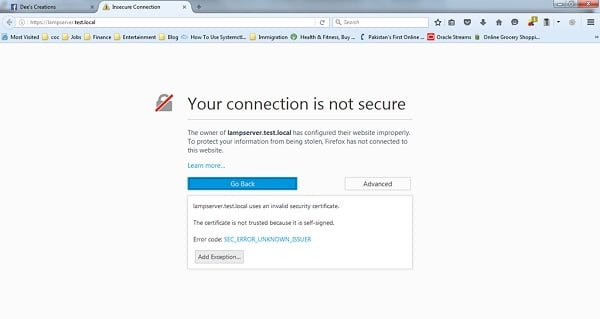
Every website that runs over HTTPS, must have a SSL (Secure Socket Layer) certificate, that is required by the client browser, to validate the authenticity of the website. This SSL Certificate should be digitally signed by a verified CA (Certificate Authority). Otherwise, if you are using an unsigned or self-signed certificate the client browser will display a warning like that “the security certificate is not verified and you must not proceed to this website”, etc.
Whether the SSL Certificate is signed or not, in both cases the communication is performed in encrypted form. So, in simple words, if you want to omit the warning message from your clients’ browsers than digitally signed your SSL certificate by a Certificate Authority, or otherwise train your users to ignore the security warning and add website to their browser’s exeption list.
We use a Linux utility openssl to generate an self-signed SSL certificate along with a private key.
mkdir /etc/httpd/ssl
openssl req -x509 -nodes -days 1095 -newkey rsa:2048 -out /etc/httpd/ssl/lampserver.crt -keyout /etc/httpd/ssl/lampserver.key
Output:
Generating a 2048 bit RSA private key
..............................+++
...............+++
writing new private key to '/etc/httpd/ssl/lampserver.key'
-----
You are about to be asked to enter information that will be incorporated
into your certificate request.
What you are about to enter is what is called a Distinguished Name or a DN.
There are quite a few fields but you can leave some blank
For some fields there will be a default value,
If you enter '.', the field will be left blank.
-----
Country Name (2 letter code) [XX]:PK
State or Province Name (full name) []:Sindh
Locality Name (eg, city) [Default City]:Karachi
Organization Name (eg, company) [Default Company Ltd]:None
Organizational Unit Name (eg, section) []:IT
Common Name (eg, your name or your server's hostname) []:lampserver.test.local
Email Address []:root@lampserver.test.local
Check generated certificate files.
ls /etc/httpd/ssl/Output:
lampserver.key lampserver.crt
Here, Common Name (CN) is very important, because it is the host/domain name used by users to access the website. If Common Name is different from the host/domain name, users will receive certificate errors.
Amazon Fire HD 8 Plus tablet, 8” HD Display, 32 GB, 30% faster processor, 3GB RAM, wireless charging, (2022 release), Gray
$119.99 (as of July 4, 2025 20:44 GMT +00:00 – More infoProduct prices and availability are accurate as of the date/time indicated and are subject to change. Any price and availability information displayed on [relevant Amazon Site(s), as applicable] at the time of purchase will apply to the purchase of this product.)Install mod_ssl on CentOS 7
To install SSL certificate on Apache HTTP Server, we have to install mod_ssl package. mod_ssl module adds the SSL functionality in Apache HTTP Server.
Install mod_ssl package using yum command.
yum install mod_ssl mod_ssl installs a SSL configuration file in Apache configuration directory.
Edit the /etc/httpd/conf.d/ssl.conf and add following directives therein to install SSL certificate.
SSLCertificateFile /etc/httpd/ssl/lampserver.crt
SSLCertificateKeyFile /etc/httpd/ssl/lampserver.key
if you got your SSL certificate digitally signed by a CA, then you have to add the CA certificate file as well.
SSLCACertificateFile /etc/httpd/ssl/ca-bundle.crt Restart the httpd.service to apply changes.
systemctl restart httpd.serviceOpen website in a client’s browser.

Client’s browser displays a security warning because our website is using a self-signed SSL certificate.
Add security exception in client’s browser.

Click on Confirm Security Exception.

Now our Apache website is running over HTTPS and you can see the Green Lock icon on the Address Bar.
How Linux Works, 3rd Edition: What Every Superuser Should Know
$28.22 (as of July 4, 2025 20:44 GMT +00:00 – More infoProduct prices and availability are accurate as of the date/time indicated and are subject to change. Any price and availability information displayed on [relevant Amazon Site(s), as applicable] at the time of purchase will apply to the purchase of this product.)Final Thoughts
Installing mod_ssl on CentOS 7 is essential for securing your Apache web server with SSL/TLS encryption. By following this guide, you can enhance the security of your server and protect your data effectively.
Optimize your cloud infrastructure and secure your servers with my AWS and Linux administration services. Let’s ensure your systems run smoothly. Connect with me on Fiverr now!


Leave a Reply
You must be logged in to post a comment.