Unlock the power of vulnerability scanning and security assessment by learning how to install OpenVAS on Rocky Linux 9 with our step-by-step guide. Enhance your system’s security posture and safeguard your infrastructure with this comprehensive tutorial tailored for seamless integration and optimal performance. #centlinux #linux #openvas
Table of Contents
What is OpenVAS?
OpenVAS (Open Vulnerability Assessment System, originally known as GNessUs) is the scanner component of Greenbone Vulnerability Manager (GVM), a software framework of several services and tools offering vulnerability scanning and vulnerability management.
All Greenbone Vulnerability Manager products are free software, and most components are licensed under the GNU General Public License (GPL). Plugins for Greenbone Vulnerability Manager are written in the Nessus Attack Scripting Language, NASL.
Greenbone Vulnerability Manager began under the name of OpenVAS, and before that the name GNessUs, as a fork of the previously open source Nessus scanning tool, after its developers Tenable Network Security changed it to a proprietary (closed source) license in October 2005. OpenVAS was originally proposed by pentesters at SecuritySpace, discussed with pentesters at Portcullis Computer Security and then announced by Tim Brown on Slashdot.
Greenbone Vulnerability Manager is a member project of Software in the Public Interest. (Source: Wikipedia)
Is OpenVAS free?
Yes, OpenVAS (Open Vulnerability Assessment System) is free and open-source software. It is licensed under the GNU General Public License (GPL) and is available for anyone to download, use, and modify without cost. OpenVAS is widely used for vulnerability scanning and management, providing users with a comprehensive set of tools for identifying and mitigating security vulnerabilities in their systems and networks.

Environment Specification
We are utilizing a minimal installation of Rocky Linux 9 on a virtual machine configured with the following specifications. This streamlined setup ensures an optimized and efficient environment, tailored specifically to meet the demands of our applications while minimizing resource overhead.
- CPU – 3.4 Ghz (2 cores)
- Memory – 2 GB
- Storage – 20 GB
- Operating System – Rocky Linux release 9.1 (Blue Onyx)
- Hostname – openvas-01.centlinux.com
- IP Address – 192.168.88.128/24
For a robust Home Lab setup to experiment with OpenVAS and other Linux server applications on Rocky Linux 9, using a dedicated Mini PC or a VPS is highly recommended. A Mini PC offers a compact, energy-efficient, and powerful local environment where you can install and test security tools like OpenVAS without impacting your main workstation.
[Grab a Mini PC for your Home Lab – Shop with Us!]
Alternatively, a VPS from reliable providers such as Bluehost gives you the flexibility of remote access, scalable resources, and high network uptime, ideal for continuous vulnerability scanning and hands-on learning.
[Try Bluehost VPS Now – Perfect for Linux & DevOps Enthusiasts!]
Both options provide an excellent platform to deepen your Linux skills and cybersecurity expertise safely and conveniently.
Disclaimer: Some of the links in this post are affiliate links. If you purchase products or services through these links, I may earn a commission at no extra cost to you. This helps support the blog and allows me to continue creating valuable Linux and security content. Thank you for your support!
Prepare your Rocky Linux Server
Connect with your Rocky Linux server as root using with the help of a ssh client.
Set a Fully Qualified Domain Name (FQDN) for your OpenVAS server by using hostnamectl command.
hostnamectl set-hostname openvas-01.centlinux.comEdit /etc/hosts file in a vim text editor.
vi /etc/hostsAdd following line in this file to setup name resolution.
192.168.88.128 openvas-01.centlinux.com openvas-01Refresh your Yum cache and update software packages in your Rocky Linux server.
dnf makecache
dnf update -y
Sometimes, the above command updates software packages related to Linux Kernel. If his happens then you should reboot your Linux operating system before moving forward with this Linux Tutorial.
rebootAfter restart check the Linux operating system and Linux Kernel versions.
cat /etc/rocky-release
uname -r
Output:
Rocky Linux release 9.1 (Blue Onyx)
5.14.0-162.12.1.el9_1.0.2.x86_64
OpenVAS requires that SELinux be disabled to function correctly, as its default policies can interfere with the operations of the OpenVAS services. To ensure smooth and uninterrupted performance, you need to permanently disable SELinux on your Rocky Linux server. This can be achieved by executing the following set of commands. These commands will update the SELinux configuration file and apply the changes system-wide, allowing OpenVAS to operate without restrictions.
sed -i 's/^SELINUX=enforcing$/SELINUX=disabled/' /etc/selinux/config
grubby --update-kernel ALL --args selinux=0
reboot
You need to install wget command to download OpenVAS installer.
Execute dnf command to install wget package.
dnf install -y wgetInstall Third Party Yum Repositories
OpenVAS requires some software packages that are not available in standard yum repositories.
Therefore, you are required to enable CRB (Power Tools) and EPEL (Extra Packages for Enterprise Linux) yum repositories.
You can enable these yum repositories by executing following set of commands.
dnf config-manager --set-enabled crb
dnf install -y epel-release epel-next-release
Execute following command to download and install Atomic yum repository.
wget -q -O - https://updates.atomicorp.com/installers/atomic | sudo shOutput:
Atomic Free Unsupported Archive installer, version 7.0.2

BY INSTALLING THIS SOFTWARE AND BY USING ANY AND ALL SOFTWARE
PROVIDED BY ATOMICORP LIMITED YOU ACKNOWLEDGE AND AGREE:

THIS SOFTWARE AND ALL SOFTWARE PROVIDED IN THIS REPOSITORY IS
PROVIDED BY ATOMICORP LIMITED AS IS, IS UNSUPPORTED AND ANY
EXPRESS OR IMPLIED WARRANTIES, INCLUDING, BUT NOT LIMITED TO, THE
IMPLIED WARRANTIES OF MERCHANTABILITY AND FITNESS FOR A PARTICULAR
PURPOSE ARE DISCLAIMED. IN NO EVENT SHALL ATOMICORP LIMITED, THE
COPYRIGHT OWNER OR ANY CONTRIBUTOR TO ANY AND ALL SOFTWARE PROVIDED
BY OR PUBLISHED IN THIS REPOSITORY BE LIABLE FOR ANY DIRECT,
INDIRECT, INCIDENTAL, SPECIAL, EXEMPLARY, OR CONSEQUENTIAL DAMAGES
(INCLUDING, BUT NOT LIMITED TO, PROCUREMENT OF SUBSTITUTE GOODS
OR SERVICES; LOSS OF USE, DATA, OR PROFITS; OR BUSINESS INTERRUPTION)
HOWEVER CAUSED AND ON ANY THEORY OF LIABILITY, WHETHER IN CONTRACT,
STRICT LIABILITY, OR TORT (INCLUDING NEGLIGENCE OR OTHERWISE)
ARISING IN ANY WAY OUT OF THE USE OF THIS SOFTWARE, EVEN IF ADVISED
OF THE POSSIBILITY OF SUCH DAMAGE.

For supported software packages please contact us at:

  sales@atomicorp.com

Do you agree to these terms? (yes/no) [Default: yes]

Configuring the [atomic] repo archive for this system

Installing the Atomic GPG keys: OK

Downloading atomic-release-1.0-23.el9.art.noarch.rpm: Verifying...                          ################################# [100%]
Preparing...                          ################################# [100%]
Updating / installing...
   1:atomic-release-1.0-23.el9.art    ################################# [100%]

Enable repo by default? (yes/no) [Default: yes]:


The Atomic repo has now been installed and configured for your system
The following channels are available:
  atomic          - [ACTIVATED] - contains the stable tree of ART packages
  atomic-testing  - [DISABLED]  - contains the testing tree of ART packages
  atomic-bleeding - [DISABLED]  - contains the development tree of ART packages
Rebuild your cache for newly installed yum repositories.
dnf makecacheOpenVAS installation on Rocky Linux 9
Now you can install OpenVAS software by executing following commands.
During installation, gvm updates Network Vulnerability Tests feed from the Greenbone Security Feed/Community Feed. It may takes a few more minutes, depends upon your Internet connection speed.
dnf install -y gvm
gvm-setup
Output:
#####################################
GVM Setup, Version: 6.1.0
Atomicorp, Inc.
#####################################

cannot access /var/lib/alternatives/python: No such file or directory
 * Initializing database in '/var/lib/pgsql/data'
 * Initialized, logs are in /var/lib/pgsql/initdb_postgresql.log
Created symlink /etc/systemd/system/multi-user.target.wants/postgresql.service → /usr/lib/systemd/system/postgresql.service.
Created symlink /etc/systemd/system/multi-user.target.wants/redis.service → /usr/lib/systemd/system/redis.service.
net.core.somaxconn = 1024
vm.overcommit_memory = 1

Update NVT, CERT, and SCAP data
Please note this step could take some time.
Once completed, this will be updated automatically every 24 hours


Updating NVTs....
/usr/bin/greenbone-nvt-sync

---
---
---

sent 727 bytes  received 99,598,473 bytes  991,036.82 bytes/sec
total size is 99,554,950  speedup is 1.00
/usr/sbin/greenbone-feed-sync --type CERT success

Updating OpenVAS Manager certificates: Complete

GVMD startup: Done

Set the GSAD admin users password.
The admin user is used to configure accounts,
Update NVT's manually, and manage roles.

Enter Administrator Password:
Verify Administrator Password:

Created symlink /etc/systemd/system/multi-user.target.wants/ospd-openvas.service → /usr/lib/systemd/system/ospd-openvas.service.
Created symlink /etc/systemd/system/multi-user.target.wants/notus-scanner.service → /usr/lib/systemd/system/notus-scanner.service.
Created symlink /etc/systemd/system/openvas-manager.service → /usr/lib/systemd/system/gvmd.service.
Created symlink /etc/systemd/system/multi-user.target.wants/gvmd.service → /usr/lib/systemd/system/gvmd.service.
Created symlink /etc/systemd/system/greenbone-security-assistant.service → /usr/lib/systemd/system/gsad.service.
Created symlink /etc/systemd/system/multi-user.target.wants/gsad.service → /usr/lib/systemd/system/gsad.service.
Created symlink /etc/systemd/system/multi-user.target.wants/mosquitto.service → /usr/lib/systemd/system/mosquitto.service.
success
success


#####################################
Setup complete
  Log in to GSAD at https://localhost
#####################################
OpenVAS software has been installed successfully.
To enable network access to the OpenVAS software, you must configure your Linux firewall to allow the HTTPS service. This ensures secure communication and allows users to connect to the OpenVAS web interface from remote systems over the network. Properly configuring the firewall is a critical step to ensure both accessibility and the protection of your system from unauthorized access.
firewall-cmd --permanent --add-service=https
firewall-cmd --reload
Access Your OpenVAS Security Assistant:
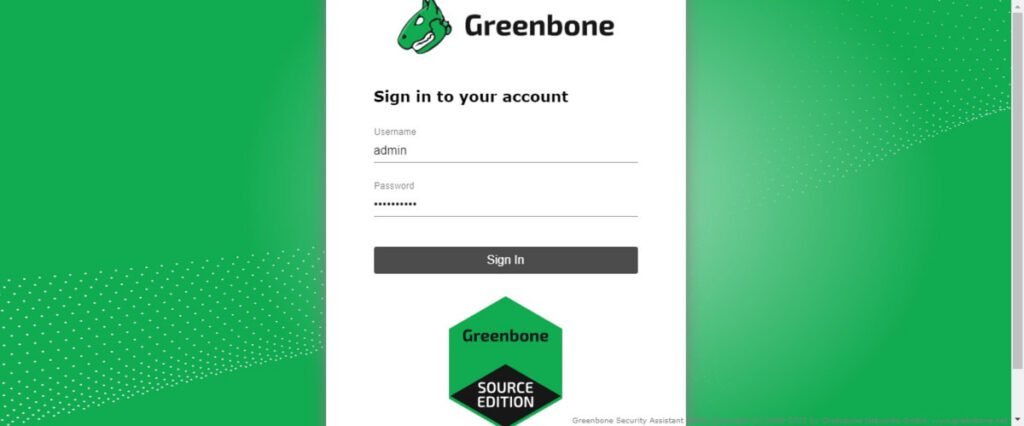
Launch your preferred web browser and navigate to the URL: https://openvas-01.centlinux.com. This will direct you to the OpenVAS interface hosted on the designated server, enabling you to begin accessing its powerful vulnerability scanning and management capabilities.

Log in to the OpenVAS interface as the admin user by entering the credentials. Use the password that you configured earlier during the execution of the gvm-setup command. This password grants administrative privileges, allowing you to fully manage and utilize the powerful features of the OpenVAS system for vulnerability assessment and security monitoring.

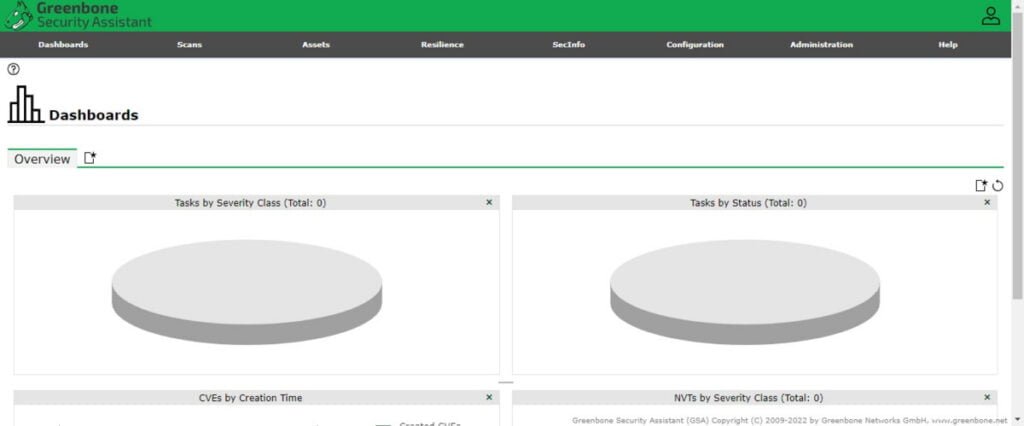
You have reached at the Dashboard of OpenVAS Security Assistant.
Video Tutorial: How to install OpenVAS on Linux
Frequently Asked Questions (FAQs)
1. How does OpenVAS differ from Nessus?
OpenVAS is the open-source fork of Nessus (after it became proprietary). It provides similar vulnerability scanning capabilities but remains free, while Nessus offers commercial features and support.
2. Can OpenVAS perform authenticated scanning?
Yes, OpenVAS supports authenticated scans by using credentials (SSH, SMB, etc.) to detect vulnerabilities that are only visible after logging into the target system.
3. How frequently are OpenVAS vulnerability feeds updated?
The OpenVAS feed (now part of Greenbone Vulnerability Management) receives daily updates, including the latest CVE and security advisory data.
4. What is the difference between OpenVAS and GVM (Greenbone Vulnerability Management)?
GVM is the successor to OpenVAS, rebranded to reflect its broader vulnerability management framework. The scanning engine (formerly OpenVAS) is now part of GVM.
5. Can OpenVAS be integrated with SIEM or ticketing systems?
Yes, OpenVAS/GVM supports integration via APIs (RESTful) and can export reports in formats (XML, PDF, CSV) for SIEMs like Splunk or ticketing tools like Jira.
Final Thoughts
Equip yourself with the knowledge to fortify your system’s defenses by seamlessly learning how to install OpenVAS on Rocky Linux 9. With our step-by-step guide, you’ll harness the power of this robust vulnerability assessment system, ensuring the security of your infrastructure. Let this tutorial be your roadmap to a more secure and resilient network environment.
Struggling with AWS or Linux server issues? I specialize in configuration, troubleshooting, and security to keep your systems performing at their best. Check out my Freelancer profile for details.
What’s Next
If you’re serious about building a career in IT, the Complete Linux Training Course to Get Your Dream IT Job 2025 by Imran Afzal is one of the best investments you can make in yourself. This highly rated course takes you from the basics of Linux to advanced system administration skills, preparing you for real-world IT roles and certifications.
Whether you’re a beginner or brushing up your skills, the structured lessons, hands-on labs, and career-oriented approach make it a perfect choice to boost your confidence and job readiness. Enroll now and start your Linux journey today!
Disclaimer: This post contains affiliate links. If you purchase through these links, I may earn a small commission at no additional cost to you. This helps support the site and allows me to continue creating valuable content.


Leave a Reply
Please log in to post a comment.