Learn how to install Squid Proxy on CentOS 7 with our comprehensive step-by-step guide. Enhance your network security and performance with this powerful caching proxy server. #centlinux #linux #squidproxy
Table of Contents
What is Squid Proxy?
Squid is a caching and forwarding HTTP web proxy. Squid has a lot of features, and it is used in variety of situations such as speeding up web server by caching repeated requests, caching web and DNS lookups, filtering traffic, blocking websites, etc. It is written in C++ and distributed under GNU GPL license.
Squid Proxy is a high-performance caching proxy server for web clients, supporting HTTP, HTTPS, FTP, and other protocols. It is widely used to improve web server performance, reduce bandwidth usage, and enhance security. Here are some key features and aspects of Squid Proxy:
- Caching: Squid Proxy caches frequently accessed web content, reducing the load on web servers and decreasing latency for users. This can significantly improve response times and reduce bandwidth consumption.
- Access Control: Squid provides robust access control features, allowing administrators to define who can access the internet, what content they can access, and when they can access it. This is useful for enforcing organizational policies and preventing unauthorized use.
- Content Filtering: Squid can be configured to filter web content, blocking access to inappropriate or harmful websites. This is particularly useful in educational institutions and corporate environments.
- Logging and Monitoring: Squid generates detailed logs of web traffic, which can be analyzed to monitor usage patterns, detect anomalies, and generate reports. This helps in maintaining security and optimizing network performance.
- Authentication: Squid supports various authentication mechanisms, enabling it to enforce user-specific access policies. This ensures that only authorized users can access certain resources.
- Load Balancing: Squid can distribute web traffic across multiple servers, balancing the load and improving overall performance and reliability.
- Bandwidth Management: Squid allows administrators to control bandwidth usage, setting limits on data transfer rates and prioritizing certain types of traffic. This helps in managing network resources more efficiently.
- SSL Interception: Squid can intercept and cache SSL-encrypted traffic, enhancing its caching capabilities even for secure websites.
- Customizable and Extensible: Squid is highly configurable and can be customized to meet specific needs. It supports various plugins and extensions, making it adaptable to different use cases.
- Open Source: Squid is open-source software, meaning it is freely available and has a large community of developers and users contributing to its development and support.
Overall, Squid Proxy is a versatile and powerful tool for managing web traffic, improving performance, and enhancing security in a network environment.
Read Also: How to install Squid on Arch Linux
Squid is considered as the most reliable content control software and has been used by many organizations since last 2 decades.

Squid Proxy Alternatives
1. Privoxy
Description: A web proxy with advanced filtering capabilities designed for privacy and ad-blocking.
Key Features:
- Content filtering and privacy features.
- Ad-blocking and access control.
- Supports HTTP and HTTPS traffic.
Use Cases: Privacy enhancement, ad-blocking, content filtering.
2. Charles Proxy
Description: A web debugging proxy application for monitoring and analyzing HTTP/HTTPS traffic.
Key Features:
- Detailed HTTP/HTTPS request and response analysis.
- SSL proxying for secure traffic.
- Traffic manipulation and debugging tools.
Use Cases: Web debugging, traffic analysis, development.
3. Fiddler
Description: A free web debugging proxy tool for monitoring and manipulating HTTP/HTTPS traffic.
Key Features:
- Traffic monitoring and debugging.
- Request and response manipulation.
- Session capturing and analysis.
Use Cases: Web debugging, traffic analysis, development.
4. Polipo
Description: A lightweight caching web proxy.
Key Features:
- Simple and lightweight caching proxy server.
- Basic HTTP/HTTPS caching capabilities.
- Easy to configure.
Use Cases: Basic web caching, low-resource environments.
5. 3proxy
Description: A small and versatile proxy server with various proxy and tunneling features.
Key Features:
- Support for HTTP, HTTPS, SOCKS, and more.
- Lightweight and highly configurable.
- Access control and traffic management features.
Use Cases: Proxy server, traffic management, access control.
6. Websense (Forcepoint)
Description: A commercial web filtering and security solution.
Key Features:
- Advanced web filtering, security, and compliance features.
- Centralized management for large deployments.
- Threat detection and protection.
Use Cases: Enterprise web security, content filtering, compliance.
Comparison Table
| Feature / Tool | Squid Proxy | Privoxy | Charles Proxy | Fiddler | Polipo | 3proxy | Websense (Forcepoint) |
|---|---|---|---|---|---|---|---|
| Caching | Yes | No | No | No | Yes | Yes | No |
| Load Balancing | No | No | No | No | No | No | Yes |
| Content Filtering | Yes | Yes | No | No | No | No | Yes |
| Access Control | Yes | Yes | No | No | No | Yes | Yes |
| Traffic Analysis | Yes | Basic | Yes | Yes | Basic | Yes | Yes |
| SSL/TLS Support | Yes | Yes | Yes | Yes | No | Yes | Yes |
| Ease of Setup | Moderate | Easy | Moderate | Easy | Easy | Easy | Moderate |
Choosing the Right Alternative
- For content filtering and privacy: Privoxy.
- For web debugging and traffic analysis: Charles Proxy or Fiddler.
- For lightweight and basic proxy needs: Polipo or 3proxy.
- For enterprise-level security and filtering: Websense (Forcepoint).
Each tool provides unique features suited for specific tasks, so your choice will depend on your particular requirements and use cases.
Recommended Training: Linux Administration: The Complete Linux Bootcamp in 2025 from Andrei Dumitrescu, Crystal Mind Academy

Environment Specification
We have successfully provisioned a CentOS 7 virtual machine with the following specifications to ensure optimal performance and reliability.
- CPU – 3.4 Ghz (1 Core)
- Memory – 1 GB
- Storage – 20 GB
- Operating System – CentOS 7.7
- Hostname – squid-proxy-01.example.com
- IP Address – 192.168.116.214/24
Install Squid Proxy on CentOS 7
Connect with squid-proxy-01.example.com using ssh as root user.
Squid software package is available in standard yum repositories, therefore, we are installing Squid proxy using yum command.
yum install -y squidEnable and start Squid proxy service.
systemctl enable --now squid.serviceAllow Squid proxy service in CentOS 7 firewall.
firewall-cmd --permanent --add-service=squid
firewall-cmd --reload
Amazon eero 6+ mesh wifi system – Supports internet plans up to a Gigabit, Coverage up to 4,500 sq. ft., Connect 75+ devices, 3-pack
$194.99 (as of July 11, 2025 22:00 GMT +00:00 – More infoProduct prices and availability are accurate as of the date/time indicated and are subject to change. Any price and availability information displayed on [relevant Amazon Site(s), as applicable] at the time of purchase will apply to the purchase of this product.)Configure Squid Proxy on CentOS 7
Global configuration file for Squid web proxy is /etc/squid/squid.conf. We can customize it according to our requirement.
vi /etc/squid/squid.confAdd following directives therein.
dns_v4_first onRestart Squid proxy service to load changes.
systemctl restart squidConfigure Client’s Browser to use Squid Proxy Server
Start the client browser and add our Squid proxy in its settings.
To do this, open Internet Explorer and go to Internet Options.

Go to Connections Tab and click on LAN settings.

Enter Squid Proxy IP Address and Port in the above dialog box.
Click on OK to exit from Internet options.
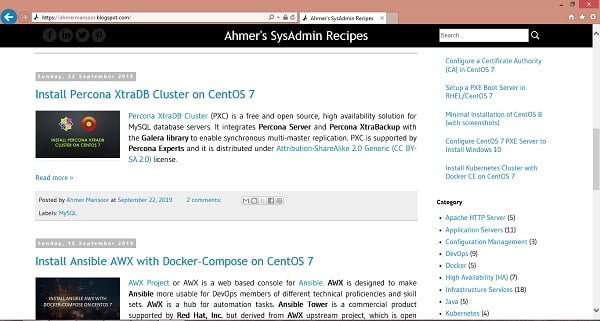
Browse https://centlinux.com in Internet Explorer.

The above website has been served through our Squid proxy server.
Xbox Wireless Gaming Controller (2025) – Shock Blue – Play on Xbox, Windows, Android, iOS, FireTV Sticks, Smart TVs, VR Headsets
$57.99 (as of July 11, 2025 23:47 GMT +00:00 – More infoProduct prices and availability are accurate as of the date/time indicated and are subject to change. Any price and availability information displayed on [relevant Amazon Site(s), as applicable] at the time of purchase will apply to the purchase of this product.)Configure Squid Client Authentication
We can use HTTP basic authentication to configure user based authentication for Squid proxy server.
Install httpd-tools package using yum command.
yum install -y httpd-toolsCreate the password file and add squiduser user therein.
htpasswd -c /etc/squid/passwd squiduserOutput:
New password:
Re-type new password:
Adding password for user squiduser
Change owner of the passwd file.
chown squid.squid /etc/squid/passwdNow, edit Squid configuration file and add Client authentication settings.
vi /etc/squid/squid.confAdd following directives after the ports’ ACLs.
auth_param basic program /usr/lib64/squid/basic_ncsa_auth /etc/squid/passwd
auth_param basic children 5
auth_param basic realm Squid Basic Authentication
auth_param basic credentialsttl 2 hours
acl auth_users proxy_auth REQUIRED
http_access allow auth_users
Restart Squid proxy service to take changes into effect.
systemctl restart squidOpen URL https://centlinux.com in the web browser.

This time, it is prompting for the authentication.
Creating a custom Blacklist to block websites
Create a blacklist file to block websites.
vi /etc/squid/blacklistand add following URLs therein.
.yahoo.com
.facebook.com
Edit Squid proxy configuration file to add blacklist settings.
vi /etc/squid/squid.confadd following directives after the ports’ ACLs.
acl bad_urls dstdomain "/etc/squid/blacklist"
http_access deny bad_urls
Restart Squid proxy service to load changes.
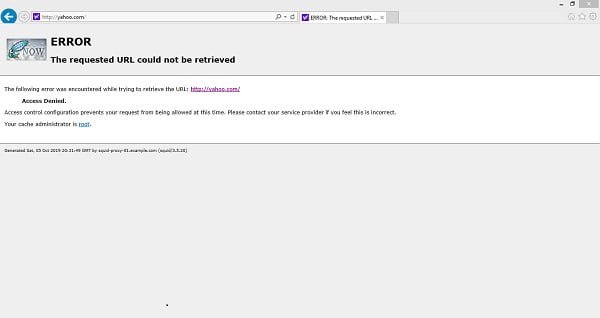
systemctl restart squidOpen URL http://www.yahoo.com in a web browser.

You can see that the http://www.yahoo.com has been blocked by our Squid proxy server.
Read Also: How to install SquidAnalyzer on CentOS 7
Linux Basics for Hackers: Getting Started with Networking, Scripting, and Security in Kali
$20.99 (as of July 10, 2025 21:22 GMT +00:00 – More infoProduct prices and availability are accurate as of the date/time indicated and are subject to change. Any price and availability information displayed on [relevant Amazon Site(s), as applicable] at the time of purchase will apply to the purchase of this product.)Frequently Asked Questions (FAQs)
1. How do I install Squid on CentOS 7?
Run the following command to install Squid:
sudo yum install squid -y2. How do I start and enable Squid after installation?
Use these commands to start Squid and enable it at boot:
sudo systemctl start squid
sudo systemctl enable squid
3. Where is the Squid configuration file located?
The main configuration file is located at: /etc/squid/squid.conf
4. How do I allow specific IP addresses to use the proxy?
Edit /etc/squid/squid.conf and add:
acl allowed_clients src 192.168.1.0/24 http_access allow allowed_clientsThen restart Squid:
sudo systemctl restart squid5. How do I check if Squid is running?
Use the following command to check Squid’s status:
sudo systemctl status squidFinal Thoughts
Installing Squid Proxy on CentOS 7 is a powerful way to enhance your network’s security and performance. With its robust caching capabilities and flexible configuration options, Squid Proxy can help you manage and optimize your web traffic effectively.
Your Linux servers deserve expert care! I provide reliable management and optimization services tailored to your needs. Discover how I can help on Fiverr!
Optimize your network with expert help. Contact me today!


Leave a Reply
You must be logged in to post a comment.