Learn step-by-step instructions to install Checkmk monitoring system on Rocky Linux 9. Follow this comprehensive guide to set up efficient monitoring for your infrastructure. #centlinux #linux #checkmk
Table of Contents
What is Checkmk?
Checkmk is software developed in Python and C++ for IT Infrastructure monitoring. It is used for the monitoring of servers, applications, networks, cloud infrastructures (public, private, hybrid), containers, storage, databases and environment sensors.
Checkmk is available in three editions:
- an open source edition (“Checkmk Raw Edition – CRE”),
- a commercial enterprise edition (“Checkmk Enterprise Edition – CEE”) and
- a commercial edition for managed services providers (“Checkmk Managed Services Edition – CME”).
These Checkmk-Editions are available for a range of platforms, in particular for various versions of Debian, Ubuntu, SLES and Red Hat / CentOS, and also as a Docker Image. In addition, physical appliances of various sizes as well as a virtual appliance are offered to simplify the administration of the underlying operating system through a graphical user interface and to enable high-availability solutions.
The agents used by Checkmk to collect data are available for 11 platforms, including Windows. (Source: Wikipedia)

Checkmk vs. Nagios: A Comparison
Both Checkmk and Nagios are powerful monitoring solutions used to track the performance and availability of servers, network devices, and other IT infrastructure. However, they differ in terms of features, usability, scalability, and configuration.
1. Ease of Use and Configuration
- Checkmk:
- Checkmk offers a more user-friendly interface compared to Nagios.
- It provides both a GUI and a web interface that simplifies the configuration and management of monitoring tasks.
- Auto-discovery of hosts and services is a key feature, making it easier to set up.
- It uses a more modern configuration approach (through “hosts” and “services”), which can be less cumbersome than Nagios.
- Nagios:
- Nagios has a steeper learning curve, especially for beginners.
- It requires more manual configuration via text files, which can be time-consuming and error-prone.
- While Nagios has a rich plugin ecosystem, the initial setup may feel complex compared to Checkmk.
2. Features and Flexibility
- Checkmk:
- Built-in features for monitoring servers, networks, applications, and cloud infrastructure.
- It includes features such as event handling, notifications, alerting, and auto-discovery.
- Checkmk also provides an integrated dashboard for monitoring and visualizing performance data, with historical data storage.
- It supports both active and passive checks, providing more flexibility in monitoring.
- Nagios:
- Nagios is highly flexible and customizable, with an extensive ecosystem of plugins available for monitoring a wide variety of services and devices.
- While it lacks some of the out-of-the-box features of Checkmk, users can extend Nagios with plugins for nearly every use case.
- Nagios has better integration with third-party tools for monitoring and alerting, but this typically requires additional setup.
3. Scalability
- Checkmk:
- Checkmk is highly scalable and can easily handle large infrastructures. It can be used to monitor thousands of hosts and services without significant performance degradation.
- It allows for distributed monitoring, with the ability to set up multiple monitoring nodes.
- Nagios:
- Nagios is scalable, but it may require additional configuration for large environments, especially when dealing with a high volume of checks.
- For large setups, Nagios may benefit from additional tools like Nagios XI (paid version) or external tools such as Nagios Fusion for centralized monitoring.
4. Alerting and Notifications
- Checkmk:
- Checkmk provides flexible alerting mechanisms, including email, SMS, and integration with other notification tools like Slack.
- It has more sophisticated event handling, such as event correlation and automatic problem resolution.
- Notifications are easy to configure through the web interface.
- Nagios:
- Nagios also offers robust alerting and notification features, but it may require additional configuration to fine-tune.
- Alerts can be sent via email, SMS, or integration with other systems like PagerDuty.
- Nagios has the advantage of being highly customizable for different notification methods.
5. Performance and Resource Usage
- Checkmk:
- Checkmk is known for its efficiency in resource usage. It handles checks faster and typically uses fewer system resources compared to Nagios.
- It uses a more efficient monitoring engine that is optimized for large-scale deployments.
- Nagios:
- Nagios can consume more resources, particularly in large environments with a high number of checks. Performance can degrade as the number of hosts and services increases, unless carefully optimized.
- Nagios can be tuned for better performance, but it requires more manual adjustments.
6. Community and Support
- Checkmk:
- Checkmk has a large and active community, with comprehensive documentation, community forums, and user groups.
- The enterprise version of Checkmk offers official support and additional features.
- Nagios:
- Nagios has been around for much longer and has an established and extensive community. It also has a vast repository of plugins, so users can often find solutions for specific monitoring needs.
- Nagios offers commercial support via Nagios Enterprises for enterprise customers.
7. Cost
- Checkmk:
- Checkmk has a free open-source version, but it also offers enterprise editions with additional features, such as extended monitoring capabilities, support, and premium plugins.
- The enterprise version requires a subscription fee.
- Nagios:
- Nagios Core is free and open-source, but there are premium versions like Nagios XI that provide additional features, user interfaces, and support. Nagios XI is a paid product, whereas Nagios Core remains free.
Summary
- Checkmk is more user-friendly, comes with out-of-the-box features, and is ideal for users looking for a scalable, easy-to-manage monitoring solution with an intuitive web interface. It’s well-suited for larger environments that need minimal manual configuration.
- Nagios is a highly customizable and flexible tool that offers a wide range of plugins and is better suited for users who need a high degree of control and are comfortable with manual configuration. It may require more resources for larger setups and has a steeper learning curve.
Ultimately, the choice between Checkmk and Nagios depends on your specific needs, environment, and preference for ease of use versus flexibility.
Read Also: Install Nagios Core on Rocky Linux 9
Environment Specification
We are using a minimal Rocky Linux 9 virtual machine with following specifications.
- CPU – 3.4 Ghz (2 cores)
- Memory – 2 GB
- Storage – 20 GB
- Operating System – Rocky Linux release 9.1 (Blue Onyx)
- Hostname – checkmk-01.centlinux.com
- IP Address – 192.168.116.128/24
For experimenting with Checkmk on Rocky Linux 9, you’ll want a reliable environment that offers both performance and flexibility. A Mini PC is an excellent choice if you prefer a dedicated physical device that’s compact, energy-efficient, and perfect for running Linux server workloads at home or in the office.
[Start Your DevOps Lab with a Mini PC – Order Today!]
Alternatively, a VPS like the ones offered by Rose Hosting provides a scalable cloud-based solution ideal for remote access and testing without hardware setup. Both options give you a hands-on way to explore the full capabilities of Checkmk in a controlled Linux server environment.
[Launch Your Own VPS with Rose Hosting – Click to Get Started!]
If you’re interested in exploring these powerful setups, consider checking out the Mini PCs and VPS plans linked here to get started quickly and efficiently.
Disclaimer: This post contains affiliate links. If you choose to purchase through these links, I may earn a small commission at no extra cost to you. This helps support my work in creating helpful Linux and DevOps content.
Prepare your Rocky Linux Server
By using a ssh client, login to your Rocky linux server as root user.
Set a Hostname (preferably FQDN) and configure Local DNS Resolver by executing following commands at Linux terminal.
hostnamectl set-hostname checkmk-01.centlinux.com
echo "192.168.116.128 checkmk-01 checkmk-01.centlinux.com" >> /etc/hosts
Execute following command to update software packages in your Linux operating system.
dnf update -yIf a software package related to Linux Kernel is updated by the above command, then you should reboot your Linux operating system with newly installed Kernel.
rebootAfter reboot, login as root user and check your Linux operating system and Kernel versions.
cat /etc/rocky-release
uname -r
Output:
Rocky Linux release 9.1 (Blue Onyx)
5.14.0-162.23.1.el9_1.x86_64
Install Third Party Yum Repositories
To install Checkmk software, you will require some software package from EPEL (Extra Packages for Enterprise Linux) yum repository. Therefore, you should install it now, by executing dnf command.
dnf install -y epel-releaseEPEL requires some packages from CRB (CodeReady Linux Builder) yum repository. Therefore, it will be better if you enable CRB yum repository too.
You can execute following command at Linux terminal to enable CRB yum repository.
/usr/bin/crb enableOutput:
Enabling CRB repo
CRB repo is enabled and named: crb
Build your cache for newly installed yum repositories.
dnf makecacheConfigure SELinux and Linux Firewall
Execute following Linux command to set SELinux boolean that allows your web server to access the network interfaces.
setsebool -P httpd_can_network_connect 1Allow the http service in Linux firewall.
firewall-cmd --permanent --add-service=http
firewall-cmd --reload
Install Checkmk on Rocky Linux
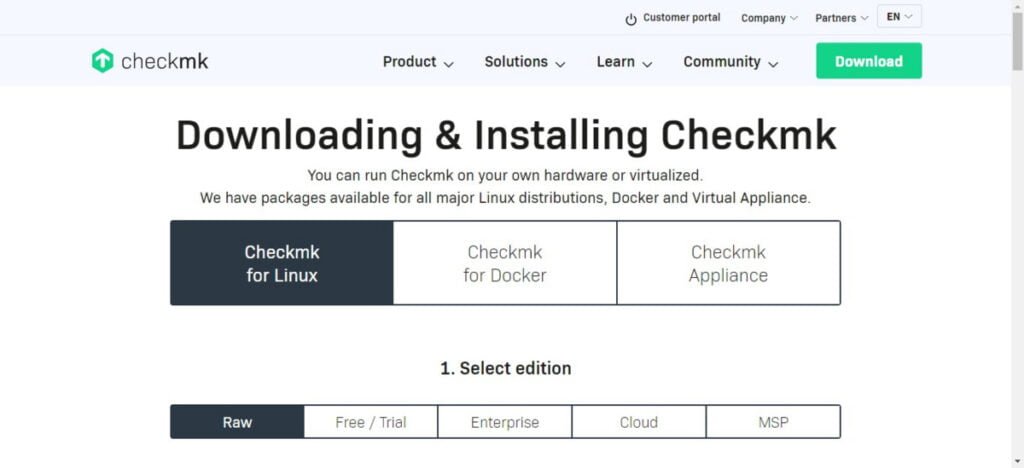
You can download different versions of this network monitoring software from Checkmk official website.

But we recommend that, you download RAW version of Checkmk if you do not have a license.
RAW version is open source edition and it is free to use under GNU GPL license.

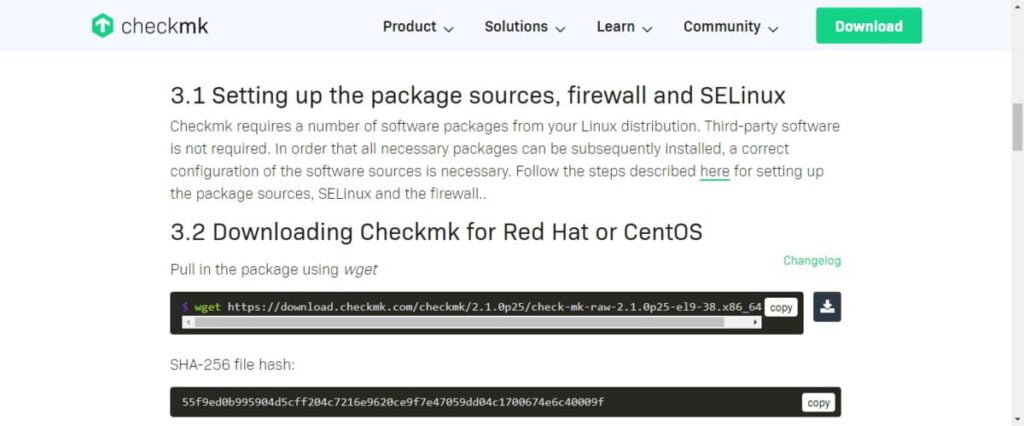
Select your preferred Checkmk version, Platfrom and OS version. The same webpage will generate a Linux command according to your selection to download checkmk software.

Copy the command from Checkmk website to download the software straight from Linux terminal.
But you need to install wget command, because it is not preinstalled on minimal Rocky Linux 9 operating systems.
dnf install -y wgetNow execute wget command to download Checkmk software.
wget https://download.checkmk.com/checkmk/2.1.0p25/check-mk-raw-2.1.0p25-el9-38.x86_64.rpmYou have already setup the required yum repositories, therefore, you can easily install checkmk software by executing following dnf command.
dnf localinstall -y check-mk-raw-2.1.0p25-el9-38.x86_64.rpmVerify installation of Checkmk software by querying it’s version by using omd command.
omd versionOutput:
OMD - Open Monitoring Distribution Version 2.1.0p25.cre
Configure Checkmk Monitoring
Create a new monitoring instance by using omd command.
omd create monitoringOutput:
Adding /opt/omd/sites/monitoring/tmp to /etc/fstab.
Creating temporary filesystem /omd/sites/monitoring/tmp...OK
Updating core configuration...
Generating configuration for core (type nagios)...
Precompiling host checks...OK
Executing post-create script "01_create-sample-config.py"...OK
Restarting Apache...OK
Created new site monitoring with version 2.1.0p25.cre.

  The site can be started with omd start monitoring.
  The default web UI is available at http://checkmk-01.centlinux.com/monitoring/

  The admin user for the web applications is cmkadmin with password: rPOtCNpZ
  For command line administration of the site, log in with 'omd su monitoring'.
  After logging in, you can change the password for cmkadmin with 'cmk-passwd cmkadmin'.
Note down the URL of Checkmk Web UI and Password for chkadmin user.
Start the monitoring instance now.
omd start monitoringOutput:
Temporary filesystem already mounted
Starting agent-receiver...OK
Starting mkeventd...OK
Starting rrdcached...OK
Starting npcd...OK
Starting nagios...OK
Starting apache...OK
Starting redis...OK
Initializing Crontab...OK
Connect to OMD Prompt as monitoring user.
omd su monitoringThen execute following command at OMD prompt to change password of chkadmin user.
cmk-passwd cmkadminExit from OMD Prompt.
exitRead Also: How to install LibreNMS on CentOS 8
Access Checkmk Dashboards
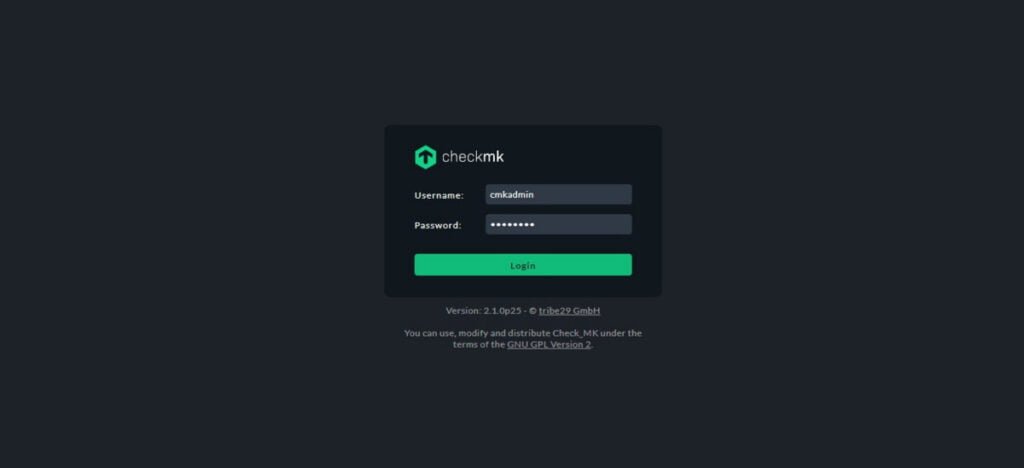
Open URL http://checkmk-01.centlinux.com/monitoring in a web browser.

Login as chkadmin user.

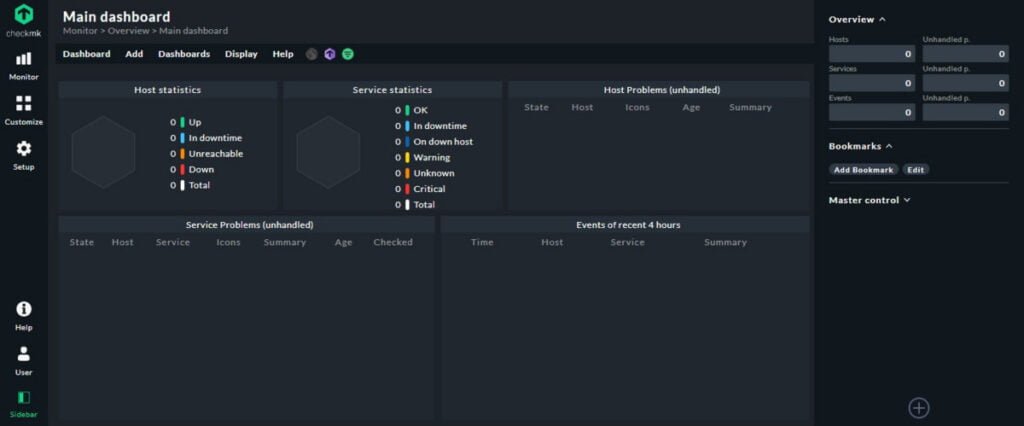
You have reached at the Dashboards of Checkmk monitoring software.
Video Tutorial
Final Thoughts
Process to install Checkmk on Rocky Linux 9 opens up a world of possibilities for robust infrastructure monitoring. By carefully following the installation steps and obtaining the required software packages from the EPEL & CRB repositories, you’ll empower yourself to keep a close eye on your system’s health and performance. With monitoring in place, you can proactively address issues and optimize your infrastructure for maximum efficiency and reliability.
Need expert AWS and Linux system administration? From cloud architecture to server optimization, I provide reliable and efficient solutions tailored to your needs. Hire me today!
FAQs
Q1: Can Checkmk be installed on Rocky Linux 9 without a GUI?
A1: Yes, Checkmk installation and operation primarily rely on the command line and web interface, so a GUI is not required on Rocky Linux 9.
Q2: Is it necessary to configure a separate database for Checkmk on Rocky Linux?
A2: No, Checkmk uses its internal database system by default, so you don’t need to set up an external database during installation.
Q3: Can Checkmk monitor containers running on Rocky Linux 9?
A3: Yes, Checkmk supports monitoring Docker and other container environments by installing appropriate agents and plugins.
Q4: How do I update Checkmk on Rocky Linux 9 without losing my configuration?
A4: You can upgrade Checkmk using the official upgrade procedures, which preserve your configuration files and monitoring data.
Q5: Does Checkmk support integration with Rocky Linux’s SELinux security module?
A5: Yes, but you may need to adjust SELinux policies or run Checkmk in permissive mode to avoid permission issues during operation.
What’s Next
If you’re serious about mastering IT infrastructure monitoring, the Zabbix Application and Network Monitoring by Sean Bradley course is a must-have resource. This practical training walks you through real-world scenarios to monitor servers, applications, and networks with confidence, making it ideal for system administrators, DevOps engineers, and IT professionals aiming to level up their skills. By enrolling, you’ll gain hands-on knowledge that can save countless hours in troubleshooting and system management. [Click here to check out the course]
Disclaimer: This link is an affiliate link, which means I may earn a small commission at no extra cost to you if you decide to purchase through it. This helps support my blog and allows me to continue creating useful content.


Leave a Reply
Please log in to post a comment.