Add PXE UEFI support to your Linux PXE server with this simple, step-by-step installation and configuration guide. #centlinux #linux #pxe
Table of Contents
UEFI vs BIOS
BIOS (Basic Input/Output System) and UEFI (Unified Extensible Firmware Interface) are two firmware interfaces for computer systems which work as an interpreter between the operating system and the computer firmware. Both of these are installed at the time of manufacturing and is the first program that runs when a computer is turned on. BIOS uses the Master Boot Record (MBR) to save information about the hard drive data while UEFI uses the GUID partition table (GPT).
MBR uses 32-bit entries in its table which limits the total physical partitions to only 4 with maximum size of 2 TB each. Whereas, GPT uses 64-bit entries in its table which allows it use more than 4 physical partitions with larger sizes.

Problem Statement
In our previous article Setup a PXE Boot Server in CentOS 7, we have configured a PXE boot server and added the RHEL 7.5 installation option in it. The configuration worked fine with BIOS based computer systems, but didn’t support UEFI based clients.
In this article, we will add UEFI support to our PXE Boot Server on CentOS 7.
If you’re serious about leveling up your Linux skills, I highly recommend the Linux Mastery: Master the Linux Command Line in 11.5 Hours by Ziyad Yehia course. It’s a practical, beginner-friendly program that takes you from the basics to advanced command line usage with clear explanations and hands-on exercises. Whether you’re a student, sysadmin, or developer, this course will help you build the confidence to navigate Linux like a pro.
👉 Enroll now through my affiliate link and start mastering the Linux command line today!
Disclaimer: This post contains affiliate links. If you purchase through these links, I may earn a small commission at no extra cost to you, which helps support this blog.
System Specification
We use the same CentOS 7 server that we have configured as PXE Boot Server in our previous article. The specifications have been re-mentioned below for convenience of the readers.
- CPU – 2 Core (2.4 Mhz)
- Memory – 2 GB
- Storage – 50 GB
- Operating System – CentOS 7.5
- Hostname – pxe-server.itlab.com
- IP Address – 192.168.116.41/24
Add PXE UEFI support in Linux PXE Server
Connect to pxe-server.itlab.com using ssh.
Adjust DHCP server configuration to support UEFI systems.
vi /etc/dhcp/dhcpd.confSearch for following lines in the above file.
#PXE boot server
next-server 192.168.116.41;
filename "pxelinux.0";
Replace above lines with following configurations.
class "pxeclients" {
          match if substring (option vendor-class-identifier, 0, 9) = "PXEClient";
          next-server 192.168.116.41;

          if substring (option vendor-class-identifier, 15, 5) = "00009" {
            filename "grubx64.efi";
            } else {
            filename "pxelinux.0";
        }
    }
Restart dhcpd.service to apply changes.
systemctl restart dhcpd.serviceIf dhcpd.service gives error during startup, then look for any possible syntax errors therein and try to restart the service again.
For more details on comparisons in the above configurations, please refer to RFC 4578 – Dynamic Host Configuration Protocol (DHCP) Options for the Intel Preboot eXecution Environment (PXE).
Now, we need a bootloader (such as grubx64.efi) to support UEFI clients. This bootloader is available in CentOS 7.5 ISO.
Copy grubx64.efi to /var/lib/tftpboot directory.
cp /var/ftp/pub/rhel7/EFI/BOOT/grubx64.efi /var/lib/tftpboot/Our PXELINUX menu does not work for UEFI systems, therefore we have to create another menu for the UEFI clients.
The menu filename is grub.cfg and it is located at /var/lib/tftpboot. Therefore, we will define RHEL 7.5 installation option in this file as follows:
cat >> /var/lib/tftpboot/grub.cfg << EOF
set timeout=60

menuentry 'Install RHEL 7.5' {
        linuxefi /networkboot/rhel7/vmlinuz inst.repo=ftp://192.168.116.41/pub/rhel7/
        initrdefi /networkboot/rhel7/initrd.img
}
EOF
Restart tftp.service to apply changes.
systemctl restart tftp.serviceUEFI configurations has been completed.
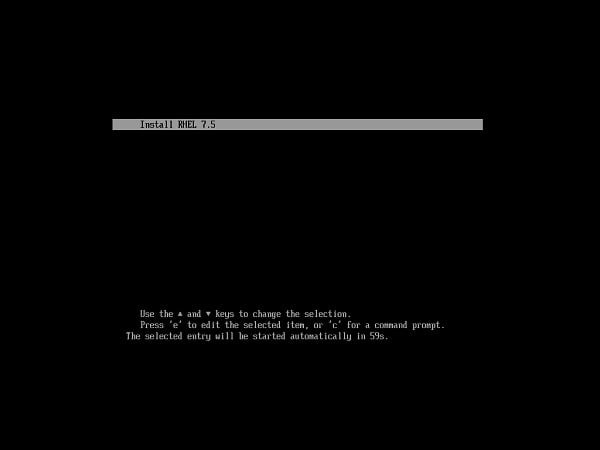
To test the configurations, connect a UEFI based system to network, and turn it on.

The UEFI client will fetch the above menu from PXE boot server.
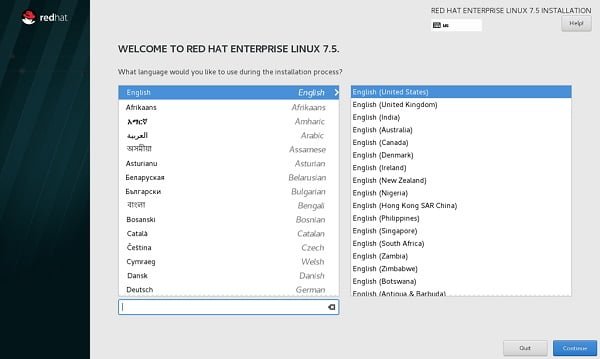
Press <ENTER> to start installation.

Our PXE boot Server is now supports both BIOS and UEFI based clients.
Frequently Asked Questions (FAQs)
1. What is PXE UEFI support, and why is it needed?
PXE UEFI support allows modern systems with UEFI firmware (instead of legacy BIOS) to boot over the network. Without it, UEFI-based machines won’t recognize the PXE boot environment.
2. What’s the difference between PXE booting in BIOS vs. UEFI mode?
BIOS uses pxelinux.0 and traditional files, while UEFI requires grubx64.efi (or similar) and EFI-compatible bootloaders stored in the correct paths (e.g., /efi/).
3. Which DHCP settings are required for UEFI PXE boot?
Your DHCP server must provide UEFI-specific boot file paths (e.g., grubx64.efi) alongside traditional BIOS paths, often using option 67 (bootfile-name) or UEFI-specific options.
4. Do I need separate boot files for UEFI and BIOS clients?
Yes. UEFI clients need EFI bootloaders (e.g., grubx64.efi), while BIOS clients use files like pxelinux.0. Both can coexist on the same server with proper configuration.
5. How do I test if UEFI PXE boot is working?
Enable UEFI network boot in the client machine’s firmware, restart, and check if it retrieves an IP and loads the EFI bootloader. Monitor server logs (like tftpd or DHCP) for errors.
Final Thoughts
By enabling PXE UEFI support on your Linux PXE server, you future-proof your infrastructure and ensure seamless provisioning for modern hardware. Don’t let outdated configurations hold you back—more organizations are switching to UEFI every day, and you can’t afford to lag behind.
You’ve seen how straightforward the process is, and now it’s your move. Take action, implement the changes, and position your network for faster, smarter, and more secure deployments.
Searching for a skilled Linux admin? From server management to security, I ensure seamless operations for your Linux systems. Find out more on my Freelancer profile!

Leave a Reply
You must be logged in to post a comment.