Learn how to install Apache Subversion (SVN) and USVN on CentOS 7 with this comprehensive guide. Step-by-step instructions, prerequisites, and tips to set up SVN for version control and USVN for web-based SVN repository management. #centlinux #linux #svn
Table of Contents
What is Apache Subversion?
Apache Subversion (abbreviated as SVN) is a software versioning and revision control system distributed as open source under the Apache License. Software developers use Subversion to maintain current and historical versions of files such as source code, web pages, and documentation. Apache subversion is shipped with RHEL, CentOS, etc, and can be installed via yum repository.
What is USVN?
User Friendly SVN (or USVN) is a free web interface written in PHP used to configure Subversion repositories. It’s goal is to ease the creation of new projects without having to use the command line interface, maybe without privileged access to the server. USVN will then generate the list of users allowed to access your source code. This enable the delegation of rights to administrate Subversion repositories.
Problem Statement
In this post, we will install and configure a Central SVN Server on Red Hat Enterprise Linux (RHEL)/CentOS 7 for our Software developers. Software developers are continuously updating source code, and we use Apache Subversion to control revisions and versioning. We will also configure USVN for easy administration of our SVN Server.
Read Also: Configure Local Yum Repository using ISO in RHEL 7
Linux Server Specification
We have provisioned a CentOS 7 virtual machine with following specifications
- Operating System – CentOS 7
- Hostname – svnserver01.itlab.com
- IP Address – 192.168.116.30/24
- Gateway – 192.168.116.2
- DNS Server – 192.168.116.2
- Yum Repository – Local
Recommended Training: Linux Administration: The Complete Linux Bootcamp in 2025 from Andrei Dumitrescu, Crystal Mind Academy

Install Apache Subversion (SVN) on CentOS 7
USVN required a web server for deployment. Therefore, we will install Apache HTTP Server.
# yum install -y httpd
Start and enable httpd service.
# systemctl start httpd ; systemctl enable httpd
ln -s '/usr/lib/systemd/system/httpd.service' '/etc/systemd/system/multi-user.target.wants/httpd.service'
Disable Welcome page of Apache HTTP Server.
# mv /etc/httpd/conf.d/welcome.conf /etc/httpd/conf.d/welcome.conf.org
Disable directory indexes in Apache HTTP Server configurations.
# cp /etc/httpd/conf/httpd.conf /etc/httpd/conf/httpd.conf.org
# sed -i "s/Options Indexes FollowSymLinks/Options FollowSymLinks/" /etc/httpd/conf/httpd.conf
# systemctl restart httpd
Allow http service through Linux firewall.
# firewall-cmd --permanent --add-service=http ; firewall-cmd --reload
success
success
USVN requires a MySQL database as it’s backend-database. Therefore, we will install mariadb database and php as well.
# yum install -y php mariadb-server php-mysql
Start and enable mariadb service.
# systemctl start mariadb ; systemctl enable mariadb
ln -s '/usr/lib/systemd/system/mariadb.service' '/etc/systemd/system/multi-user.target.wants/mariadb.service'
Configure mariadb server.
# mysql_secure_installation
/usr/bin/mysql_secure_installation: line 379: find_mysql_client: command not found

NOTE: RUNNING ALL PARTS OF THIS SCRIPT IS RECOMMENDED FOR ALL MariaDB
      SERVERS IN PRODUCTION USE!  PLEASE READ EACH STEP CAREFULLY!

In order to log into MariaDB to secure it, we'll need the current
password for the root user.  If you've just installed MariaDB, and
you haven't set the root password yet, the password will be blank,
so you should just press enter here.

Enter current password for root (enter for none):

OK, successfully used password, moving on...
Setting the root password ensures that nobody can log into the MariaDB
root user without the proper authorisation.
Set root password? [Y/n] Y
New password:
Re-enter new password:
Password updated successfully!
Reloading privilege tables..
 ... Success!

By default, a MariaDB installation has an anonymous user, allowing anyone
to log into MariaDB without having to have a user account created for
them.  This is intended only for testing, and to make the installation
go a bit smoother.  You should remove them before moving into a
production environment.
Remove anonymous users? [Y/n] Y
 ... Success!

Normally, root should only be allowed to connect from 'localhost'.  This
ensures that someone cannot guess at the root password from the network.
Disallow root login remotely? [Y/n] Y
 ... Success!

By default, MariaDB comes with a database named 'test' that anyone can
access.  This is also intended only for testing, and should be removed
before moving into a production environment.
Remove test database and access to it? [Y/n] Y
 - Dropping test database...
 ... Success!

 - Removing privileges on test database...
 ... Success!

Reloading the privilege tables will ensure that all changes made so far
will take effect immediately.
Reload privilege tables now? [Y/n] Y
 ... Success!

Cleaning up...
All done!  If you've completed all of the above steps, your MariaDB
installation should now be secure.

Thanks for using MariaDB!
Set timezone in php settings.
# vi /etc/php.ini
screenshot after editing in php.ini file is given below:
[Date]
; Defines the default timezone used by the date functions
; http://php.net/date.timezone
date.timezone = Asia/Karachi

; http://php.net/date.default-latitude
;date.default_latitude = 31.7667
Install Apache Subversion and relevant Apache HTTP server module..
# yum install -y subversion mod_dav_svn
Charger for HP Laptop Computer 65W 45W Smart Blue Tip Power Adapter
$9.90 (as of April 15, 2025 15:53 GMT +00:00 – More infoProduct prices and availability are accurate as of the date/time indicated and are subject to change. Any price and availability information displayed on [relevant Amazon Site(s), as applicable] at the time of purchase will apply to the purchase of this product.)Install User Friendly SVN (USVN) on CentOS 7
Download and extract USVN application on Apache HTTP Server. You can also visit http://www.usvn.info to get a latest version.
# cd /var/www/html
# wget https://github.com/usvn/usvn/archive/1.0.7.tar.gz
--2018-07-14 10:26:00--  https://codeload.github.com/usvn/usvn/tar.gz/1.0.7
Resolving codeload.github.com (codeload.github.com)... 192.30.253.120, 192.30.253.121
Connecting to codeload.github.com (codeload.github.com)|192.30.253.120|:443... connected.
HTTP request sent, awaiting response... 200 OK
Length: 4570697 (4.4M) [application/x-gzip]
Saving to: â1.0.7.tar.gzâ

100%[================================================================================>] 4,570,697    222KB/s   in 26s

2018-07-14 10:26:34 (171 KB/s) - â1.0.7.tar.gzâ saved [4570697/4570697]

# tar xf 1.0.7.tar.gz > /dev/null
Create required directories and set necessary folder permissions.
# mv usvn-1.0.7 usvn
# cd usvn
# mkdir files
# chmod -R g+w {public,config,files}
# chgrp -R apache /var/www/html/usvn
# semanage fcontext -a -t httpd_sys_rw_content_t "/var/www/html/usvn/public(/.*)?"
# semanage fcontext -a -t httpd_sys_rw_content_t "/var/www/html/usvn/config(/.*)?"
# semanage fcontext -a -t httpd_sys_rw_content_t "/var/www/html/usvn/files(/.*)?"
# restorecon -R /var/www/html/usvn
Deploy USVN application on Apache HTTP Server.
# cat >> /etc/httpd/conf.d/usvn.conf << EOF
> <Directory /var/www/html/usvn/>
>         AllowOverride All
>         Require all granted
> </Directory>
> EOF

# systemctl restart httpd
Open http://svnserver01.itlab.com/usvn/public/install.php in browser, and start USVN installation.
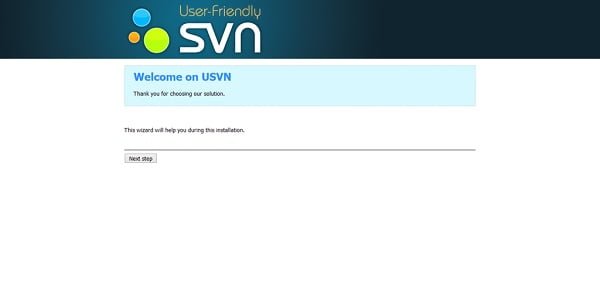
Click on Next step.
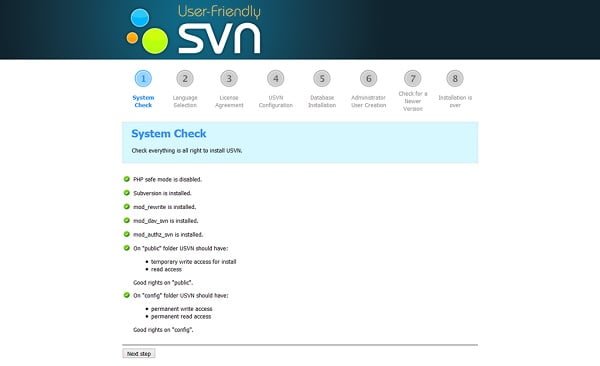
Installer performs System Check and produce warnings. If you have follow the exact steps above, then you won’t get any warning here.
Click on Next step.
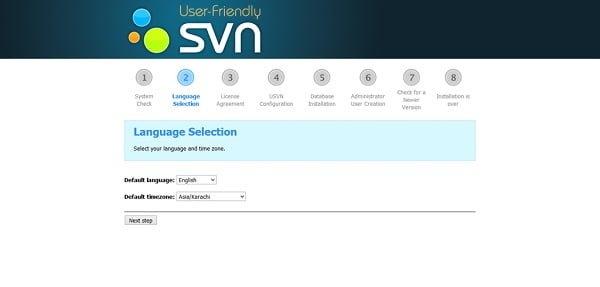
Select your required language and timezone.
Click on Next step.
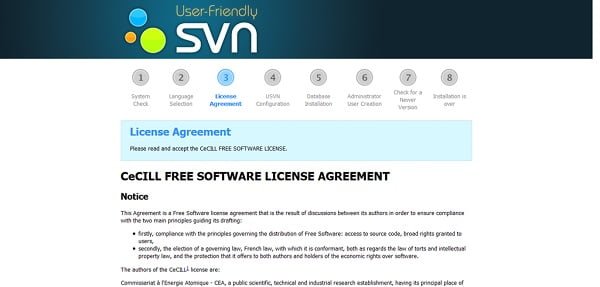
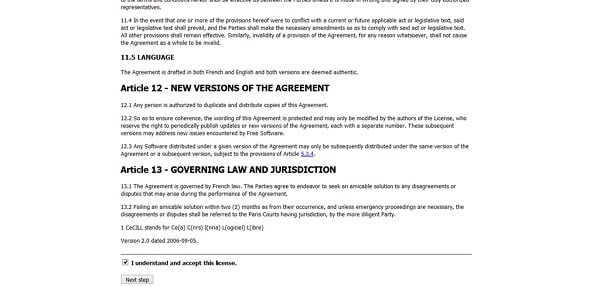
Check I understand and accept this license and Click on Next Step.
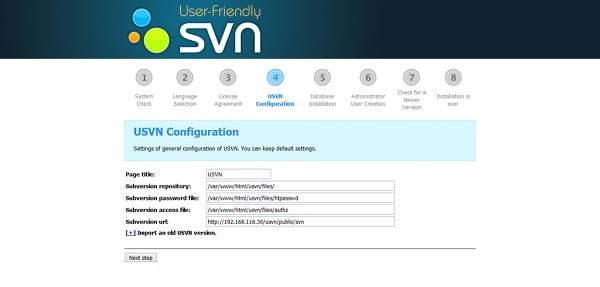
No customization required here. Click on Next Step.
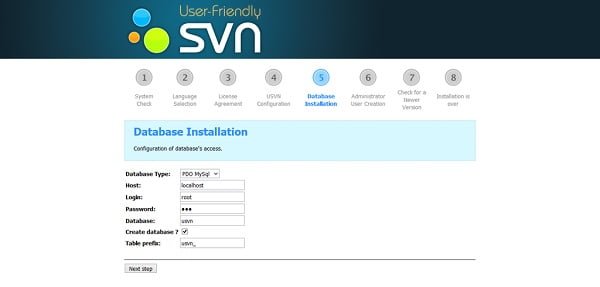
Provide database password and make necessary customization as we made in the screenshot above.
Click on Next Step.
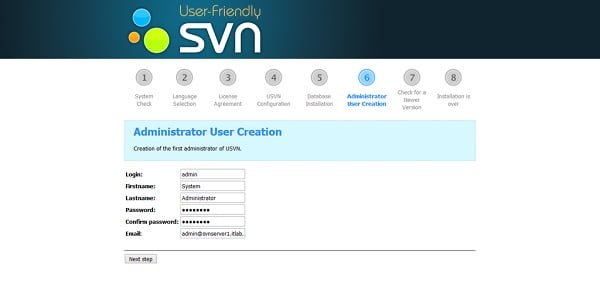
Create a USVN Administrator here and click on Next Step.
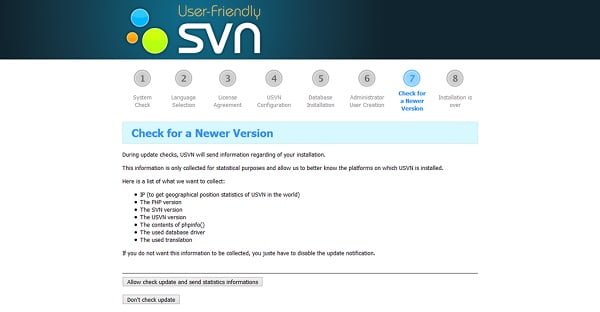
Since, I am installing on an isolated network, I prefer to disable auto checks for updated versions of USVN.
Click on Don’t check update.
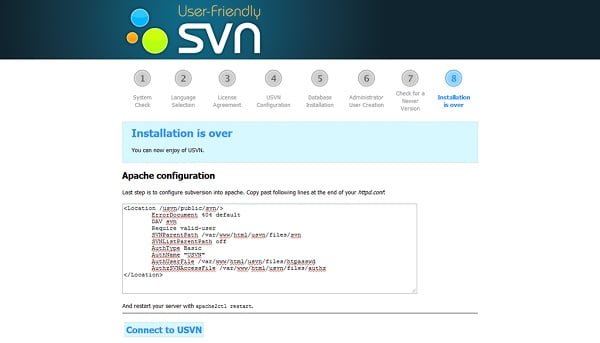
Installation is completed. Copy the selected code and paste it at the end of /etc/httpd/conf.d/usvn.conf.
Click on Connect to USVN.
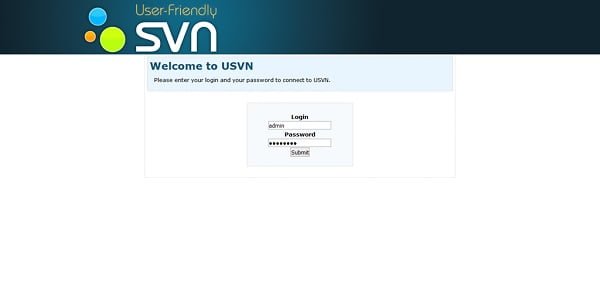
Login with admin user.
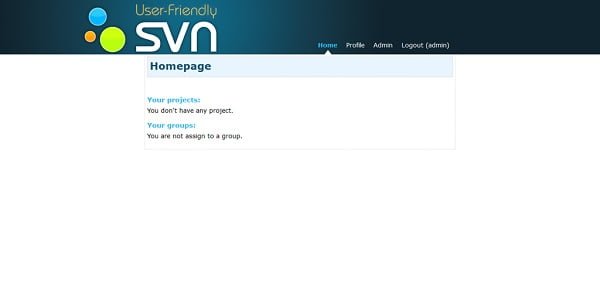
We have successfully installed User Friendly SVN (USVN) Application and Apache Subversion (SVN) on our Linux Server. Our USVN application is running in HTTP mode. Although, we can convert it to HTTPS easily, but we intentionally overlooked it because it is beyond the scope of this post. However, you may read our previous post Convert an Apache Website from HTTP to HTTPs to convert your USVN application from HTTP to HTTPS.
Site Reliability Engineering: How Google Runs Production Systems
$24.80 (as of April 16, 2025 15:55 GMT +00:00 – More infoProduct prices and availability are accurate as of the date/time indicated and are subject to change. Any price and availability information displayed on [relevant Amazon Site(s), as applicable] at the time of purchase will apply to the purchase of this product.)Final Thoughts
Installing Apache Subversion (SVN) and USVN on CentOS 7 empowers your team with robust version control capabilities and a user-friendly web interface for repository management. By following this guide, you should now have SVN and USVN configured to streamline collaboration and code management.
For further assistance or custom configurations tailored to your needs, I offer professional services to ensure your SVN setup is optimized. Check out my Fiverr gig for more details: DevOps Engineer. Let’s enhance your version control workflow and productivity together!
Efficient version control starts with Apache Subversion and USVN on CentOS 7.


Leave a Reply
You must be logged in to post a comment.