Learn how to install Mattermost on CentOS 7 with our detailed guide. Follow step-by-step instructions to set up your own open-source, self-hosted chat platform for team collaboration and communication. #centlinux #linux
Table of Contents
What is Mattermost?
Mattermost is an open-source online chat service. Mattermost is developed by Mattermost Inc, and it is written in Golang and Javascript. Mattermost is designed as an internal chat server for organizations and being marketed as an alternate to Slack.
Mattermost has a simple web interface that can be used for administration as well as instant messaging. Besides that, there are various chat clients are available as Desktop and Mobile Apps for Mattermost chat server.
In this article, we will install Mattermost on CentOS 7. We are also installing PostgreSQL 11, as a prerequisite of Mattermost server software.
Mattermost Features
Some of popular features of Mattermost 5.13 are:
- Encrypted Push notifications
- Unlimited search history
- Advanced access control
- Multi-node database deployment support
- Open source and private cloud-ready
- Custom emojis
- Plugin framework
- SAML based SSO
- File sharing
- 1 to 1 and Group messaging
- Multi-language translations
- Role based permissions
- Audio/Video conferencing
Recommended Online Training: Learn Bash Shell in Linux for Beginners

Mattermost System Requirements
Following are the Mattermost 5.13 server requirements. We are only consolidating the requirements specific to our working environment. You can see Mattermost detailed system requirements on it’s website.
- CPU – Single Core
- Memory – 2 GB
- Operating System – CentOS 7+
- Database Software – MySQL 5.6,5.7,8 / PostgreSQL 9.4+
Linux Server Specification
Based on Mattermost system requirements, we have provisioned a CentOS 7 server with following specifications.
- CPU – 3.4 Ghz (Single Core)
- Memory – 2 GB
- Storage – 20 GB
- Operating System – CentOS 7.6
- Database Software – PostgreSQL 11
Install PostgreSQL on CentOS 7
Connect with mattermost-01.example.com using ssh as root user.
In standard yum repositories, only PostgreSQL 9.2 is available. Therefore, to install a latest version of PostgreSQL, we have to install PostgreSQL yum repository.
Yum repositories for various Linux distros can be obtained from PostgreSQL official download page.
Install PostgreSQL yum repository as follows:
# rpm -ivh https://download.postgresql.org/pub/repos/yum/reporpms/EL-7-x86_64/pgdg-redhat-repo-latest.noarch.rpm
Retrieving https://download.postgresql.org/pub/repos/yum/reporpms/EL-7-x86_64/pgdg-redhat-repo-latest.noarch.rpm
warning: /var/tmp/rpm-tmp.nzDSUU: Header V4 DSA/SHA1 Signature, key ID 442df0f8: NOKEY
Preparing...                          ################################# [100%]
Updating / installing...
   1:pgdg-redhat-repo-42.0-4          ################################# [100%]
The same PostgreSQL package provides the yum repositories for various versions of PostgreSQL database.
Therefore, we are disabling the PostgreSQL yum repositories other than version 11 as follows.
# yum-config-manager --disable pgdg10 pgdg94 pgdg95 pgdg96
Build yum cache for PostgreSQL repository.
# yum makecache fast
Loaded plugins: fastestmirror
Loading mirror speeds from cached hostfile
 * base: mirrors.ges.net.pk
 * extras: mirrors.ges.net.pk
 * updates: mirrors.ges.net.pk
base                                                     | 3.6 kB     00:00
extras                                                   | 3.4 kB     00:00
pgdg11                                                   | 3.6 kB     00:00
updates                                                  | 3.4 kB     00:00
(1/2): pgdg11/7/x86_64/group_gz                            |  245 B   00:01
(2/2): pgdg11/7/x86_64/primary_db                          | 231 kB   00:03
Metadata Cache Created
Install PostgreSQL client and server packages using yum command.
# yum install -y postgresql11 postgresql11-server
Initialize PostgreSQL database instance as follows.
# /usr/pgsql-11/bin/postgresql-11-setup initdb
Initializing database ... OK
Edit pg_hba.conf file to allow md5 based user authentication.
# vi /var/lib/pgsql/11/data/pg_hba.conf
Find following directive:
host all all 127.0.0.1/32 ident
and update it as:
host all all 127.0.0.1/32 md5
Enable and start PostgreSQL service.
# systemctl enable postgresql-11.service
Created symlink from /etc/systemd/system/multi-user.target.wants/postgresql-11.service to /usr/lib/systemd/system/postgresql-11.service.
# systemctl start postgresql-11.service
Connect as postgres user and set password for admin user.
# su - postgres
-bash-4.2$ psql
psql (11.4)
Type "help" for help.

postgres=# ALTER USER postgres WITH PASSWORD '123';
ALTER ROLE
Create the Mattermost database.
postgres=# CREATE DATABASE mattermost;
CREATE DATABASE
Create the Mattermost user.
postgres=# CREATE USER mmuser WITH PASSWORD '123';
CREATE ROLE
Grant all privileges on mattermost database to mmuser.
postgres=# GRANT ALL PRIVILEGES ON DATABASE mattermost to mmuser;
GRANT
Exit from psql and logout from postgres user.
postgres=# q
-bash-4.2$ exit
logout
PostgreSQL 11 has been installed on CentOS 7 server.
Install Mattermost on CentOS 7
Mattermost is a free and open source software. Hence, it can be downloaded from Mattermost official download page.
Currently, Mattermost 5.13 is available for download.
Download Mattermost software using wget command.
# cd /tmp
# wget https://releases.mattermost.com/5.13.1/mattermost-5.13.1-linux-amd64.tar.gz
--2019-07-21 13:02:48--  https://releases.mattermost.com/5.13.1/mattermost-5.13.1-linux-amd64.tar.gz
Resolving releases.mattermost.com (releases.mattermost.com)... 143.204.15.59, 143.204.15.72, 143.204.15.34, ...
Connecting to releases.mattermost.com (releases.mattermost.com)|143.204.15.59|:443... connected.
HTTP request sent, awaiting response... 200 OK
Length: 127082925 (121M) [application/x-gzip]
Saving to: âmattermost-5.13.1-linux-amd64.tar.gzâ

100%[======================================>] 127,082,925  548KB/s   in 4m 0s

2019-07-21 13:06:49 (518 KB/s) - âmattermost-5.13.1-linux-amd64.tar.gzâ saved [127082925/127082925]
To install mattermost software, we need to extract downloaded TAR file using following command.
# tar -C /opt -xf mattermost-5.13.1-linux-amd64.tar.gz
Create the storage directory for Mattermost files. This storage directory is used to store files and images posted by Mattermost users.
# cd
# mkdir /opt/mattermost/data
Create OS user and group for Mattermost software.
# useradd --system --user-group mattermost
Adjust file permissions and ownership of /opt/mattermost directory.
# chown -R mattermost:mattermost /opt/mattermost
# chmod -R g+w /opt/mattermost
Edit /opt/mattermost/config/config.json file to set PostgreSQL database configurations.
# vi /opt/mattermost/config/config.json
Search for “SqlSettings” section and update following directives therein.
"DriverName": "postgres",
"DataSource": "postgres://mmuser:123@127.0.0.1:5432/mattermost?sslmode=disable&connect_timeout=10",
Testing Mattermost configurations by executing mattermost command.
# cd /opt/mattermost/
# sudo -u mattermost ./bin/mattermost
{"level":"info","ts":1563702400.3613825,"caller":"utils/i18n.go:83","msg":"Loaded system translations for 'en' from '/opt/mattermost/i18n/en.json'"}
{"level":"info","ts":1563702400.3616445,"caller":"app/server_app_adapters.go:58","msg":"Server is initializing..."}
{"level":"info","ts":1563702400.3725283,"caller":"sqlstore/supplier.go:224","msg":"Pinging SQL master database"}
{"level":"info","ts":1563702400.683637,"caller":"sqlstore/upgrade.go:105","msg":"The database schema has been set to version 5.13.0"}
{"level":"error","ts":1563702401.0069945,"caller":"app/server_app_adapters.go:125","msg":"SiteURL must be set. Some features will operate incorrectly if the SiteURL is not set. See documentation for details: http://about.mattermost.com/default-site-url"}
{"level":"info","ts":1563702401.0074744,"caller":"filesstore/localstore.go:33","msg":"Able to write files to local storage."}
{"level":"info","ts":1563702401.0109901,"caller":"app/license.go:41","msg":"License key from https://mattermost.com required to unlock enterprise features."}
{"level":"info","ts":1563702401.0120814,"caller":"app/migrations.go:26","msg":"Migrating roles to database."}
{"level":"info","ts":1563702401.0590556,"caller":"sqlstore/post_store.go:1277","msg":"Post.Message supports at most 16383 characters (65535 bytes)"}
{"level":"info","ts":1563702401.0611773,"caller":"app/migrations.go:102","msg":"Migrating emojis config to database."}
{"level":"info","ts":1563702401.1515534,"caller":"mlog/log.go:164","msg":"Starting up plugins"}
{"level":"info","ts":1563702408.3935342,"caller":"mlog/sugar.go:19","msg":"Ensuring Surveybot exists","plugin_id":"com.mattermost.nps"}
{"level":"info","ts":1563702409.0745614,"caller":"mlog/sugar.go:19","msg":"Surveybot created","plugin_id":"com.mattermost.nps"}
{"level":"info","ts":1563702409.0869186,"caller":"mlog/sugar.go:19","msg":"Upgrade detected. Checking if a survey should be scheduled.","plugin_id":"com.mattermost.nps"}
{"level":"info","ts":1563702409.0896227,"caller":"app/server.go:213","msg":"Current version is 5.13.0 (5.13.1/Fri Jul 19 18:11:48 UTC 2019/9fecfd5ad41cd2f29fcbf72a842fe594a5d9423a/1ab74b3ea1137c385e03a9982dce917a4128f903)"}
{"level":"info","ts":1563702409.0897117,"caller":"app/server.go:214","msg":"Enterprise Enabled: true"}
{"level":"info","ts":1563702409.0897608,"caller":"app/server.go:216","msg":"Current working directory is /opt/mattermost"}
{"level":"info","ts":1563702409.0898397,"caller":"app/server.go:217","msg":"Loaded config","source":"file:///opt/mattermost/config/config.json"}
{"level":"info","ts":1563702409.0997791,"caller":"mlog/sugar.go:19","msg":"Scheduling next survey for Aug 11, 2019","plugin_id":"com.mattermost.nps"}
{"level":"error","ts":1563702409.1200254,"caller":"plugin/hclog_adapter.go:60","msg":"reading plugin stderr","plugin_id":"com.mattermost.nps","wrapped_extras":"errorread |0: file already closed"}
{"level":"error","ts":1563702409.122352,"caller":"mlog/log.go:172","msg":"RPC call OnConfigurationChange to plugin failed.","plugin_id":"com.mattermost.nps","error":"connection is shut down"}
{"level":"error","ts":1563702409.2013958,"caller":"mlog/log.go:172","msg":"RPC call OnConfigurationChange to plugin failed.","plugin_id":"com.mattermost.nps","error":"connection is shut down"}
{"level":"info","ts":1563702409.2474277,"caller":"jobs/workers.go:68","msg":"Starting workers"}
{"level":"info","ts":1563702409.247602,"caller":"app/server.go:413","msg":"Starting Server..."}
{"level":"info","ts":1563702409.2494857,"caller":"jobs/schedulers.go:72","msg":"Starting schedulers."}
{"level":"info","ts":1563702409.2829065,"caller":"app/server.go:479","msg":"Server is listening on [::]:8065"}
{"level":"info","ts":1563702409.3070872,"caller":"app/web_hub.go:75","msg":"Starting 2 websocket hubs"}
Create a systemd service unit for Mattermost.
# cd
# vi /usr/lib/systemd/system/mattermost
and define the service unit directives as follows.
[Unit]
Description=Mattermost
After=syslog.target network.target postgresql-11.service

[Service]
Type=notify
WorkingDirectory=/opt/mattermost
User=mattermost
ExecStart=/opt/mattermost/bin/mattermost
PIDFile=/var/spool/mattermost/pid/master.pid
TimeoutStartSec=3600
LimitNOFILE=49152

[Install]
WantedBy=multi-user.target
Enable and start mattermost.service.
# systemctl enable mattermost.service
Created symlink from /etc/systemd/system/multi-user.target.wants/mattermost.service to /usr/lib/systemd/system/mattermost.service.
# systemctl start mattermost.service
Configure Linux Firewall
Allow Mattermost service port in Linux firewall.
# firewall-cmd --permanent --add-port=8065/tcp
success
# firewall-cmd --reload
success
Access Mattermost Web UI
Browse URL http://mattermost-01.example.com:8065 in a client’s browser.
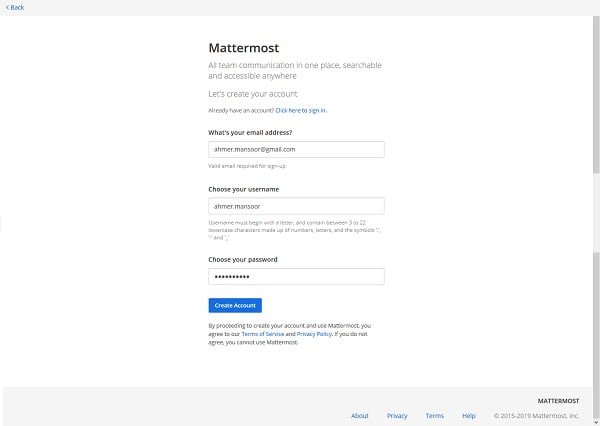
Enter Email Address, Username and Password to Sign up with Mattermost.
Click on Create Account.
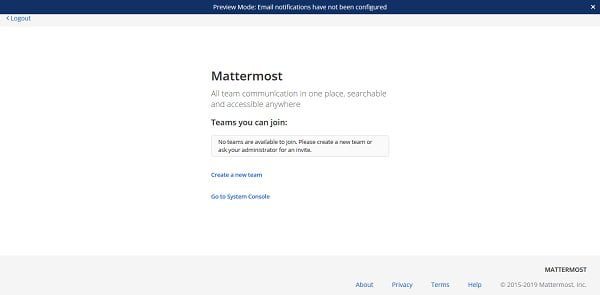
Click on Create a new team.
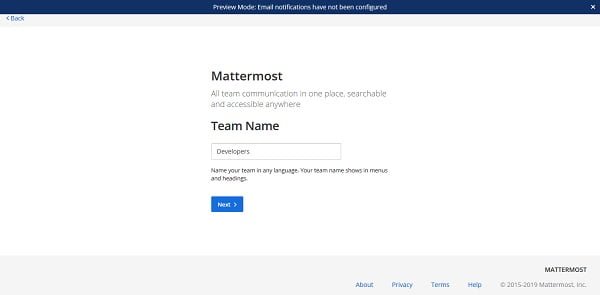
Enter Team name and click on Next >.
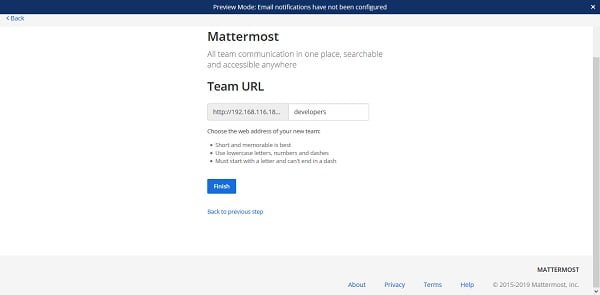
Set a Team URL here and click on Finish.
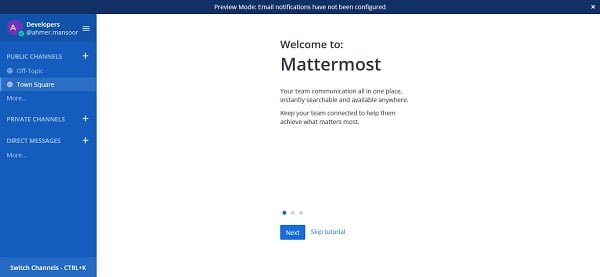
We are now at the dashboard of Mattermost web interface.
Click on Next.
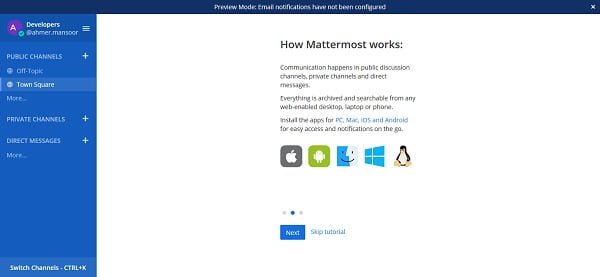
Click on Next.
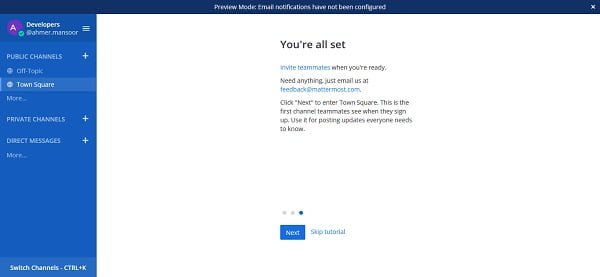
Click on Next.
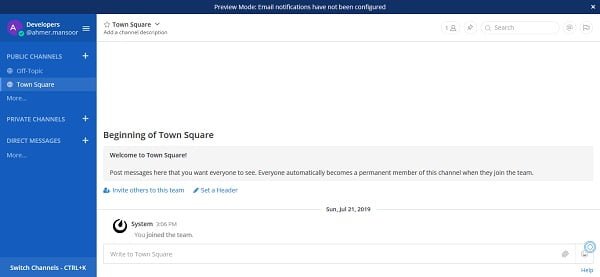
We are now at the default channel of Mattermost server.
Let’s send some messages in this channel for testing.
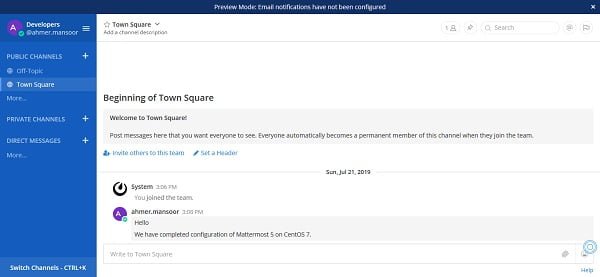
We have successfully install Mattermost on CentOS 7 server.
If you are new to Linux and facing difficulty in working at Linux Bash prompt. We recommend that, you should read The Linux Command Line, 2nd Edition: A Complete Introduction by William Shotts.
Final Thoughts
Installing Mattermost on CentOS 7 can enhance your team’s communication and collaboration with a self-hosted, open-source chat platform. If you need expert assistance or a customized setup, check out my Fiverr gig: Linux System Administration for professional installation and configuration services. I’m here to help you get Mattermost up and running smoothly!
