Discover a comprehensive guide on installing NagiosQL on CentOS 7. Follow our step-by-step instructions for prerequisites, installation, and configuration to get Nagios Server up and running. #centlinux #linux #nagios
Table of Contents
What is NagiosQL?
Nagios Core is an free and open source Network, Server and Application monitoring software. A drawback of Nagios Core is that it lacks a configuration tool, therefore we have to edit configurations files using a text editor. Manually editing configuration files is always a headache and highly prone to typo static errors.
NagiosQL is a web based configurator for Nagios Core. It completely integrates with Nagios Core and makes configuration management much easier. We have configured another Nagios configurator: Lilac Reloaded in our previous article.
In this article, we will install NagiosQL on CentOS 7 based Nagios Core server. We are assuming that, you already have basic understanding of Nagios and related technologies. Otherwise, it is recommended that, you should join:
Recommended Training: Nagios | Ultimate IT monitoring guide with EyesOfNetwork from Tech Academy

Nagios Server Specification
We are using the same CentOS 7 virtual machine, on which we have configured Nagios Core.
- Hostname – nagios-01.example.com
- IP Address – 192.168.116.143/24
- Operating System – CentOS 7.6
- Nagios Version – Nagios Core 4.4
- NagiosQL Version – 3.4
Install MariaDB on CentOS 7
NagiosQL requires MariaDB or MySQL database for creating its repository. Therefore, we are installing the available MariaDB server from CentOS 7 yum repository.
yum install -y mariadb-serverStart and enable MariaDB service.
systemctl enable mariadb.service
systemctl start mariadb.service
Configure MariaDB database instance.
mysql_secure_installationOutput:
NOTE: RUNNING ALL PARTS OF THIS SCRIPT IS RECOMMENDED FOR ALL MariaDB
      SERVERS IN PRODUCTION USE!  PLEASE READ EACH STEP CAREFULLY!

In order to log into MariaDB to secure it, we'll need the current
password for the root user.  If you've just installed MariaDB, and
you haven't set the root password yet, the password will be blank,
so you should just press enter here.

Enter current password for root (enter for none):
OK, successfully used password, moving on...

Setting the root password ensures that nobody can log into the MariaDB
root user without the proper authorisation.

Set root password? [Y/n] Y
New password:
Re-enter new password:
Password updated successfully!
Reloading privilege tables..
 ... Success!


By default, a MariaDB installation has an anonymous user, allowing anyone
to log into MariaDB without having to have a user account created for
them.  This is intended only for testing, and to make the installation
go a bit smoother.  You should remove them before moving into a
production environment.

Remove anonymous users? [Y/n] Y
 ... Success!

Normally, root should only be allowed to connect from 'localhost'.  This
ensures that someone cannot guess at the root password from the network.

Disallow root login remotely? [Y/n] Y
 ... Success!

By default, MariaDB comes with a database named 'test' that anyone can
access.  This is also intended only for testing, and should be removed
before moving into a production environment.

Remove test database and access to it? [Y/n] Y
 - Dropping test database...
 ... Success!
 - Removing privileges on test database...
 ... Success!

Reloading the privilege tables will ensure that all changes made so far
will take effect immediately.

Reload privilege tables now? [Y/n] Y
 ... Success!

Cleaning up...

All done!  If you've completed all of the above steps, your MariaDB
installation should now be secure.

Thanks for using MariaDB!
Gamrombo LED Wireless Controller for PS5, Compatible with PS5 Pro/Slim/PC, Dual Vibration, Marco/Turbo Function, 3.5mm Audio Jack, 6-Axis Motion Contro Gamepad with Speaker
$49.99 (as of July 10, 2025 20:22 GMT +00:00 – More infoProduct prices and availability are accurate as of the date/time indicated and are subject to change. Any price and availability information displayed on [relevant Amazon Site(s), as applicable] at the time of purchase will apply to the purchase of this product.)Install Apache on CentOS 7
Since, we are installing on the same server, on which we are running Nagios Core, then there is no need to install Apache HTTP server, because it was already installed during Nagios Core configurations.
Install PHP on CentOS 7
Since, we are installing on the same server, on which we have configured Nagios Core. Therefore, we have already installed PHP 5.4 on it during Nagios Core configurations. But NagiosQL required PHP 5.5 or above, therefore, we have to upgrade PHP from 5.4 to 5.5.
PHP 5.5 is available through various third party yum repositories. Therefore, we are installing webtatic yum repository.
But first, install EPEL (Extra Packages for Enterprise Linux) as a prerequisite for webtatic yum repository.
yum install -y epel-releaseDownload and install Webtatic yum repository RPM from Webtatic Website according to your Linux version.
rpm -Uvh https://mirror.webtatic.com/yum/el7/webtatic-release.rpmOutput:
Retrieving https://mirror.webtatic.com/yum/el7/webtatic-release.rpm
warning: /var/tmp/rpm-tmp.OjmyAU: Header V4 RSA/SHA1 Signature, key ID 62e74ca5: NOKEY
Preparing...                          ################################# [100%]
Updating / installing...
   1:webtatic-release-7-3             ################################# [100%]
Build yum cache for newly added yum repositories.
yum makecache fastRemove current version of PHP.
yum remove -y php-common php php-gd php-cliInstall PHP 5.5 from webtatic yum repository.
yum install -y php55w-common php55w php55w-gd php55w-cli php55w-mysql php55w-devel php55w-pearInstall libssh2-devel package required by PHP.
yum install -y libssh2-develInstall ssh2 extension for PHP from PECL (PHP Extension Community Library).
pecl channel-update pecl.php.netOutput:
Updating channel "pecl.php.net"
Update of Channel "pecl.php.net" succeeded
# pecl install ssh2
...
Build process completed successfully
Installing '/usr/lib64/php/modules/ssh2.so'
install ok: channel://pecl.php.net/ssh2-0.13
configuration option "php_ini" is not set to php.ini location
You should add "extension=ssh2.so" to php.ini
Add following directives in /etc/php.ini.
echo "date.timezone='Asia/Karachi'" >> /etc/php.ini
echo "extension=ssh2.so" >> /etc/php.ini
Restart Apache service.
systemctl restart httpdWe have installed all the NagiosQL prerequisite packages on our CentOS 7 server.
Amazon Fire 7 Kids tablet (newest model) ages 3-7. Top-selling 7″ kids tablet on Amazon. Includes ad-free and exclusive content, easy parental controls, 10-hr battery, 16 GB, Purple
$54.99 (as of July 9, 2025 21:12 GMT +00:00 – More infoProduct prices and availability are accurate as of the date/time indicated and are subject to change. Any price and availability information displayed on [relevant Amazon Site(s), as applicable] at the time of purchase will apply to the purchase of this product.)Install NagiosQL on CentOS 7
NagiosQL is available at Nagios Exchange and SourceForge. While you can also download NagiosQL Documentation from SourceForge website.
Download NagiosQL latest version and copy it in home directory of root user.
tar xjf nagiosql-3.4.0.tar.bz2 -C /var/www/html/
mv /var/www/html/nagiosql-3.4.0/ /var/www/html/nagiosql
Reapply SELinux security context for /var/www/html/nagiosql/ directory.
restorecon -Rv /var/www/html/nagiosql/Create a directory for NagiosQL to place Nagios Core configuration files.
mkdir /usr/local/nagios/etc/nagiosql
chown apache:apache /usr/local/nagios/etc/nagiosql/
Give write permission to all users on config directory for creating configuration files.
chmod o+w /var/www/html/nagiosql/configBrowse URL http://nagios-01.example.com/nagiosql/ to run NagiosQL installation wizard.
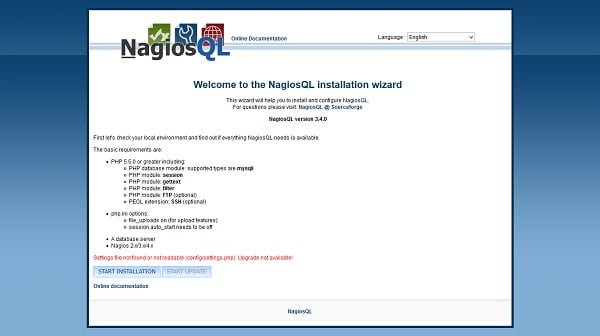
Since, we are running NagiosQL installation wizard for the first time and there isn’t any settings.php file exists in config folder, therefore the wizard is giving us the following warning
“Settings file not found or not readable (config/settings.php). Upgrade not available!”
It is save to ignore it.
Click on START INSTALLATION.
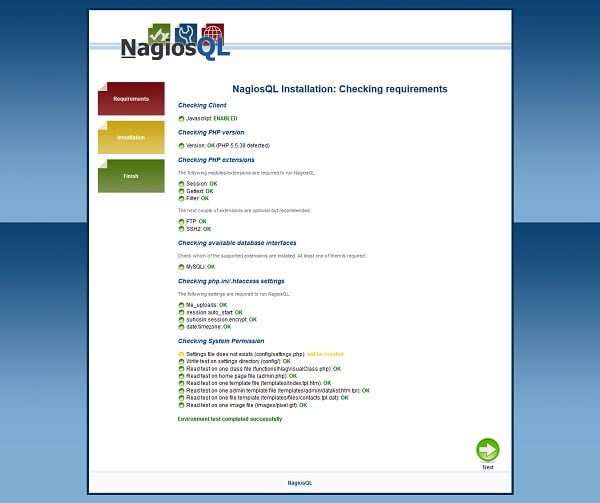
NagiosQL installation wizard is checking for requirments and will give warnings, if a prerequisite is missing.
If you have followed the steps above correctly, then it won’t give you any warning.
Click on Next.
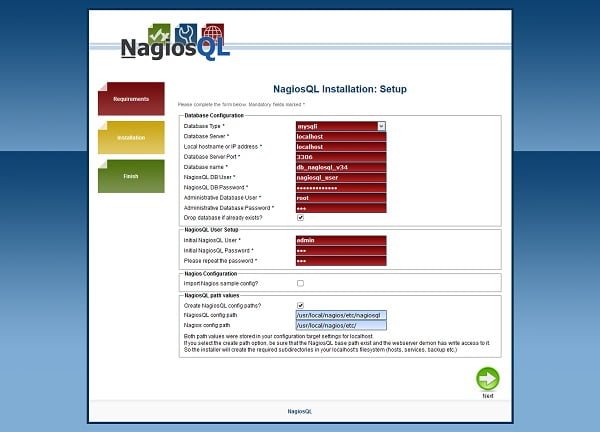
Define the settings according to the above screenshot.
Click on Next.
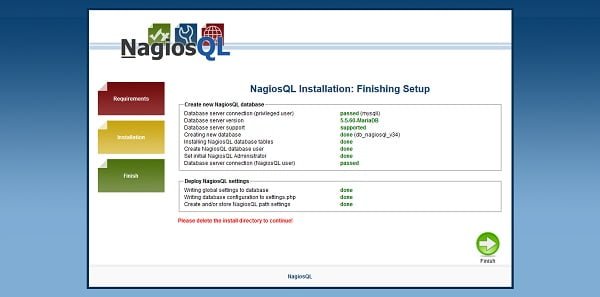
Click on Next.
If everything goes fine, then you will reach at the NagiosQL login page.
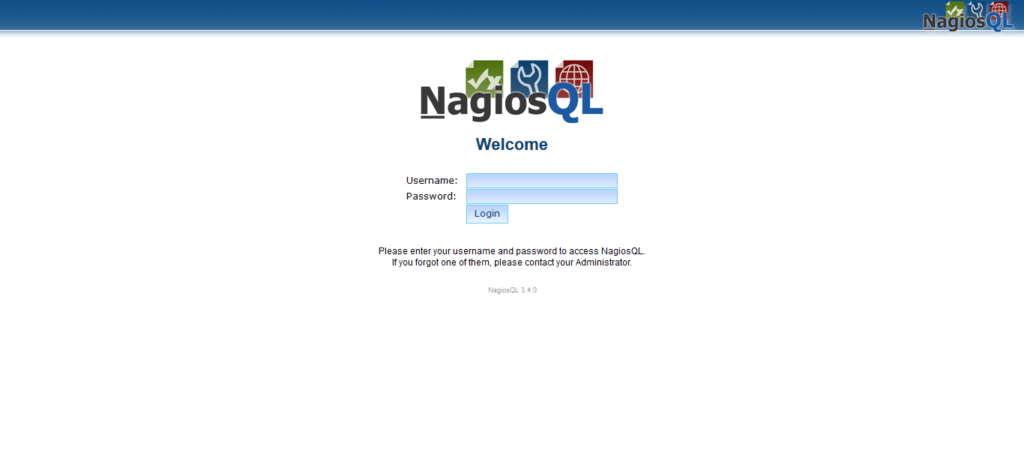
Login as admin user.
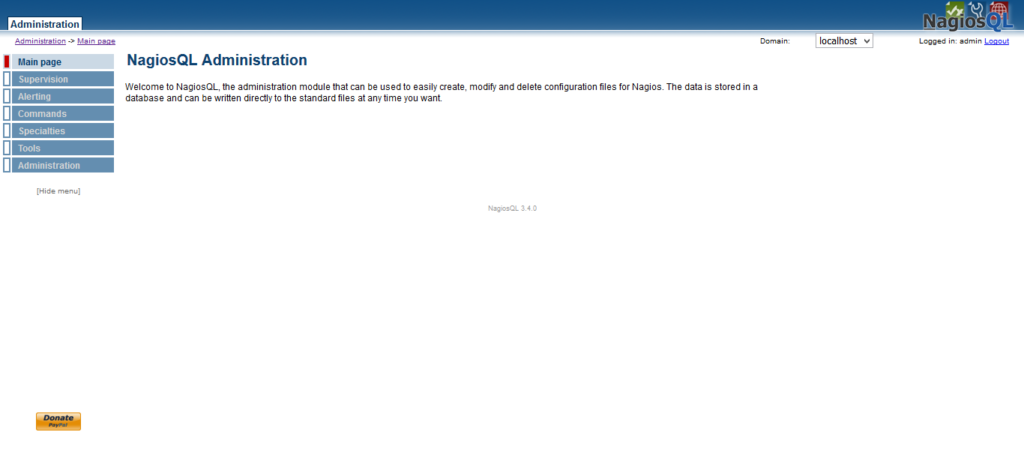
NagiosQL Post Installation Configurations
NagiosQL has been installed, we can now delete install directory to prevent anyone to run installation wizard again.
rm -rf /var/www/html/nagiosql/nagiosql-3.4.0/install/We have successfully generated settings.php file. Therefore, revoke write permissions from other users for security.
chmod o-w /var/www/html/nagiosql/configImport Nagios Core configuration
NagiosQL is installed with zero configurations, therefore, we have to import our existing Nagios Core configurations.
Go to Administration > Config Targets.
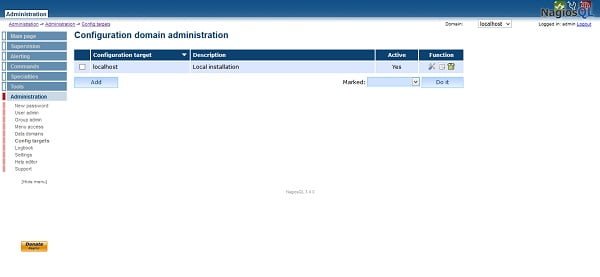
Click on Modify under Function column.
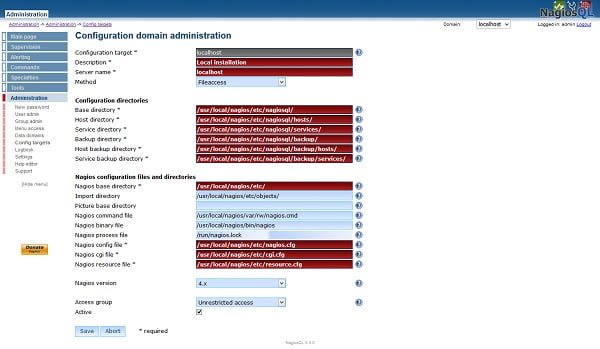
Adjust directory paths according to you environment and click on Save.
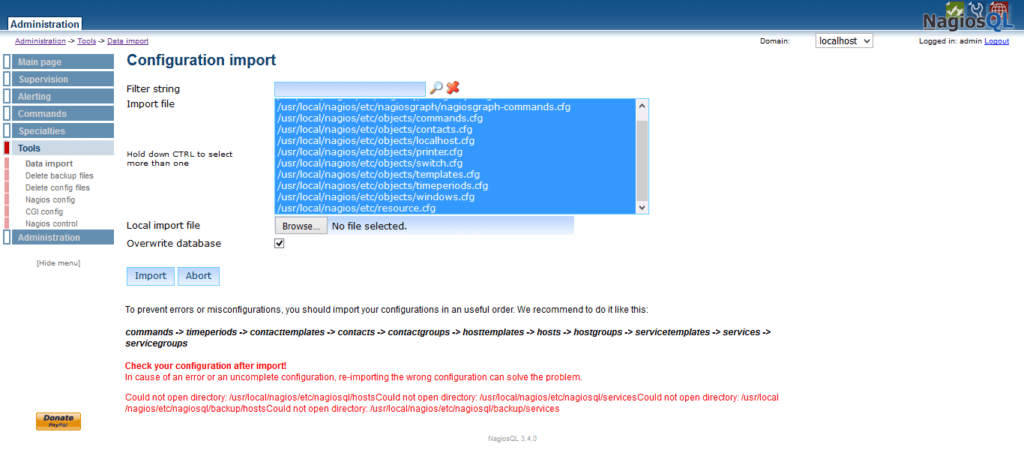
Go to Tools > Data Import.
Select all import files and click on Import.
Go to Supervision tab and you may observe that there are now some active groups has been imported.
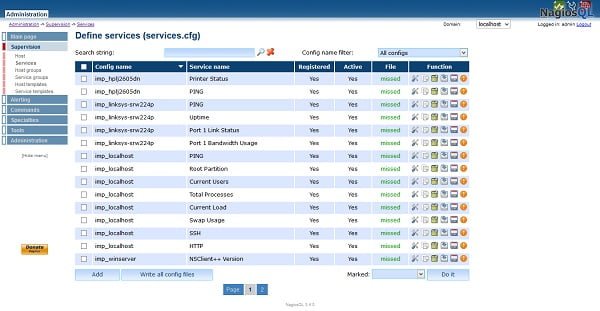
File status is missed because we haven’t save our files yet. Therefore, Click on Write all config files.
You may observe that the file status is now up-to-date.
Repeat the process for other targets/configurations like hosts, commands, templates, etc to save them in NagiosQL configure directory.
Finally, we have to edit nagios.cfg file to remove current cfg_dir directives and add our new configuration directory actively managed by NagiosQL. This can be achieved by following two commands.
sed -i 's/^cfg/#cfg/' /usr/local/nagios/etc/nagios.cfg
echo "cfg_dir=/usr/local/nagios/etc/nagiosql/" >> /usr/local/nagios/etc/nagios.cfg
Restart nagios.service to check is there any configuration errors.
systemctl restart nagios.serviceIf you have performed above steps correctly, then there should be no error.
Now, Nagios Core is using configurations from NagiosQL configuration directory.
Frequently Asked Questions (FAQs)
What is NagiosQL?
NagiosQL is a web-based configuration tool for Nagios that simplifies managing monitoring setups without manually editing config files.
What are the prerequisites for installing NagiosQL on CentOS 7?
You need a working LAMP stack (Linux, Apache, MySQL/MariaDB, PHP), Nagios Core installed, and proper permissions set for the web server.
Do I need to install Nagios Core separately before NagiosQL?
Yes, NagiosQL only configures Nagios—it doesn’t replace it. Ensure Nagios Core is installed and running first.
How do I access NagiosQL after installation?
Open a web browser and navigate to http://[your-server-IP]/nagiosql (or the directory where you installed it), then log in with admin credentials.
Why can’t NagiosQL apply configurations after setup?
Common issues include incorrect file permissions, Nagios not being in the web server’s user group, or misconfigured paths in NagiosQL settings. Verify these first.
Linux: The Comprehensive Guide to Mastering Linux—From Installation to Security, Virtualization, and System Administration Across All Major Distributions (Rheinwerk Computing)
$44.12 (as of July 10, 2025 21:22 GMT +00:00 – More infoProduct prices and availability are accurate as of the date/time indicated and are subject to change. Any price and availability information displayed on [relevant Amazon Site(s), as applicable] at the time of purchase will apply to the purchase of this product.)Final Thoughts
Installing NagiosQL on CentOS 7 provides a powerful web-based interface to simplify the configuration and management of Nagios Core.
By following the steps to install required dependencies, configure the LAMP stack, set appropriate permissions, and integrate Nagios Core with NagiosQL, you now have a centralized and user-friendly platform to manage your monitoring environment more efficiently.
Regular updates and security best practices will help ensure that your NagiosQL installation remains stable and secure.
Looking for a Linux server expert? I provide top-tier administration, performance tuning, and security solutions for your Linux systems. Explore my Fiverr profile for details!
Feel free to reach out for personalized solutions to ensure your NagiosQL setup is done right and efficiently!


Leave a Reply
You must be logged in to post a comment.