Discover how to install NSClient on Windows with this easy-to-follow guide. Ensure efficient monitoring of Windows servers and desktops using Nagios. #centlinux #linux #nagios
Table of Contents
Problem Definition
We have already configured our Nagios Monitoring Server in my previous post Install Nagios Core on CentOS 6. Now, its time to add some hosts to our Nagios Monitoring Server. For this purpose, we need to install a Monitoring Agent software in our Host. There are many Monitoring Agents are available, that works well with not only Nagios, but also with other forks of Nagios (such as Icinga). But after having some research we have selected NSClient++.

What is NSClient?
NSClient++ is an open-source monitoring agent that enables Nagios to monitor Windows-based systems. It allows for the collection of performance data, execution of checks, and monitoring of various aspects of Windows servers and desktops. Key features of NSClient++ include:
- Monitoring Local Resources: It can monitor CPU usage, memory usage, disk space, and other system metrics.
- Event Log Monitoring: It can monitor Windows event logs for specific events.
- Service and Process Monitoring: It can check the status of services and processes running on the Windows system.
- Custom Scripts: It allows the execution of custom scripts for advanced monitoring needs.
- Integration with Nagios: It works seamlessly with Nagios, allowing for centralized monitoring and alerting.
NSClient++ is a versatile tool that helps ensure the health and performance of Windows systems in a networked environment.
If you’re serious about mastering IT infrastructure monitoring, the Zabbix Application and Network Monitoring by Sean Bradley course is a must-have resource. This practical training walks you through real-world scenarios to monitor servers, applications, and networks with confidence, making it ideal for system administrators, DevOps engineers, and IT professionals aiming to level up their skills. By enrolling, you’ll gain hands-on knowledge that can save countless hours in troubleshooting and system management. [Click here to check out the course]
Disclaimer: This link is an affiliate link, which means I may earn a small commission at no extra cost to you if you decide to purchase through it. This helps support my blog and allows me to continue creating useful content.
Environment Specification
In this post, we will install NSClient++ Nagios Core Agent on a Windows host to add it to Nagios Monitoring Server. Here, we use following two server in this installation guide.
1) Nagios Monitoring Server – A working Nagios Core Server.
- Hostname – nagios01.example.com
- IP Address – 192.168.229.129/24
2) Windows Host – A windows machine, in which we are going to install NSClient++.
- Hostname – winserver.example.com
- IP Address – 192.168.229.1/24
Read Also: How to install NRPE in CentOS 7
Install NSClient on Windows
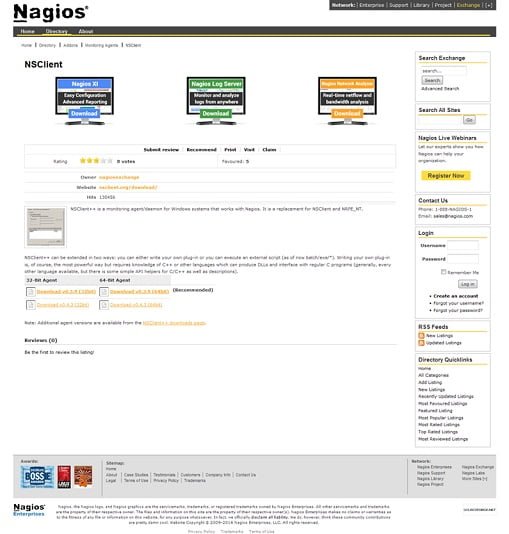
Download NSClient++ from Nagios Exchange.

We are installing NSClient++ on a 64-bit host, therefore, we have downloaded 64-bit Setup.
Install the downloaded plugin.

Click on Next.

Read and Agree with the License, then click on Next.

Move on with the Typical setup type.

Click on Next.

Append the IP address of Nagios Monitoring Server to Allowed Hosts. Check two options as shown in the screenshot and click on Next. Also note down the Password, because we will need it later.

Click on Install.


NSClient++ has been installed successfully. Click on Finish to complete installation.
Open command prompt and execute following to check status of NSClient++ Agent Service.
Check Display name of nscp service.
sc getdisplayname nscp
Output:
[SC] GetServiceDisplayName SUCCESS
Name = NSClient++ (x64)
Check details of nscp service.
sc query nscpOutput:
SERVICE_NAME: nscp
        TYPE               : 10  WIN32_OWN_PROCESS
        STATE              : 4  RUNNING
                                (STOPPABLE, NOT_PAUSABLE, IGNORES_SHUTDOWN)
        WIN32_EXIT_CODE    : 0  (0x0)
        SERVICE_EXIT_CODE  : 0  (0x0)
        CHECKPOINT         : 0x0
        WAIT_HINT          : 0x0
Find service port used by nscp service.
netstat -a -n -o | findstr 12489Output:
  TCP    0.0.0.0:12489          0.0.0.0:0              LISTENING       6980
  TCP    0.0.0.0:12489          0.0.0.0:0              LISTENING       6980
  TCP    [::]:12489             [::]:0                 LISTENING       6980
The NSClient++ service runs on Port 12489/tcp. Our tests show that it is up and listening for the requests.
Now, log on to Nagios Monitoring Server thru ssh and add server-side configurations.
A sample template for windows-servers is already located at /usr/local/nagios/etc/objects/windows.cfg. we added the IP address of my Windows host in it, and keep the remaining services definitions unchanged.
vi /usr/local/nagios/etc/objects/windows.cfgdefine host{
use windows-server ; Inherit default values from a template
host_name winserver ; The name we're giving to this host
alias My Windows Server ; A longer name associated with the host
address 192.168.229.1 ; IP address of the host
}We also need to add this configuration file to nagios.cfg.
cat >> /usr/local/nagios/etc/nagios.cfg << EOF
cfg_file=/usr/local/nagios/etc/objects/windows.cfg
EOF
Edit the commands.cfg file in the vi editor and add the Password of NSClient++ in the check_nt command as follows.
vi /usr/local/nagios/etc/objects/commands.cfg# 'check_nt' command definition
define command{
command_name check_nt
command_line $USER1$/check_nt -H $HOSTADDRESS$ -p 12489 -s frAQBc8Wsa1xVPfv -v $ARG1$ $ARG2$
}Restart Nagios service to reload changes.
systemctl restart nagios.service Now open Nagios Web UI in browser.

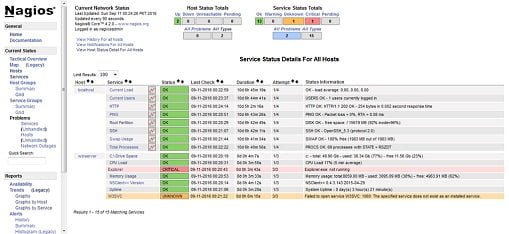
Checkout the winserver that we have added recently. A couple of services are already defined by the Nagios here.
Final Thoughts
Installing NSClient on Windows is a crucial step to effectively monitor your Windows servers and desktops using Nagios. By following this guide, you can set up NSClient++ smoothly and ensure your systems are well-monitored.
Whether you need cloud optimization, server management, or automation, I provide comprehensive AWS and Linux services. Hire me to elevate your systems.

Leave a Reply
You must be logged in to post a comment.