Learn how to install Payara Server on CentOS 7 with our detailed step-by-step guide. Follow our instructions to set up Payara Server on your CentOS 7 server quickly and efficiently. #centlinux #linux #java
Table of Contents
What is Payara Server?
Payara Server is a fork of famous open-source application server i.e. GlassFish Server. Payara Server was created in year 2014, as a drop in replacement for GlassFish after Oracle announced to discontinue commercial support for GlassFish. Payara server is sponsored by Payara Services Ltd since April 2016. Version 5.1 is the latest release of this project.
Payara is an open-source, enterprise-ready application server for deploying and managing Java applications. It is a commercially supported fork of the GlassFish application server and is designed to provide a robust and reliable platform for Java EE (Enterprise Edition) applications. Here’s a detailed overview of Payara Server, including its features, benefits, and common use cases:

Key Features
- Java EE / Jakarta EE Compatibility:
- Standard Compliance: Supports the full Java EE / Jakarta EE specification, allowing developers to build and deploy applications using standard APIs and technologies.
- Enhanced Performance and Stability:
- Performance Improvements: Offers optimizations and performance enhancements over the original GlassFish server.
- Reliability: Designed for production environments with stability improvements and bug fixes.
- Enterprise Support:
- Commercial Support: Offers commercial support options with services such as technical support, consulting, and training.
- Clustering and High Availability:
- Load Balancing: Supports clustering for load balancing and failover, ensuring high availability and scalability for applications.
- Management Console:
- Web-Based Interface: Includes an intuitive web-based admin console for managing server settings, applications, and deployments.
- Monitoring and Management:
- Advanced Monitoring: Provides tools for monitoring server performance, application health, and resource usage.
- Security Features:
- Comprehensive Security: Supports features like SSL/TLS encryption, authentication, and authorization for secure application deployments.
- MicroProfile Support:
- Microservices Framework: Supports MicroProfile for developing and deploying microservices-based applications.
- Docker and Kubernetes Integration:
- Containerization: Supports deployment in Docker containers and Kubernetes clusters for modern application architectures.
- Developer-Friendly:
- Open Source: Available as open-source software, allowing developers to contribute to the project and customize the server for their needs.
Common Use Cases
- Enterprise Applications: For deploying large-scale enterprise Java EE applications.
- Web Services: Hosting web services and RESTful APIs.
- Microservices Architectures: Building and managing microservices-based applications.
- Development and Testing: A reliable platform for developing and testing Java applications.
Recommended Training: Java Masterclass 2025: 130+ Hours of Expert Lessons from Tim Buchalka

Linux Server Specification
In this article, we will install Payara Server on CentOS 7 and deploy a Java App on that Application Server.
We have provisioned a CentOS 7 virtual machine on CentOS 7.
- Hostname – payara-01.example.com
- IP Address – 192.168.116.169 /24
- Operating System – CentOS 7.6
- Payara Server – 5.1
Install OpenJDK on CentOS 7
Connect with payara-01.example.com using ssh as root user.
Payara is a Java based application server and it requires JRE (Java Runtime Environment). Therefore, we are installing OpenJDK using yum command.
yum install -y java-1.8.0-openjdkSet Java related enironment variables.
echo "export JAVA_HOME=/usr/lib/jvm/jre-1.8.0-openjdk-1.8.0.212.b04-0.el7_6.x86_64" >> /etc/profile
. /etc/profile
env | grep JAVA_HOME
JAVA_HOME=/usr/lib/jvm/jre-1.8.0-openjdk-1.8.0.212.b04-0.el7_6.x86_64
Verify Java installation by checking its version.
java -versionOutput:
openjdk version "1.8.0_212"
OpenJDK Runtime Environment (build 1.8.0_212-b04)
OpenJDK 64-Bit Server VM (build 25.212-b04, mixed mode)
Apple 2025 MacBook Air 13-inch Laptop with M4 chip: Built for Apple Intelligence, 13.6-inch Liquid Retina Display, 16GB Unified Memory, 512GB SSD Storage, 12MP Center Stage Camera, Touch ID; Sky Blue
$1,049.00 (as of July 15, 2025 00:30 GMT +00:00 – More infoProduct prices and availability are accurate as of the date/time indicated and are subject to change. Any price and availability information displayed on [relevant Amazon Site(s), as applicable] at the time of purchase will apply to the purchase of this product.)Install Payara Server on CentOS 7
Create a user to own Payara software.
useradd -s /sbin/nologin payaraPayara 5.1 software can be downloaded from Payara website.
cd /tmp
curl -O https://s3-eu-west-1.amazonaws.com/payara.fish/Payara+Downloads/5.191/payara-5.191.zip
Extract downloaded file in /opt directory.
unzip payara-5.191.zip -d /opt/Adjust ownership of the /opt/payara5 directory.
chown -R payara:payara /opt/payara5/Create a Systemd service for Payara Server.
vi /usr/lib/systemd/system/payara.serviceand add following directives therein.
[Unit]
Description = Payara Server v5.1
After = syslog.target network.target

[Service]
User = payara
ExecStart = /usr/bin/java -jar /opt/payara5/glassfish/lib/client/appserver-cli.jar start-domain
ExecStop = /usr/bin/java -jar /opt/payara5/glassfish/lib/client/appserver-cli.jar stop-domain
ExecReload = /usr/bin/java -jar /opt/payara5/glassfish/lib/client/appserver-cli.jar restart-domain
Type = forking

[Install]
WantedBy = multi-user.target
Enable and start payara.service.
systemctl enable payara.service
systemctl start payara.service
Configure Linux Firewall
Payara server uses following Service ports.
- 4848 – Administration Console
- 8080 – HTTP Service
- 8181 – HTTPS Service
Allow above service ports in Linux firewall.
firewall-cmd --permanent --add-port={4848,8080,8181}/tcp
firewall-cmd --reload
Access Payara Server Web UI
Browse URL http://payara-01.example.com:8080 using a client’s browser.
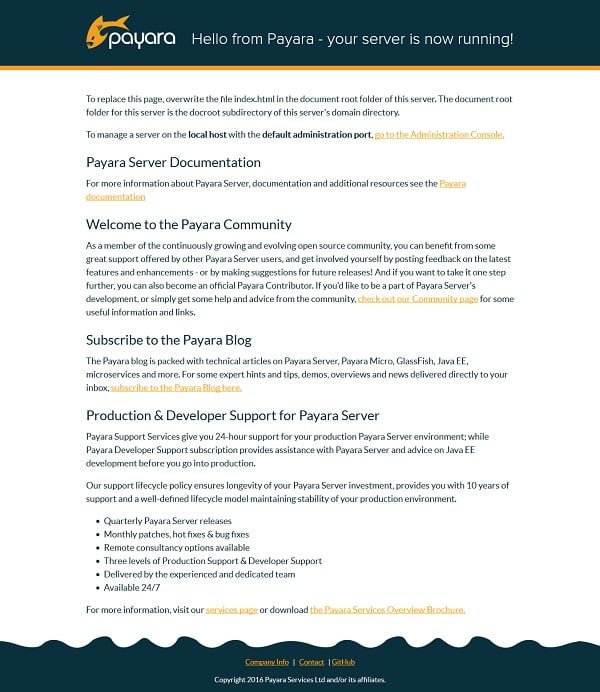
Payara Server 5.1 is installed and running on designated port.
Add Payara server binaries to PATH environment variable.
sed -i 's/^PATH=*/PATH=/opt/payara5/bin:/g' ~/.bash_profile
. ~/.bash_profile
Set password for Payara Admin user.
asadmin --port 4848 change-admin-passwordOutput:
Enter admin user name [default: admin]>Enter the admin password>
Enter the new admin password>
Enter the new admin password again>
Command change-admin-password executed successfully.
By default, Payara Admin Console is running as a clear text HTTP service. Run following command to enable secure administration console.
asadmin --host payara-01.example.com --port 4848 enable-secure-adminOutput:
Enter admin user name>  admin
Enter admin password for user "admin">
You must restart all running servers for the change in secure admin to take effect.
Command enable-secure-admin executed successfully.
Restart payara.service.
systemctl restart payara.serviceBrowse URL https://payara-01.example.com:4848 using a client’s browser. You may encounter a security certificate warning; just ignore it and continue.
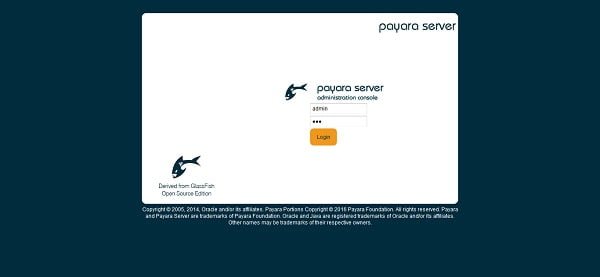
Login with admin user and password.
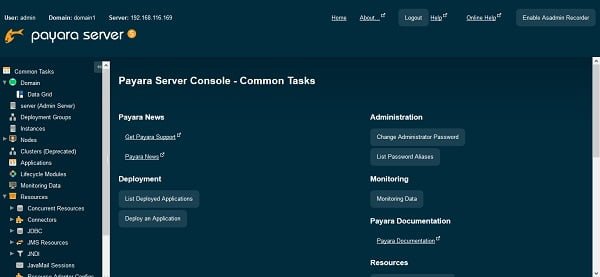
We are at the dashboard of Payara Server Administration Console.
GameSir G7 SE Wired Controller for Xbox Series X|S, Xbox One & Windows 10/11, Plug and Play Gaming Gamepad with Hall Effect Joysticks/Hall Trigger, 3.5mm Audio Jack-Gray
$44.99 (as of July 14, 2025 22:07 GMT +00:00 – More infoProduct prices and availability are accurate as of the date/time indicated and are subject to change. Any price and availability information displayed on [relevant Amazon Site(s), as applicable] at the time of purchase will apply to the purchase of this product.)Deploy a Java App in Payara Server 5.1
There are many Java applications available on GitHub. We are also downloading a Simple Java App. Although this Java App is for the demonstration purpose of BoxFuse, however we can use it for testing purpose of Payara Server as well.
But first, we need git to clone the project and Apache Maven to compile and build the project. Therefore, we are installing both of these tools using yum command.
yum install -y git mavenUse git to clone the required project.
git clone https://github.com/boxfuse/boxfuse-sample-java-war-helloOutput:
Cloning into 'boxfuse-sample-java-war-hello'...
remote: Enumerating objects: 74, done.
remote: Total 74 (delta 0), reused 0 (delta 0), pack-reused 74
Unpacking objects: 100% (74/74), done.
Now, Build the project using Apache Maven.
cd boxfuse-sample-java-war-hello
mvn package
Output:
...
[INFO] Packaging webapp
[INFO] Assembling webapp [hello] in [/root/boxfuse-sample-java-war-hello/target/hello-1.0]
[INFO] Processing war project
[INFO] Copying webapp resources [/root/boxfuse-sample-java-war-hello/src/main/webapp]
[INFO] Webapp assembled in [83 msecs]
[INFO] Building war: /root/boxfuse-sample-java-war-hello/target/hello-1.0.war
[INFO] ------------------------------------------------------------------------
[INFO] BUILD SUCCESS
[INFO] ------------------------------------------------------------------------
[INFO] Total time: 7:48.082s
[INFO] Finished at: Tue May 21 14:09:56 PKT 2019
[INFO] Final Memory: 14M/35M
[INFO] ------------------------------------------------------------------------
Check currently deployed applications on Payara server.
asadmin list-applicationsOutput:
Enter admin user name>  admin
Enter admin password for user "admin">
Nothing to list.
No applications are deployed to this target server.
Command list-applications executed successfully.
Deploy the WAR file in Payara Application Server as follows.
asadmin deploy target/hello-1.0.warOutput:
Enter admin user name>  admin
Enter admin password for user "admin">
Application deployed with name hello-1.0.
Command deploy executed successfully.
Again check list of deployed Java Apps.
asadmin list-applicationsOutput:
Enter admin user name>  Enter admin password>
hello-1.0  <web>
Command list-applications executed successfully.
Now, it displays our recently deployed Java App in the list.
Browse URL http://payara-01.example.com:8080/hello-1.0 from a client’s browser.

Frequently Asked Questions (FAQs)
1. What is Payara Server?
Payara Server is an open-source application server derived from GlassFish, designed for running Java EE (now Jakarta EE) applications. It provides enhanced features, stability, and support for enterprise deployments.
2. How is Payara Server different from GlassFish?
Payara Server is a fork of GlassFish with additional improvements, including bug fixes, performance enhancements, and extended support—making it more suitable for production environments.
3. Is Payara Server free to use?
Yes, Payara Server is open-source and free to use under the Apache License 2.0. However, Payara also offers commercial support plans for enterprises needing extra assistance.
4. What are the system requirements for running Payara Server?
Payara Server requires Java SE 8 or later (JDK 11+ recommended) and at least 512MB of RAM (1GB+ recommended for production). It runs on Windows, Linux, and macOS.
5. How do I deploy an application on Payara Server?
You can deploy applications via the Admin Console (web-based UI), the asadmin command-line tool, or by simply dropping WAR/EAR files into the autodeploy directory.
Linux Mint 22 for Beginners (2025) : Install, Customize, and Use the Cinnamon Desktop, Manage Your System, and Master the Linux Terminal with Ease
$7.00 (as of July 15, 2025 00:26 GMT +00:00 – More infoProduct prices and availability are accurate as of the date/time indicated and are subject to change. Any price and availability information displayed on [relevant Amazon Site(s), as applicable] at the time of purchase will apply to the purchase of this product.)Final Thoughts
Installing Payara Server on CentOS 7 equips you with a powerful and flexible platform for deploying Jakarta EE (formerly Java EE) applications. In this guide, we walked through downloading Payara, setting up the server environment, configuring the service, and verifying the installation.
With Payara Server now operational, you are ready to build and manage enterprise-grade applications with improved performance, scalability, and support. To ensure smooth operation, keep the server updated, secure your deployments, and regularly monitor system health and resource usage.
Struggling with AWS or Linux server issues? I specialize in configuration, troubleshooting, and security to keep your systems performing at their best. Check out my Fiverr profile for details.


Leave a Reply
You must be logged in to post a comment.