Learn how to install WordPress on CentOS 7 with this detailed guide. Follow our step-by-step instructions to set up your WordPress site quickly and efficiently. #centlinux #linux #wordpress
Table of Contents
What is WordPress?
WordPress (WordPress.org) is a free and open-source content management system. WordPress is developed in PHP and has a plugin architecture and template system. It is mostly used for blogs but can also be used for other type of web contents like mailing lists, forums, media gallery and online stores. WordPress is the most popular content management system in use. It is used by more than 60 million websites.
Here are some key features of WordPress:
- User-Friendly Interface: WordPress offers an intuitive and easy-to-use interface that allows users to create and manage content without needing extensive technical knowledge.
- Themes and Customization: A vast library of free and premium themes enables users to customize the appearance of their website. Themes can be further customized with CSS and theme options.
- Plugins: Thousands of plugins are available to extend the functionality of WordPress, including SEO, security, e-commerce, social media integration, and more.
- SEO-Friendly: WordPress is designed with SEO best practices in mind, and numerous plugins can help enhance your website’s search engine visibility.
- Community Support: WordPress has a large and active community that contributes to its development, offers support through forums, creates tutorials, and shares resources.
- Responsive Design: Many WordPress themes are designed to be responsive, ensuring that websites look good on all devices, including desktops, tablets, and smartphones.
- Content Management: WordPress makes it easy to manage content with features like posts, pages, categories, tags, and media management.
- Security: Regular updates and a variety of security plugins help protect WordPress sites from vulnerabilities and attacks.
WordPress is highly versatile and can be used to create a wide range of websites, from simple blogs to complex e-commerce sites, making it one of the most popular CMS platforms in the world.
WordPress System Requirements
WordPress.org recommends following system requirements.
- Database – MySQL 5.6 | MariaDB 10.1 or later
- Web Server – Apache | Nginx with mod_rewrite module
- PHP – version 7.3 or later
For complete requirements, you can visit WordPress documentation.
Recommended Courses
If you’re serious about mastering web hosting and server management, the Apache Web Server by Vipin Gupta online course is a perfect choice. This beginner-friendly yet comprehensive training will guide you through Apache installation, configuration, optimization, and troubleshooting—all the essential skills you need to confidently manage real-world server environments.
Whether you’re a student, system administrator, or developer, this course will give you practical knowledge that you can immediately apply in your projects or career. Enroll now through my affiliate link and start building your expertise in one of the world’s most popular web servers.
Disclaimer: This post contains affiliate links. If you purchase through these links, I may earn a small commission at no extra cost to you.
Linux Server Specification
In this article, we will install WordPress on CentOS 7 based LAMP server. First, we install and configure LAMP server components and then we will deploy WordPress on it.
We have configured a CentOS 7 virtual machine with following specifications.
- CPU – 3.4 Ghz (2 cores)
- Memory – 2 GB
- Storage – 20 GB
- Operating System – CentOS 7.6
- Hostname – wordpress-server-01.example.com
- IP Address – 192.168.116.181/24
To build a reliable WordPress environment on CentOS 7, it’s essential to have solid hardware and tools that support smooth server performance and easy management. For seamless server setup, the Seagate Portable 4TB External Hard Drive is a top pick for reliable backup and storage, ensuring your WordPress data stays safe and accessible.
Complement this with the TP-Link AX1800 WiFi 6 Router, which delivers fast, stable network connections ideal for hosting and managing your WordPress site locally or remotely. These tools not only boost your setup efficiency but also enhance overall system reliability for your WordPress projects.
Disclaimer: This post contains affiliate links. Purchasing through these links supports the blog at no extra cost to you.
Install MariaDB on CentOS 7
Connect with wordpress-server-01.example.com using ssh as root user.
MariaDB 5.x packages are available through standard yum repositories. However, WordPress requires 10.1 or later. Therefore, we will install MariaDB Server on CentOS 7 from MariaDB yum repository.
Install MariaDB yum repository as follows.
cat >> /etc/yum.repos.d/mariadb.repo << EOF
[mariadb]
name=MariaDB
baseurl=http://yum.mariadb.org/10.3/centos7-amd64
gpgkey=https://yum.mariadb.org/RPM-GPG-KEY-MariaDB
gpgcheck=1
enabled=1
EOF
Build cache for MariaDB yum repository.
yum makecache fastNow, we can install MariaDB 10.3 using yum command.
yum install -y mariadb-serverMariaDB service is already enabled by the Installer, therefore, we are only required to start MariaDB Service.
systemctl start mariadb.serviceConfigure MariaDB server instance.
mysql_secure_installationOutput:
NOTE: RUNNING ALL PARTS OF THIS SCRIPT IS RECOMMENDED FOR ALL MariaDB
      SERVERS IN PRODUCTION USE!  PLEASE READ EACH STEP CAREFULLY!

In order to log into MariaDB to secure it, we'll need the current
password for the root user.  If you've just installed MariaDB, and
you haven't set the root password yet, the password will be blank,
so you should just press enter here.

Enter current password for root (enter for none):
OK, successfully used password, moving on...

Setting the root password ensures that nobody can log into the MariaDB
root user without the proper authorisation.

Set root password? [Y/n] Y
New password:
Re-enter new password:
Password updated successfully!
Reloading privilege tables..
 ... Success!


By default, a MariaDB installation has an anonymous user, allowing anyone
to log into MariaDB without having to have a user account created for
them.  This is intended only for testing, and to make the installation
go a bit smoother.  You should remove them before moving into a
production environment.

Remove anonymous users? [Y/n] Y
 ... Success!

Normally, root should only be allowed to connect from 'localhost'.  This
ensures that someone cannot guess at the root password from the network.

Disallow root login remotely? [Y/n] Y
 ... Success!

By default, MariaDB comes with a database named 'test' that anyone can
access.  This is also intended only for testing, and should be removed
before moving into a production environment.

Remove test database and access to it? [Y/n] Y
 - Dropping test database...
 ... Success!
 - Removing privileges on test database...
 ... Success!

Reloading the privilege tables will ensure that all changes made so far
will take effect immediately.

Reload privilege tables now? [Y/n] Y
 ... Success!

Cleaning up...

All done!  If you've completed all of the above steps, your MariaDB
installation should now be secure.

Thanks for using MariaDB!
MariaDB 10.3 database has been installed and configured on Linux server.
Install Apache on CentOS 7
Apache 2.4 HTTP Server is available in base yum repository, therefore, we can install Apache easily with yum command.
yum install -y httpdEnable and start httpd.service.
systemctl enable httpd.service
systemctl start httpd.service
Allow HTTP service in Linux firewall.
firewall-cmd --permanent --add-service=http
firewall-cmd --reload
Apache 2.4 HTTP Server has been installed on CentOS 7.
Install PHP on CentOS 7
WordPress requires PHP 7.4 or later, which is not available in standard yum repositories.
Therefore, we are installing Remi, a third party yum repository, to install latest version of PHP on CentOS 7.
But, first we are installing EPEL (Extra Packages for Enterprise Linux) because Remi repository is depend on EPEL yum repository.
yum install -y epel-releaseInstall Remi yum repository using rpm command.
rpm -ivh http://rpms.remirepo.net/enterprise/remi-release-7.rpmOutput:
Retrieving http://rpms.remirepo.net/enterprise/remi-release-7.rpm
warning: /var/tmp/rpm-tmp.D7RUDj: Header V4 DSA/SHA1 Signature, key ID 00f97f56: NOKEY
Preparing...                          ################################# [100%]
Updating / installing...
   1:remi-release-7.6-2.el7.remi      ################################# [100%]
Build cache for Remi yum repository.
yum makecache fastInstall PHP 7.4 and relevant packages from Remi yum repository.
yum install -y php74-php php74-php-common php74-php-opcache php74-php-mcrypt php74-php-cli php74-php-gd php74-php-curl php74-php-mysqlndVerify PHP 7.4 installation by checking its version.
php74 -vOutput:
PHP 7.4.0alpha2 (cli) (built: Jun 25 2019 09:01:47) ( NTS )
Copyright (c) The PHP Group
Zend Engine v3.4.0-dev, Copyright (c) Zend Technologies
    with Zend OPcache v7.4.0alpha2, Copyright (c), by Zend Technologies
Restart httpd.service to apply changes.
systemctl restart httpd.servicePHP 7.4 and relevant packages have been installed on CentOS 7 server.
Create a MariaDB Database and User
Connect to MariaDB database instance using mysql command as root user.
mysql -u root -p123Create a database as required by WordPress.
CREATE DATABASE wordpress DEFAULT CHARACTER SET utf8 COLLATE utf8_unicode_ci;Create a user with complete privileges on wordpress database.
GRANT ALL ON wordpress.* TO 'wpuser'@'localhost' IDENTIFIED BY '123';Reload privileges tables and exit.
flush privileges;
exit
Install WordPress on CentOS 7
Currently, WordPress 5.2.2 is available on WordPress Download Page.
But, you can always download the latest release of WordPress using the link in following command.
cd /tmp
wget https://wordpress.org/latest.tar.gz
Extract downloaded file to Apache document root directory.
tar xf latest.tar.gz -C /var/www/html/Create the configuration file for WordPress as follows.
touch /var/www/html/wordpress/wp-config.phpAdjust file permissions and SELinux file contexts.
chown -R apache:apache /var/www/html/wordpress/
restorecon -R /var/www/html/wordpress/
Temporarily put SELinux in permissive mode, so the WordPress Installer can write on wp-config.php file.
setenforce 0Browse URL http://wordpress-server-01.example.com/wordpress/ from a client’s browser.
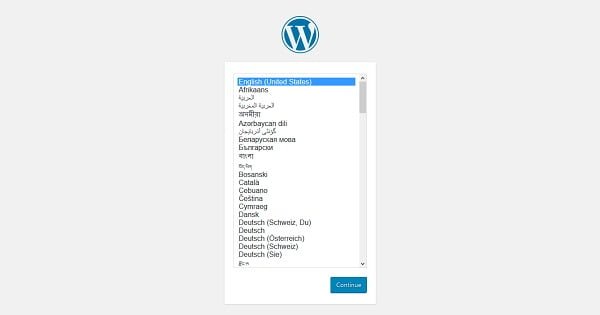
Select your preferred Language and click on Continue.
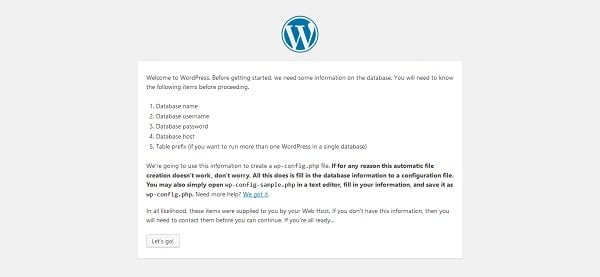
Read the instructions and click on Let’s go!.
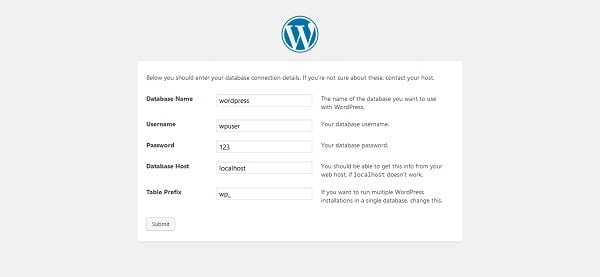
Provides database connection details like database name and user, that we have created in previous section.
Click on Submit.
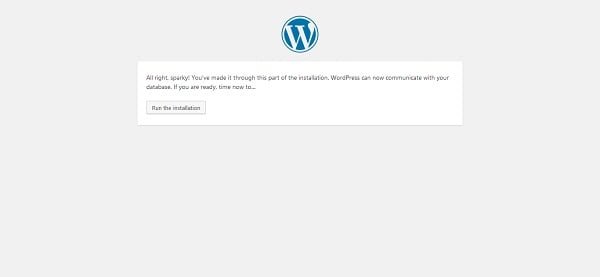
Click on Run the installation.
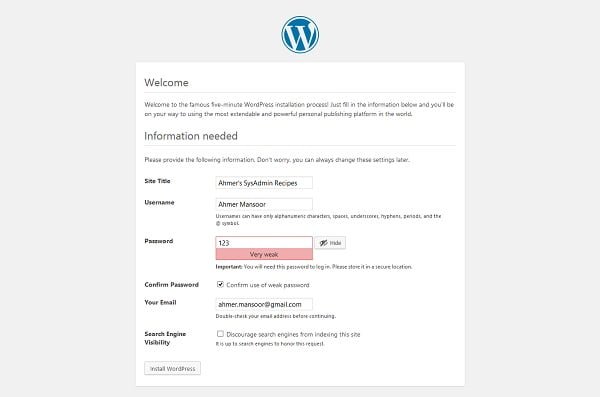
Provide details about your site in this page.
Click on Install WordPress.
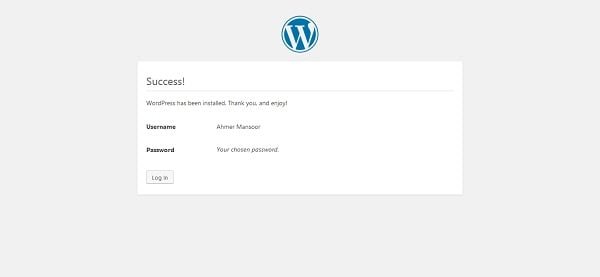
WordPress has been installed.
Click on Log in to go to Login Page.
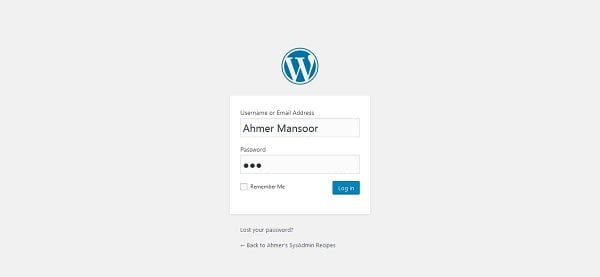
Login as Ahmer user.
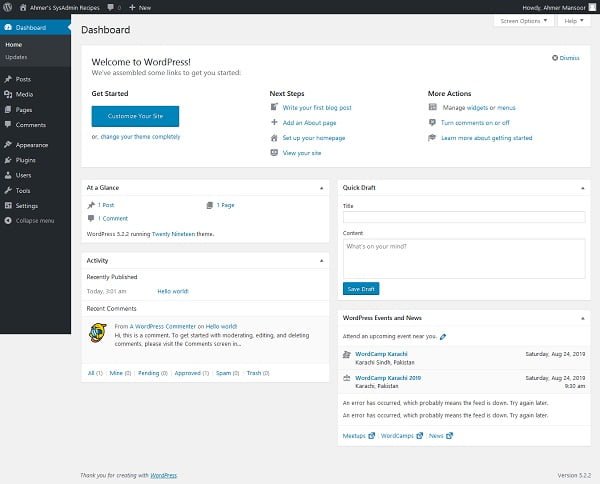
We are reached at the dashboard of WordPress.
We can visit our WordPress site by accessing the URL http://wordpress-server-01.example.com/wordpress from a client’s browser.
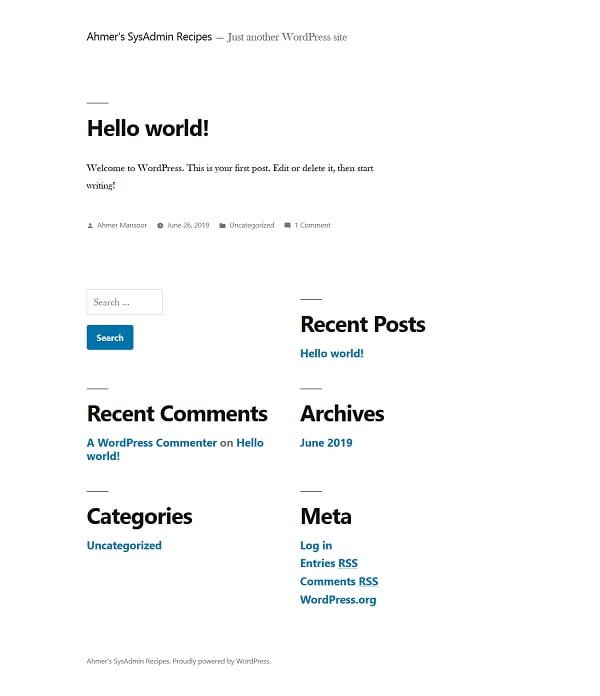
Put back SELinux in enforcing mode.
setenforce 1Final Thoughts
Setting up WordPress on CentOS 7 can be a seamless experience when you follow the right steps. This guide provides you with the necessary instructions to get your WordPress site up and running efficiently. If you encounter any issues or need professional assistance, I offer expert services to help you with your WordPress installation and configuration.
For personalized support, please check out my Fiverr gig: Linux System Support. I provide comprehensive services to ensure your WordPress site is set up and optimized for your needs.
Thank you for following this guide, and I look forward to helping you with your WordPress projects!

Leave a Reply
You must be logged in to post a comment.