
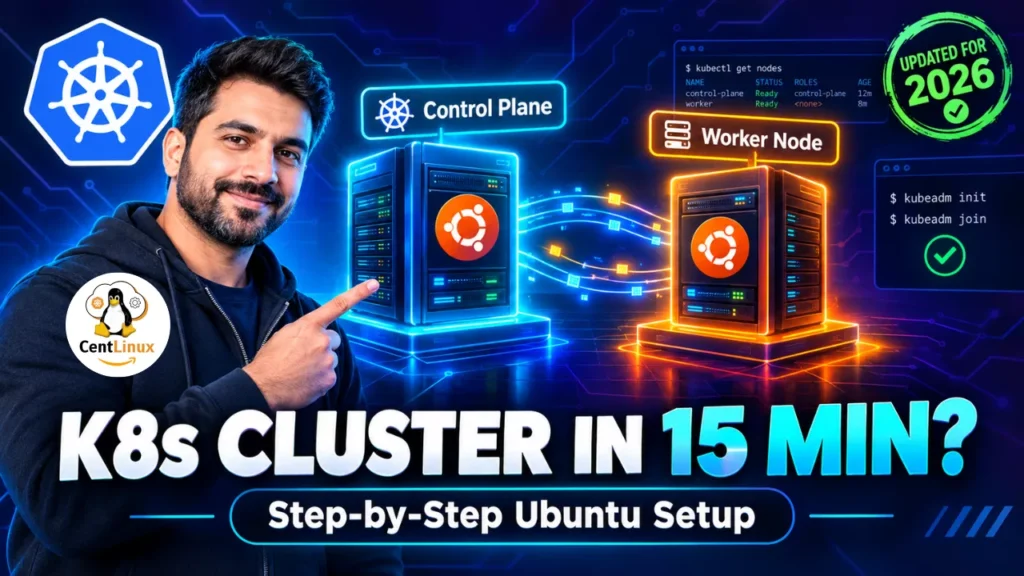
How to set up a two-node Kubernetes cluster on Ubuntu using kubeadm in 15 minutes. Step-by-step guide with real commands for production-ready k8s installation. #Kubernetes #Ubuntu #CentLinux
Table of Contents
Introduction
After 15+ years in the infrastructure trenches and a decade of creating technical content, I’ve learned that the foundation of any successful Kubernetes deployment is a rock-solid installation. Today, I’m walking you through the exact steps I use to set up a production-ready two-node cluster in my home lab. This setup is ideal for beginners and provides a practical environment for practicing common CKA exam tasks.
Kubernetes Cluster Architecture
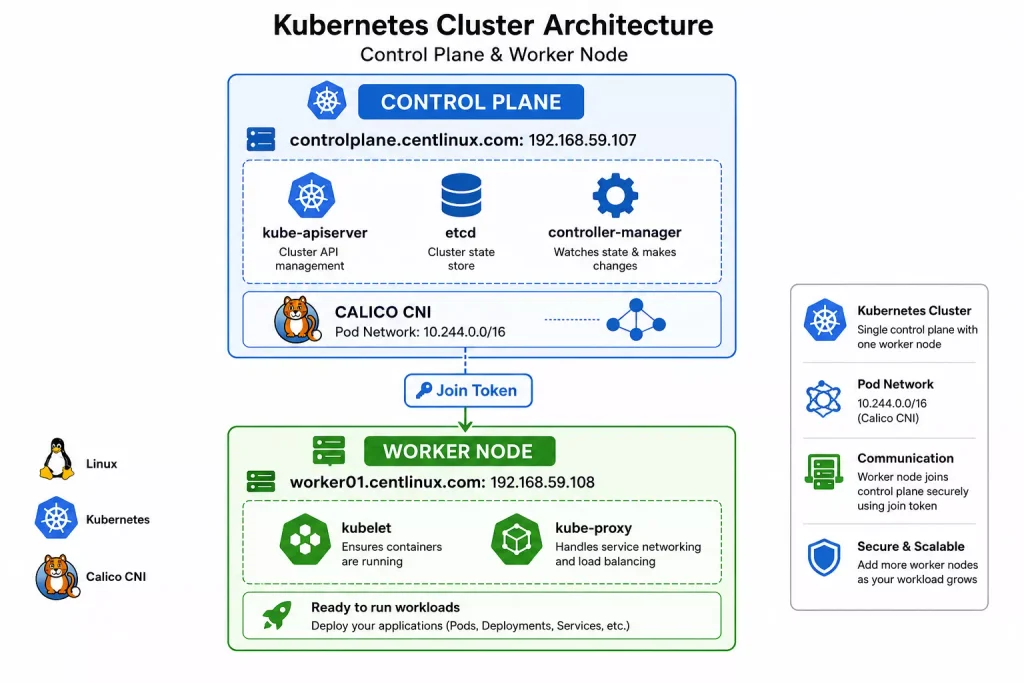
Why This Setup?
Let me be frank – I’ve seen too many engineers rush through cluster setup only to face mysterious network issues, pod scheduling failures, and certificate problems later. This step-by-step approach has been battle-tested across production environments, and it works. Every. Single. Time.
Read Also: Ubuntu Initial Server Setup and Hardening: A Complete Guide
Phase 1: Node Preparation (Execute on Both Nodes)
1. Disable Swap on Ubuntu
# Temporary turn off Swap
sudo swapoff -a

# Make it permanent by commenting out any swap lines in /etc/fstab
sudo sed -i '/ swap / s/^/#/' /etc/fstab
Why this matters: Kubelet requires swap to be disabled to function properly. I’ve seen countless troubleshooting tickets where the root cause was forgotten swap partitions. The sed trick here is my personal preference – it’s cleaner than deleting lines and makes rollback trivial if needed.
Pro Tip: After running these commands, verify with free -h. If swap shows 0, you’re golden.
2. Load Essential Kernel Modules
# Add Required Kernel Modules
cat <<EOF | sudo tee /etc/modules-load.d/k8s.conf
overlay
br_netfilter
EOF

sudo modprobe overlay
sudo modprobe br_netfilter
The Technical Breakdown:
overlay– Supports overlay filesystems for container imagesbr_netfilter– Enables bridge traffic to pass through iptables (critical for networking)
3. Configure Critical Sysctl Parameters
# Configure Sysctl Parameters
cat <<EOF | sudo tee /etc/sysctl.d/k8s.conf
net.bridge.bridge-nf-call-iptables  = 1
net.bridge.bridge-nf-call-ip6tables = 1
net.ipv4.ip_forward                 = 1
EOF

sudo sysctl --system
From My Experience: The bridge-nf-call parameters are often overlooked but absolutely essential. Without these, your pods won’t be able to communicate across nodes, and you’ll spend hours chasing networking ghosts. Always verify with sysctl net.bridge.bridge-nf-call-iptables after applying.
Phase 2: Container Runtime Setup (Execute on Both Nodes)
Install containerd – The Backbone of Container Operations
# Install containerd
sudo apt update
sudo apt install -y containerd

# Create containerd config file
sudo mkdir -p /etc/containerd
containerd config default | sudo tee /etc/containerd/config.toml > /dev/null
sudo sed -i 's/SystemdCgroup = false/SystemdCgroup = true/' /etc/containerd/config.toml

sudo systemctl restart containerd
sudo systemctl enable containerd
Critical Configuration: The SystemdCgroup = true setting ensures proper cgroup management with systemd. This is crucial for resource isolation and has been the source of many performance issues in production. I can’t stress this enough – USE systemd cgroups!
Pro Tip: Always check the containerd status: sudo systemctl status containerd. If you see any errors, check /var/log/syslog for detailed diagnostics.
Phase 3: Kubernetes Component Installation (Execute on Both Nodes)
Setting Up the Kubernetes Repositories
# Setup Kubernetes Repository
sudo apt install -y apt-transport-https ca-certificates curl gpg
sudo mkdir -p -m 755 /etc/apt/keyrings
curl -fsSL https://pkgs.k8s.io/core:/stable:/v1.37/deb/Release.key | sudo gpg --dearmor -o /etc/apt/keyrings/kubernetes-apt-keyring.gpg
echo 'deb [signed-by=/etc/apt/keyrings/kubernetes-apt-keyring.gpg] https://pkgs.k8s.io/core:/stable:/v1.37/deb/ /' | sudo tee /etc/apt/sources.list.d/kubernetes.list
sudo apt update
Version Note: I’m using Kubernetes v1.37 here. Which is the latest release so far.
Install the Trinity
sudo apt install -y kubelet kubeadm kubectl
sudo apt-mark hold kubelet kubeadm kubectl
The Hold Command: This is your lifeline. Production environments have been brought to their knees by automatic version upgrades. The apt-mark hold prevents accidental updates and gives you control over versioning.
From Experience: Always maintain version parity across all nodes. I’ve seen clusters with mismatched versions develop subtle bugs that take days to diagnose.
Phase 4: Control Plane Initialization
1. Initialize the Cluster
# Initialize the Cluster with kubeadm
sudo kubeadm init --pod-network-cidr=10.244.0.0/16
Network Note: I’m using Flannel’s default CIDR because it’s been stable since the early days. However, ensure this doesn’t conflict with your existing network. I’ve had instances where these ranges overlapped with corporate networks, causing chaos.
Pro Tip: Save the join command output! I’ve seen engineers frantically searching for it later. If you lose it, use following command on the control plane to regenerate it.
kubeadm token create --print-join-command 2. Configure kubectl for Your User
# Configure kubectl for Your User
mkdir -p $HOME/.kube
sudo cp -i /etc/kubernetes/admin.conf $HOME/.kube/config
sudo chown $(id -u):$(id -g) $HOME/.kube/config
Security Consideration: The admin.conf file has full cluster admin privileges. Never share it or commit it to version control. I’ve seen this mistake made by junior engineers, leading to security incidents.
3. Install Calico CNI
# Install a CNI (Container Network Interface) Plugin
kubectl apply -f https://raw.githubusercontent.com/projectcalico/calico/v3.27.0/manifests/calico.yaml

kubectl get pods -n kube-system
Why Calico? After years of experimenting with various CNIs, Calico gives me the best balance of performance, security policies, and reliability. The ability to implement network policies is invaluable in production environments.
Pro Tip: Wait 2-3 minutes before checking pods. Calico takes time to pull images and initialize. I typically run following command to watch the rollout in real-time.
kubectl get pods -n kube-system -wPhase 5: Worker Node Joining
1. Join the Cluster
# Execute the copied join command from control plane
# Example:
sudo kubeadm join 192.168.59.107:6443 --token <token> --discovery-token-ca-cert-hash <hash>
2. Recreate Join Command (If Needed)
# If you forget the command, regenerate it:
kubeadm token create --print-join-command
3. Verify Cluster Health
# Verify configuration
kubectl get nodes -o wide
Expected Output:
NAME                      STATUS   ROLES           AGE     VERSION
controlplane.centlinux.com   Ready    control-plane   10m     v1.37.x
worker01.centlinux.com       Ready    <none>          2m      v1.37.x
Post-Installation Best Practices
1. Test Pod Scheduling
kubectl run nginx --image=nginx --restart=Never
kubectl get pods -o wide
2. Verify Component Health
kubectl get cs3. Monitor for Potential Issues
kubectl top nodes
kubectl describe nodes
Troubleshooting Checklist
Based on years of experience, here are the top issues I’ve seen and their solutions:
| Symptom | Likely Cause | Solution |
|---|---|---|
| Nodes not ready | CNI not installed | Wait for Calico pods to initialize |
| Join fails | Token expired | Generate new token with kubeadm token create |
| Pods can’t communicate | Missing kernel modules | Verify lsmod | grep -E "overlay|br_netfilter" |
| containerd failures | SystemdCgroup mismatch | Verify config.toml setting |
| Certificate issues | Time synchronization | Install and configure NTP |
Bonus: Ansible Playbook
A complete Ansible playbook is available in our GitHub repository to quickly set up a two-node Kubernetes cluster.
Ansible Playbook Link: CentLinux GitHub Repository: k8s-cluster-setup
Final Thoughts
Setting up a Kubernetes cluster is like building a house – a strong foundation prevents future headaches. This configuration has served me well across countless production environments, from small startups to enterprise deployments.
Key Takeaways:
- Never skip the preparation steps – They’re not optional
- Version consistency matters – Keep everything in sync
- Network configuration is critical – Choose your CNI wisely
- Document everything – Future you will thank present you
Final Pro Tip: Save all these commands in a script for automation. I’ve created Ansible playbooks based on these exact commands that deploy clusters in minutes. That’s the power of standardization!
What’s Next: CKA Exam Practice Test: 12 Real-World Kubernetes Tasks with Solutions
Frequently Asked Questions (FAQs)
1. What are the minimum hardware requirements for this Kubernetes setup?
Answer: For a functional two-node cluster, your control plane node needs at least 2 CPUs and 2GB RAM, while the worker node requires 1 CPU and 1GB RAM minimum. However, for production workloads, I recommend doubling these specifications to ensure stable performance during peak loads.
I prefer to use a Mini PC for my Home Lab setup. Check out my Amazon store for latest offers and discounts on DevOps related products.
2. Why do I need to disable swap on all Kubernetes nodes?
Answer: Kubernetes requires swap to be disabled because the kubelet cannot properly manage pod resource limits and memory allocation when swap is active. This ensures that containers are killed based on memory usage rather than being swapped to disk, which prevents unpredictable performance issues and maintains the quality of service guarantees Kubernetes provides.
3. Which container runtime is best for Kubernetes clusters?
Answer: While containerd is the most commonly used runtime and the one we used in this setup, other options include CRI-O and Docker. I prefer containerd because it’s lightweight, well-maintained, and comes as the default runtime in modern Kubernetes distributions, offering excellent stability and performance for both development and production environments.
4. How long does it take for the cluster to become fully operational?
Answer: The actual cluster initialization takes about 2-3 minutes, but you should allow 5-10 minutes for all pods to come online, especially Calico CNI pods which need to download container images and establish networking across nodes. I always recommend waiting until all pods in the kube-system namespace show “Running” status before deploying any workloads.
5. What should I do if my worker node fails to join the cluster?
Answer: The most common failure points are expired tokens, time synchronization issues, or mismatched Kubernetes versions. I recommend checking that your system time is synchronized across all nodes using NTP, regenerating a new join token from the control plane, and verifying that all nodes are running identical versions of kubeadm, kubelet, and kubectl before attempting to join again.
Recommended Courses for Beginners
If you’re eager to kickstart your journey into cloud-native technologies, “Kubernetes for the Absolute Beginners – Hands-on” by Mumshad Mannambeth is the perfect course for you. Designed for complete beginners, this course breaks down complex concepts into easy-to-follow, hands-on lessons that will get you comfortable deploying, managing, and scaling applications on Kubernetes.
Whether you’re a developer, sysadmin, or IT enthusiast, this course provides the practical skills needed to confidently work with Kubernetes in real-world scenarios. By enrolling through the links in this post, you also support this website at no extra cost to you.
Disclaimer: Some of the links in this post are affiliate links. This means I may earn a small commission if you make a purchase through these links, at no additional cost to you.
Found this guide helpful? I create regular content on Kubernetes, Linux, and DevOps. Connect with me on CentLinux Youtube Channel for more production-tested infrastructure insights.
Remember: In the world of Kubernetes, patience and attention to detail are your greatest allies. Happy clustering!



Leave a Reply
You must be logged in to post a comment.