Learn how to set up an SSL Certificate Authority (CA) on CentOS 7 with this step-by-step guide. Follow our instructions to create and manage your own CA for secure communications and encrypted connections. #centlinux #linux #ssl
Table of Contents
What is SSL Certificate Authority?
SSL Certificate Authority, abbreviated as CA, is an entity that issues digital certificates. A digital certificate certifies the ownership of a public key by the CN (Common Name) of the certificate. Third parties trust the SSL certificates of the websites that are digitally signed by a trusted CA.
Configuration of a SSL Certificate Authority (CA) Server in CentOS 7 is a simple and straight-forward operation. However, in this article, we are not only configuring a CA, besides that we are also configuring an Apache Website to use SSL Certificate and then add the root CA certificate to client’s trusted CA store.
An SSL Certificate Authority (CA) is a trusted organization or entity that issues and manages digital certificates for SSL/TLS encryption. These certificates are essential for establishing secure, encrypted connections between web servers and clients, such as web browsers.

Here’s a detailed overview of SSL Certificate Authorities and their role in digital security:
What Does an SSL Certificate Authority Do?
- Issues SSL/TLS Certificates:
- Certificate Issuance: The primary function of a CA is to issue SSL/TLS certificates to individuals, organizations, or servers. These certificates validate the identity of the certificate requestor and enable secure encrypted communications.
- Certificate Types: CAs issue various types of certificates, including Domain Validated (DV), Organization Validated (OV), and Extended Validation (EV) certificates, each with different levels of validation and trust.
- Verifies Identities:
- Identity Verification: Before issuing a certificate, the CA verifies the identity of the requestor. This process varies based on the certificate type, from simple domain ownership checks for DV certificates to more rigorous checks for OV and EV certificates.
- Signs Certificates:
- Digital Signing: Once the CA verifies the requestor’s identity, it signs the certificate with its private key. This signature is used to verify the authenticity of the certificate during secure communications.
- Maintains Certificate Lifecycles:
- Management: The CA manages the entire lifecycle of SSL/TLS certificates, including issuance, renewal, revocation, and expiration.
- Certificate Revocation Lists (CRLs): CAs publish CRLs and Online Certificate Status Protocol (OCSP) responses to inform clients of certificates that have been revoked before their expiration dates.
- Publishes Trust Information:
- Root Certificates: CAs distribute root certificates that are pre-installed in browsers, operating systems, and devices. These root certificates are used to establish a chain of trust from the certificate holder to the CA.
- Provides Certificate Transparency:
- Transparency Logs: Many CAs log issued certificates in public Certificate Transparency (CT) logs to prevent misissuance and increase trust in the CA’s operations.
Why is an SSL Certificate Authority Important?
- Ensures Secure Communications:
- Encryption: SSL/TLS certificates provided by a CA encrypt data exchanged between web servers and clients, protecting sensitive information like login credentials and financial transactions.
- Verifies Trustworthiness:
- Authentication: Certificates issued by a CA authenticate the identity of websites and services, helping users confirm they are interacting with legitimate entities.
- Builds Trust:
- User Confidence: Browsers display visual indicators, such as padlocks and green address bars, to show that a site’s certificate is trusted, enhancing user confidence in the security of their interactions.
- Supports Compliance:
- Regulatory Requirements: SSL/TLS certificates are often required to meet security standards and compliance regulations, such as those set by PCI-DSS for online payments.
Types of SSL/TLS Certificates Issued by a CA
| Certificate Type | Validation Level | Details |
|---|---|---|
| Domain Validated (DV) | Basic | Validates domain ownership. Fast issuance with minimal verification. |
| Organization Validated (OV) | Intermediate | Validates domain ownership and the organization’s legitimacy. Provides more trust than DV. |
| Extended Validation (EV) | High | Rigorous validation of domain ownership and organization. Displays the organization’s name in the browser’s address bar. |
| Wildcard Certificate | Domain and Subdomains | Covers the main domain and all its subdomains (e.g., *.example.com). |
| Multi-Domain Certificate | Multiple Domains | Covers multiple domains with a single certificate (e.g., example.com, example.net). |
Master Linux from scratch with The Linux Command Line Bootcamp: Beginner to Power User and take your skills to the next level—fast!

Environment Specification
In this article, we are using three virtual machines with following specifications:
| Hostname: | ca-01.centlinux.com | web-01.centlinux.com | client-01.centlinux.com |
| IP Address: | 192.168.116.54 /24 | 192.168.116.51 /24 | 192.168.116.52 /24 |
| Operating System: | CentOS 7.6 | CentOS 7.6 | CentOS 7.6 |
| Purpose: | CA Server | Apache HTTP Server | Client System |
Apple 2024 Mac mini Desktop Computer with M4 chip with 10‑core CPU and 10‑core GPU: Built for Apple Intelligence, 16GB Unified Memory, 256GB SSD Storage, Gigabit Ethernet. Works with iPhone/iPad
16% OffConfiguring a SSL Certificate Authority in CentOS 7
Connect to the ca-01.centlinux.com as root user by using an ssh tool like PuTTY.
Openssl package provides the necessary commands to create SSL certificates and keys.
Openssl package is by default installed on even a minimally installed CentOS 7. However, if you don’t find it then, you can install it by using yum command.
yum install -y opensslOutput:
Loaded plugins: fastestmirror
Loading mirror speeds from cached hostfile
 * base: mirrors.ges.net.pk
 * epel: mirror1.ku.ac.th
 * extras: mirrors.ges.net.pk
 * updates: mirrors.ges.net.pk
Package 1:openssl-1.0.2k-16.el7.x86_64 already installed and latest version
Nothing to do
Openssl is already installed on this server.
For implementing public encryption, first of all, we need a private key that is later used to generate a CA certificate.
cd /etc/pki/CA/private/
openssl genrsa -aes128 -out ourCA.key 2048
Output:
Generating RSA private key, 2048 bit long modulus
.................................................................+++
..............+++
e is 65537 (0x10001)
Enter pass phrase for ourCA.key:
Verifying - Enter pass phrase for ourCA.key:
Here, we have generated a private key using RSA algorithm with a relatively larger key size of 2048-bits for improved security.
Although, we can generate a private key without a pass phrase. But, it is strongly recommended that you should set a pass phrase while generating private keys. It increases the security during transfer or backup of the private keys.
Now create a SSL Certificate Authority (CA) certificate using the ourCA.key.
openssl req -new -x509 -days 1825 \
-key /etc/pki/CA/private/ourCA.key \
-out /etc/pki/CA/certs/ourCA.crt
Output:
Enter pass phrase for /etc/pki/CA/private/ourCA.key:
You are about to be asked to enter information that will be incorporated
into your certificate request.
What you are about to enter is what is called a Distinguished Name or a DN.
There are quite a few fields but you can leave some blank
For some fields there will be a default value,
If you enter '.', the field will be left blank.
-----
Country Name (2 letter code) [XX]:PK
State or Province Name (full name) []:Sindh
Locality Name (eg, city) [Default City]:Karachi
Organization Name (eg, company) [Default Company Ltd]:Ahmer's SysAdmin Recipes
Organizational Unit Name (eg, section) []:ITLAB
Common Name (eg, your name or your server's hostname) []:ca-01.centlinux.com
Email Address []:ahmer@example.com
Our Certificate Authority (CA) server is ready now.
Configure Apache Server to use SSL Certificates
Connect to web-01.centlinux.com using ssh.
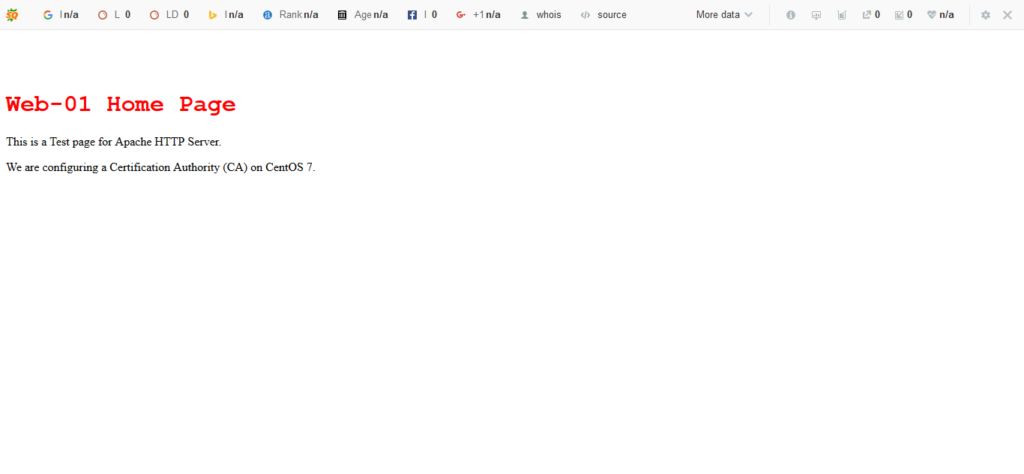
We have already installed Apache HTTP Server on web-01.centlinux.com. But it is running using HTTP protocol at default port 80.

Our objective is to convert this website from HTTP to HTTPS. For this purpose, we need mod_ssl module for Apache. Therefore, we are installing it by using yum command.
yum install -y mod_sslOutput:
Loaded plugins: fastestmirror
Loading mirror speeds from cached hostfile
 * base: mirrors.ges.net.pk
 * extras: mirrors.ges.net.pk
 * updates: mirrors.ges.net.pk
Resolving Dependencies
--> Running transaction check
---> Package mod_ssl.x86_64 1:2.4.6-88.el7.centos will be installed
--> Finished Dependency Resolution

Dependencies Resolved

================================================================================
 Package        Arch          Version                         Repository   Size
================================================================================
Installing:
 mod_ssl        x86_64        1:2.4.6-88.el7.centos           base        112 k

Transaction Summary
================================================================================
Install  1 Package

Total download size: 112 k
Installed size: 224 k
Downloading packages:
mod_ssl-2.4.6-88.el7.centos.x86_64.rpm                     | 112 kB   00:02
Running transaction check
Running transaction test
Transaction test succeeded
Running transaction
  Installing : 1:mod_ssl-2.4.6-88.el7.centos.x86_64                         1/1
  Verifying  : 1:mod_ssl-2.4.6-88.el7.centos.x86_64                         1/1

Installed:
  mod_ssl.x86_64 1:2.4.6-88.el7.centos

Complete!
During installation mod_ssl created a default configuration file ssl.conf at /etc/httpd/conf.d directory.
We can amend ssl.conf to add the SSL certificates for the website. But first we have to acquire a SSL certificate for our website.
Make sure openssl is installed on this server, because we require it to generate private key and CSR (Certificate Signing Request).
Generate a private key for the server web-01.centlinux.com.
openssl genrsa -out /etc/pki/tls/private/web-01.key 1024Output:
Generating RSA private key, 1024 bit long modulus
..................................................................................................++++++
..++++++
e is 65537 (0x10001)
We have generated a private key with RSA key algorithm with key size of 1024.
This time we are not protecting our private key with a pass phrase, because if we set a pass phrase then whenever we start httpd.service will ask for this pass phrase.
Now, generate a CSR (Certificate Signing Request) for our website.
openssl req -new -key /etc/pki/tls/private/web-01.key \
-out /etc/pki/tls/web-01.csr
Output:
You are about to be asked to enter information that will be incorporated
into your certificate request.
What you are about to enter is what is called a Distinguished Name or a DN.
There are quite a few fields but you can leave some blank
For some fields there will be a default value,
If you enter '.', the field will be left blank.
-----
Country Name (2 letter code) [XX]:PK
State or Province Name (full name) []:Sindh
Locality Name (eg, city) [Default City]:Karachi
Organization Name (eg, company) [Default Company Ltd]:Ahmer's SysAdmin Recipes
Organizational Unit Name (eg, section) []:ITLAB
Common Name (eg, your name or your server's hostname) []:web-01.centlinux.com
Email Address []:ahmer@example.com

Please enter the following 'extra' attributes
to be sent with your certificate request
A challenge password []:
An optional company name []:
We have generated a CSR. Now we send it to CA for digital signature.
scp /etc/pki/tls/web-01.csr root@ca-01:~/web-01.csrConnect to ca-01.centlinux.com and digitally signed that CSR.
openssl x509 -req -in web-01.csr \
-CA /etc/pki/CA/certs/ourCA.crt \
-CAkey /etc/pki/CA/private/ourCA.key \
-CAcreateserial \
-out web-01.crt \
-days 365
Output:
Signature ok
subject=/C=PK/ST=Sindh/L=Karachi/O=Ahmer's SysAdmin Recipes/OU=ITLAB/CN=web-01.centlinux.com/emailAddress=ahmer@example.com
Getting CA Private Key
Enter pass phrase for /etc/pki/CA/private/ourCA.key:
Our CSR has been digitally signed by our SSL Certificate Authority (CA).
Transfer web-01.crt to web-01.centlinux.com.
scp web-01.crt root@web-01:/etc/pki/tls/certs/web-01.crtConnect to web-01.centlinux.com using ssh as root user.
Now, we have a digitally signed SSL certificate. Add this certificate and private key in ssl.conf file.
vi /etc/httpd/conf.d/ssl.confwe only required to update following two directives therein.
SSLCertificateFile /etc/pki/tls/certs/web-01.crt
SSLCertificateKeyFile /etc/pki/tls/private/web-01.key
Restart Apache service.
systemctl restart httpd.serviceAllow https service in Linux firewall.
firewall-cmd --permanent --add-service=https
firewall-cmd --reload
We have successfully configured our Apache server to use HTTPS protocol.
Wahl Micro Groomsman Battery Personal Trimmer for Hygienic Grooming with Rinseable, Interchangeable Heads for Eyebrows, Neckline, Nose, Ears, & Other Detailing – 05640-600
(as of September 18, 2025 02:29 GMT +00:00 – More infoProduct prices and availability are accurate as of the date/time indicated and are subject to change. Any price and availability information displayed on [relevant Amazon Site(s), as applicable] at the time of purchase will apply to the purchase of this product.)Add CA Certificate to CentOS 7 clients’ Trusted Store
Connect to client-01.centlinux.com using ssh as root user.
Install elinks browser using yum repository.
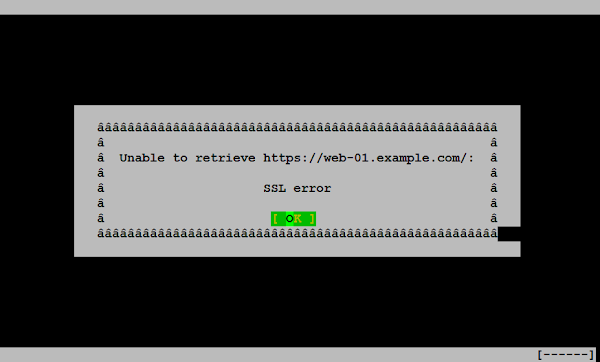
yum install -y elinksBrowser URL https://web-01.centlinux.com using elinks.

Don’t worry, we haven’t misconfigured anything. Actually this SSL error is thrown because our CA is not included in local ca-trust store of client-01.centlinux.com.
Install CA certificate by adding it to local ca-trust store. But first, we acquire the CA certificate from ca-01.centlinux.com.
cd /etc/pki/ca-trust/source/anchors/
scp root@ca-01:/etc/pki/CA/certs/ourCA.crt .
Now, use the following command to add ourCA.crt to local ca-trust store.
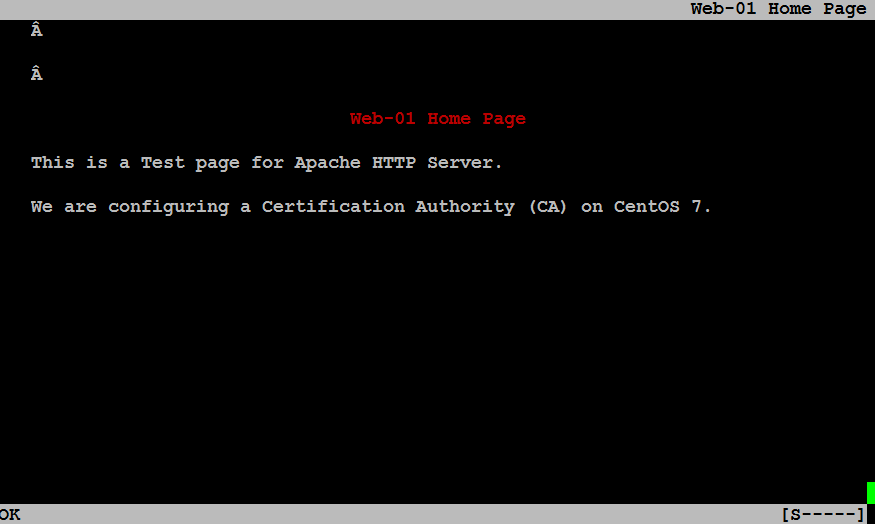
update-ca-trustBrowse URL https://web-01.centlinux.com again.

In this configuration guide, we have successfully configured a SSL Certificate Authority on CentOS 7 server. You can refer to our next article, if you want to install SSL certificate on Nginx web server.
This article focuses on a specific scenario of configuring a SSL Certificate Authority on CentOS 7 and do not addresses all the information pertains to cryptography. Therefore, it is recommended that you should read:
Frequently Asked Questions (FAQs)
What is an SSL Certificate Authority (CA)?
An SSL Certificate Authority (CA) is an entity that issues digital certificates to verify the identity of websites or servers, enabling secure encrypted connections.
Why would I need my own CA in CentOS 7?
Creating your own CA allows you to issue and manage SSL certificates internally, which is useful for testing, development, or securing private networks without relying on public CAs.
What are the basic components needed to set up a CA?
You need OpenSSL installed, a secure directory to store CA files, and configuration files to define certificate policies and settings.
Is a self-signed CA secure for production use?
Self-signed CAs are not recommended for public-facing websites since browsers don’t trust them by default. They are best suited for internal or testing environments.
How do I distribute my CA certificate to clients?
Clients must manually install and trust your CA certificate in their browser or system keystore to recognize certificates issued by your CA as valid.
Dating Site Online
$0.00 (as of September 17, 2025 18:53 GMT +00:00 – More infoProduct prices and availability are accurate as of the date/time indicated and are subject to change. Any price and availability information displayed on [relevant Amazon Site(s), as applicable] at the time of purchase will apply to the purchase of this product.)Final Thoughts
Setting up your own SSL Certificate Authority (CA) on CentOS 7 allows you to issue and manage trusted certificates for internal services and secure communications within your infrastructure.
By configuring OpenSSL, generating the CA key and certificate, and issuing server/client certificates, you’ve established a foundation for a secure, encrypted environment. Proper management of the CA, including secure storage of private keys and regular certificate renewal, is essential to maintain trust and integrity in your SSL ecosystem.
Optimize your cloud infrastructure and secure your servers with my AWS and Linux administration services. Let’s ensure your systems run smoothly. Connect with me now! if you need any guidance or advice related to your Linux VPS.
Ensure your communications are secure with expert assistance for your SSL Certificate Authority setup today!


15 responses to “Setup SSL Certificate Authority in CentOS 7”
Many Thanks for this complete tutorial, I've followed all the instructions, but I'm getting an SSL error when trying to browse the website using https.
I'm able to browse http using elinks, but https is not working, I'm running Centos 7.
I've seen the following two commands on other websites/forums:
sudo update-ca-trust enable; sudo update-ca-trust extract
Are they necessary?
Thanks again.
Hi,
Thanks for appreciation.
Following steps may be executed to resolve the issue.
1) Copy ourCA.crt to /etc/pki/ca-trust/source/anchors/ on client's system.
2) execute "update-ca-trust".
Thanks for complete step by step. In my current environment just followed the steps blindly. it worked!!
Thanks for complete step by step but I face one problem i can't get green signal and show in browser yellow triangle
Check the certificate details in browser and it will give you the actual cause of the problem.
Wonderful article. I set it up with the above steps and it is working fine with Firefox. In google chrome though, I believe post version 58, I think it is necessary to add "Subject Alt Names" else we still see the dreaded "Not Secure" icon. Can you please let know how to do it?
Thanks for liking this article. You are right that CN certificates are being replaced by SAN certificates. I will try to write something on SAN Certificates a.s.a.p. But for immediate solution you can also use the same openssl command with some different switches to generate a SAN certificates as well.
Great tutorial. Can you please add how to generate intermediate certs ?
Thanks. I had already written on Self Signed Certificates several times. But I do not add the information here to kept the scope of this article to Certificate Authority only.
Perfect ! many thanks 😉
Did you write something on :
CAs ans SubCAs ?
Cross linked CAs between organizations ?
I'm looking for reliable informations on these subjects …
Have a nice week-end 😉
Thanks. We do not yet worked on the above topics. But we will try to work on it a.s.a.p.
our client are using window 10 so could you help me how to install ourca.crt on windown 10 . thank you so much!
For MS Windows, you have to add the ourca.crt in your Internet Explorer. Go to Internet Options > Content > Certificates and import ourca.crt.
Great tutorial.
So how can i revoke ssl cert?
Thanks. You can use "openssl -revoke" command for this purpose.