Learn how to install Zabbix on CentOS 8 with our comprehensive step-by-step guide. Set up and configure Zabbix for efficient network monitoring and management. #centlinux #linux #zabbix
Table of Contents
What is Zabbix?
Zabbix is a free and open-source networking monitoring software. With Zabbix, we can monitor networks, servers, virtual machines and cloud services. Zabbix provides monitoring metrics, among others network utilization, CPU load and disk space consumption.
Zabbix network monitoring software backend is written in C language and web frontend is written in PHP. Zabbix can use MySQL, MariaDB, PostgreSQL, SQLite, Oracle, IBM DB2 to store data.
Zabbix software is developed and maintained by Zabbix LLC and distributed under GPLv2 license.
Read Also: How to install Zabbix on Rocky Linux 9

Zabbix Server Features:
Some of the distinct features of Zabbix are:
- Distributed monitoring with centralized web administration.
- Auto-discovery of servers and network devices and interfaces
- High performance, high capacity (able to monitor hundreds of thousands of devices).
- SLA, and ITIL KPI metrics on reporting.
- Native high performance agents (client software for Linux, Solaris, HP-UX, AIX, FreeBSD, OpenBSD, OS X, Tru64/OSF1, Windows 2000, Windows Server 2003, Windows XP, Windows Vista, Windows Server 2008, Windows 7)
Zabbix Server Prerequisites:
Zabbix server requires following software packages.
- Database Backend – MySQL Server (5.0.3 – 8.0.x)
- Web Server – Apache Web Server (1.3.12 or later)
- PHP Support (5.4 or later)
Hardware requirements may vary based on the number of devices that you want to monitor via Zabbix server. For complete information about Zabbix requirements, you can visit Zabbix documentation.
Zabbix vs LibreNMS
Zabbix and LibreNMS are both powerful network monitoring tools, but they cater to slightly different needs and have distinct features. Here’s a comparison to help you understand the differences and choose the right tool for your needs:
Zabbix
Overview
- Purpose: Comprehensive monitoring solution for networks, servers, cloud services, and applications.
- Strengths: Robust alerting, flexible data collection, extensive integration options, strong scalability, and a powerful agent system.
Features
- Data Collection: Collects data via agents, SNMP, IPMI, JMX, SSH, and more.
- Alerting: Highly customizable alerts with multiple notification channels (email, SMS, script execution).
- Scalability: Suitable for small to large environments, capable of handling thousands of monitored devices.
- Dashboard: Advanced visualization with customizable dashboards, graphs, and maps.
- Configuration: Offers templates for easy setup and configuration.
- Scripting and Automation: Supports custom scripts for monitoring and automation.
Pros
- Versatile and highly customizable.
- Strong community and commercial support.
- Extensive documentation and user community.
Cons
- Steeper learning curve for beginners.
- More complex initial setup compared to some other tools.
LibreNMS
Overview
- Purpose: Network monitoring system focusing on ease of use and comprehensive device support.
- Strengths: Autodiscovery, ease of setup, excellent device support through SNMP, and a strong community.
Features
- Data Collection: Primarily SNMP-based, with additional support for IPMI, and various APIs.
- Alerting: Supports alerting via email, Slack, Webhooks, and more.
- Scalability: Suitable for small to medium-sized networks, with growing support for larger environments.
- Dashboard: User-friendly interface with customizable dashboards and widgets.
- Configuration: Autodiscovery of devices simplifies the setup process.
- Scripting and Automation: Supports custom extensions and integrations.
Pros
- Easy to install and configure.
- Great autodiscovery and device compatibility.
- Active and supportive user community.
Cons
- Primarily SNMP-based, which may limit some advanced monitoring scenarios.
- Less customizable compared to Zabbix in terms of complex data collection and alerting configurations.
Conclusion
Both Zabbix and LibreNMS are excellent network monitoring solutions, but your choice depends on your specific needs and expertise:
- Choose Zabbix if you need a highly customizable and scalable monitoring solution with advanced alerting, data collection, and automation capabilities.
- Choose LibreNMS if you prefer a straightforward, easy-to-setup solution with strong SNMP support and a user-friendly interface for small to medium-sized networks.
Assess your specific requirements, the size of your network, and the complexity of your monitoring needs to make the best choice for your environment.
Read Also: How to install Zabbix on Rocky Linux 10
Linux Server Specification
We have provisioned a CentOS 8 virtual machine for this tutorial.
- CPU – 3.4 Ghz (2 cores)
- Memory – 2 GB
- Storage – 20 GB
- Operating System – CentOS Linux 8.0
- Hostname – zabbix-01.recipes.com
- IP Address – 192.168.116.207 /24
For optimal performance while following this guide to install Zabbix on CentOS 8, it is highly recommended to use a reliable server setup that can handle continuous monitoring and data logging efficiently. A powerful yet cost-effective option is the Dell 7050 Mini Tower Desktop, which offers robust processing power and expandability suited for running Zabbix smoothly.
Additionally, pairing your setup with a high-quality Uninterruptible Power Supply (UPS) like the APC Back-UPS Pro 1500VA ensures your monitoring system remains operational during power disruptions, protecting your valuable data. These Amazon best-sellers are frequently chosen by system administrators and IT professionals for their reliability and performance in demanding environments.
Disclaimer: This post contains affiliate links. If you purchase through these links, a small commission may be earned at no extra cost to you, helping support the blog.
Installing LAMP Stack on CentOS 8
Connect to zabbix-01.recipes.com as root user by using a ssh client.
Zabbix is PHP based network monitoring tool thus requires a PHP application server to run.
Therefore, we are installing Apache web server, MySQL database server and PHP support by using a single dnf command.
dnf install -y httpd mysql-server php php-mysqlnd php-mbstring php-pdo php-gdEnable and start Apache service.
systemctl enable --now httpd.serviceAllow Apache service to accept incoming traffic in Linux firewall.
firewall-cmd --permanent --add-service=http
firewall-cmd --reload
Enable and start MySQL database service.
systemctl enable --now mysqld.serviceConfigure MySQL server instance as follows.
mysql_secure_installationOutput:
Securing the MySQL server deployment.

Connecting to MySQL using a blank password.

VALIDATE PASSWORD COMPONENT can be used to test passwords
and improve security. It checks the strength of password
and allows the users to set only those passwords which are
secure enough. Would you like to setup VALIDATE PASSWORD component?

Press y|Y for Yes, any other key for No: y

There are three levels of password validation policy:

LOW    Length >= 8
MEDIUM Length >= 8, numeric, mixed case, and special characters
STRONG Length >= 8, numeric, mixed case, special characters and dictionary                  file

Please enter 0 = LOW, 1 = MEDIUM and 2 = STRONG: 2
Please set the password for root here.

New password:

Re-enter new password:

Estimated strength of the password: 100
Do you wish to continue with the password provided?(Press y|Y for Yes, any other key for No) : y
By default, a MySQL installation has an anonymous user,
allowing anyone to log into MySQL without having to have
a user account created for them. This is intended only for
testing, and to make the installation go a bit smoother.
You should remove them before moving into a production
environment.

Remove anonymous users? (Press y|Y for Yes, any other key for No) : y
Success.


Normally, root should only be allowed to connect from
'localhost'. This ensures that someone cannot guess at
the root password from the network.

Disallow root login remotely? (Press y|Y for Yes, any other key for No) : y
Success.

By default, MySQL comes with a database named 'test' that
anyone can access. This is also intended only for testing,
and should be removed before moving into a production
environment.


Remove test database and access to it? (Press y|Y for Yes, any other key for No) : y
 - Dropping test database...
Success.

 - Removing privileges on test database...
Success.

Reloading the privilege tables will ensure that all changes
made so far will take effect immediately.

Reload privilege tables now? (Press y|Y for Yes, any other key for No) : y
Success.

All done!
Edit PHP configurations to customize it according to your environment.
vi /etc/php.iniUncomment and set following directive.
date.timezone = Asia/KarachiInstall Zabbix Yum Repository
As described in Zabbix documentation, we can install Zabbix yum repository in our CentOS 8 server as follows.
cd /tmp
wget https://repo.zabbix.com/zabbix/4.4/rhel/8/x86_64/zabbix-release-4.4-1.el8.noarch.rpm
Install downloaded RPM by using dnf command.
dnf install -y zabbix-release-4.4-1.el8.noarch.rpmBuild yum package manager cache for Zabbix yum repository.
dnf makecacheOutput:
CentOS-8 - AppStream                            3.8 kB/s | 4.3 kB     00:01
CentOS-8 - Base                                 2.3 kB/s | 3.9 kB     00:01
CentOS-8 - Extras                               546  B/s | 1.5 kB     00:02
Zabbix Official Repository - x86_64             1.7 kB/s | 2.9 kB     00:01
Zabbix Official Repository non-supported - x86_ 2.8 kB/s | 3.0 kB     00:01
Metadata cache created.
Install Zabbix on CentOS 8
We have setup the Zabbix yum repository, therefore, we can easily install Zabbix on CentOS 8 by using dnf command. Here, we are installing Zabbix with MySQL database support by using following command.
dnf install -y zabbix-server-mysqlInstall Zabbix frontend with MySQL and Apache support.
dnf -y install zabbix-web-mysql zabbix-apache-confLogin to MySQL database server.
mysql -u root -pExecute following commands to create database user for Zabbix.
create database zabbix;
create user 'zabbix'@'localhost' identified by 'Zabbix@1234';
grant ALL on zabbix.* to 'zabbix'@'localhost';
flush privileges;
exit
Create Zabbix database by using the script provided with Zabbix server installation files.
zcat /usr/share/doc/zabbix-server-mysql*/create.sql.gz | mysql -uzabbix -D zabbix -pZabbix@1234Configure Zabbix server settings.
vi /etc/zabbix/zabbix_server.confAnd set following directives therein.
DBHost=localhost
DBName=zabbix
DBUser=zabbix
DBPassword=Zabbix@1234
Configure SELinux settings for Zabbix on CentOS 8. Make sure you have installed policoreutils-python package before executing following commands.
grep zabbix_t /var/log/audit/audit.log | audit2allow -M zabbix_server_customOutput:
******************** IMPORTANT ***********************
To make this policy package active, execute:

semodule -i zabbix_server_custom.pp
Now execute following commands to configure SELinux settings.
semodule -i zabbix_server_custom.pp
rm -f zabbix_server_custom.*
setsebool -P httpd_can_connect_zabbix on
setsebool -P httpd_can_network_connect_db on
Enable and start Zabbix service.
systemctl enable --now zabbix-serverWe have successfully install Zabbix on CentOS 8.
Install Zabbix Agent on CentOS 8
Zabbix is agent based server monitoring software. Therefore, we need to install Zabbix agent software on each server that need to be monitored.
Install Zabbix Agent on the same Linux server.
dnf install -y zabbix-agentEnable and start Zabbix agent service.
systemctl enable --now zabbix-agentAllow Zabbix agent service ports in Linux firewall.
firewall-cmd --permanent --add-port={10051/tcp,10050/tcp}
firewall-cmd --reload
Open URL http://zabbix-01.recipes.com/zabbix/ in a web browser.
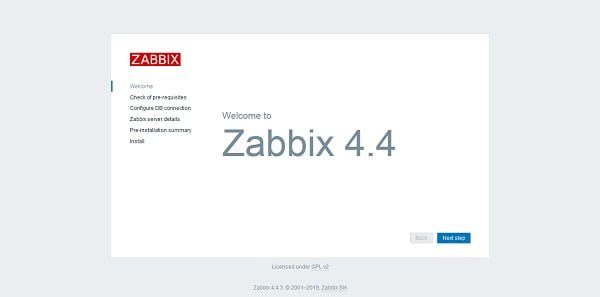
Click on Next Step.
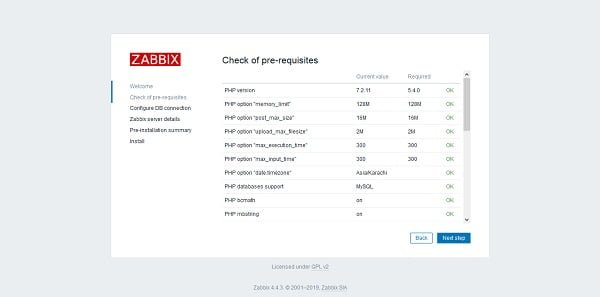
Review that all required PHP settings are OK. Click on Next Step.
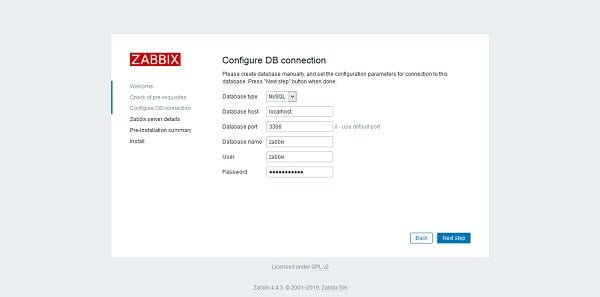
Enter MySQL Database connectivity parameters and click on Next Step.
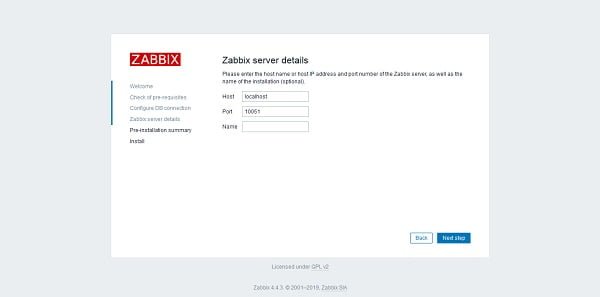
Click on Next Step.
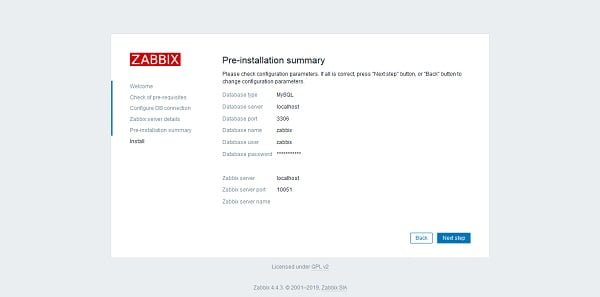
Click on Next Step.
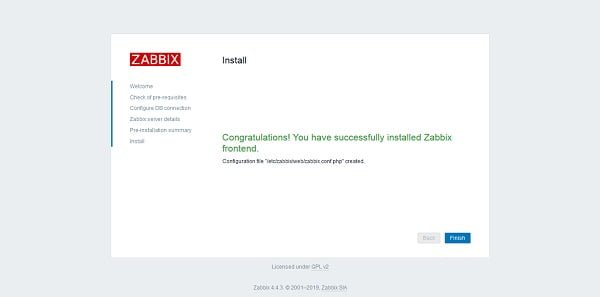
Click on Finish.

Login using Zabbix default username/password i.e. admin/zabbix.
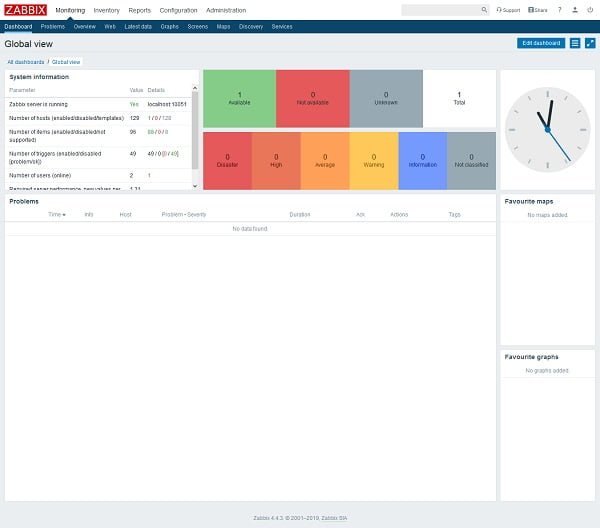
We are reached at the Zabbix Dashboard.
Frequently Asked Questions (FAQs)
1. What is Zabbix, and why is it used?
Zabbix is an open-source monitoring tool used to track the performance and availability of servers, network devices, applications, and cloud services. It provides real-time monitoring, alerts, and visualization of system metrics.
2. What are the prerequisites for installing Zabbix on CentOS 8?
To install Zabbix, you need a CentOS 8 server, a web server (Apache or Nginx), a database (MySQL/MariaDB), PHP, and the Zabbix repository.
3. What database does Zabbix use on CentOS 8?
Zabbix supports MariaDB or MySQL as its backend database to store monitoring data, logs, and configurations.
4. How can I access the Zabbix web interface after installation?
After installation, you can access the Zabbix web interface by navigating to your server’s IP address or domain name in a web browser, followed by the configured Zabbix path.
5. How do I ensure Zabbix is running properly after installation?
You can verify Zabbix is working by checking the Zabbix server service status, ensuring the database is properly configured, and logging into the web interface to confirm data collection.
Final Thoughts
Installing Zabbix on CentOS 8 can significantly enhance your network monitoring and management capabilities. By following the right steps, you can set up and configure Zabbix to ensure efficient performance and comprehensive oversight of your systems. Whether you’re a system administrator or a network manager, mastering Zabbix will enable you to maintain the health and security of your network infrastructure.
Whether you need cloud optimization, server management, or automation, I provide comprehensive AWS and Linux services. Hire me to elevate your systems.
Recommended Courses
If you’re serious about mastering IT infrastructure monitoring, I highly recommend the online course “Zabbix Application and Network Monitoring“ by Sean Bradley. This hands-on training is perfect for system administrators, DevOps engineers, and IT professionals who want to efficiently monitor applications, servers, and networks using Zabbix. With real-world examples and step-by-step guidance, you’ll gain practical skills that can immediately improve your monitoring workflows and career prospects.
Disclaimer: Some of the links in this post are affiliate links. This means if you click on them and make a purchase, I may earn a small commission at no extra cost to you. This helps support my work and allows me to keep creating helpful content.

Leave a Reply
Please log in to post a comment.