Learn how to perform a CentOS 8 minimal installation with our detailed guide and screenshots. Follow step-by-step instructions to set up a lightweight and efficient CentOS 8 environment. #centlinux #linux
Table of Contents
What is CentOS 8?
CentOS 8 is a free and open-source Linux distribution based on Red Hat Enterprise Linux (RHEL). It was designed for enterprise and server environments, providing a robust and stable platform for a variety of applications. Here’s an in-depth look at what CentOS 8 is, its features, and its uses:
CentOS 8 (Community ENTerprise Operating System) is the eighth major version of the CentOS Linux distribution. It is derived from the sources of RHEL 8, providing a similar experience to the enterprise-level features of RHEL but without the associated support costs. CentOS 8 was officially released in September 2019, and it has since been succeeded by CentOS Stream.
Key Features
1. Based on Red Hat Enterprise Linux 8
CentOS 8 uses the same source code as RHEL 8, providing a stable and reliable platform with many of the same features found in Red Hat’s enterprise solution.
2. New Package Manager: DNF
CentOS 8 introduces the DNF (Dandified YUM) package manager, replacing the older YUM (Yellowdog Updater, Modified) for package management. DNF offers:
- Improved performance and enhanced dependency resolution.
- Better support for modular repositories.
- Advanced features like history management and rollback capabilities.
3. Modular Repository System
The Modular Repository System allows users to choose from multiple versions of software packages to better meet specific needs:
- Provides modularity for different software versions and streams.
- Enables easy management of different versions of applications and components.
4. Updated Kernel
CentOS 8 ships with the Linux kernel 4.18, which includes many improvements over previous kernels:
- Enhanced performance and security features.
- Support for new hardware and technologies.
5. New Default Desktop Environment: GNOME 3
The default desktop environment for CentOS 8 is GNOME 3, offering a modern and streamlined interface:
- Improved user experience with a focus on simplicity and productivity.
- Updated GNOME Shell for a more intuitive user interface.
6. System Roles and Automation
CentOS 8 supports System Roles and automation:
- Predefined roles for various system configurations.
- Integration with Red Hat Ansible Automation Platform for efficient management and automation.
7. Security Enhancements
CentOS 8 includes numerous security improvements:
- Enhanced SELinux policies for better system security.
- Improved cryptographic libraries and secure boot support.
8. Application Streams
Application Streams allow users to install multiple versions of software packages:
- Separate from the core OS packages.
- Provides access to up-to-date applications and frameworks.
9. Performance and Scalability Improvements
CentOS 8 is designed for both performance and scalability:
- Supports large-scale deployments.
- Enhanced performance for both physical and virtualized environments.
Uses of CentOS 8
CentOS 8 can be used in a variety of scenarios, including:
- Enterprise Servers: Hosting web servers, application servers, and database servers.
- Development Environments: Building and testing applications in a stable and consistent environment.
- Educational Purposes: Teaching and learning about Linux systems and administration.
- Cloud Environments: Running virtual machines and services in cloud infrastructures.
- High-Performance Computing (HPC): Supporting scientific computing and research applications.
CentOS 8 vs. CentOS Stream
It’s important to note that CentOS 8 has been succeeded by CentOS Stream, which acts as a rolling-release distribution that provides a preview of upcoming RHEL features. CentOS Stream sits between Fedora and RHEL in the release cycle, offering a continuous stream of updates.
For those looking for a traditional CentOS experience akin to RHEL, CentOS Stream may offer a different approach compared to CentOS 8’s fixed release model.
Comparison Table
| Feature | CentOS 8 | CentOS Stream | RHEL 8 |
|---|---|---|---|
| Release Model | Fixed Release | Rolling Release | Fixed Release |
| Updates | Updates in major releases | Continuous updates | Major updates with support |
| Support | Community Support | Community Support | Paid Support and Subscription |
| Focus | Enterprise Stability | Preview of Future RHEL | Enterprise Stability and Support |
In this article, we will perform minimal installation of CentOS 8 operating system and also attach the screenshots of all the steps. Alternatively, you can upgrade your existing applications and databases by following our previous article on How to upgrade Centos 7 to 8
Recommended Courses
If you’re serious about building a career in IT, the Complete Linux Training Course to Get Your Dream IT Job 2025 by Imran Afzal is one of the best investments you can make in yourself. This highly rated course takes you from the basics of Linux to advanced system administration skills, preparing you for real-world IT roles and certifications.
Whether you’re a beginner or brushing up your skills, the structured lessons, hands-on labs, and career-oriented approach make it a perfect choice to boost your confidence and job readiness. Enroll now and start your Linux journey today!
Disclaimer: This post contains affiliate links. If you purchase through these links, I may earn a small commission at no additional cost to you. This helps support the site and allows me to continue creating valuable content.
Environment Specification
We have provisioned a KVM virtual machine with following specifications.
- CPU – 3.4 Ghz (2 cores)
- Memory – 2 GB
- Storage – 60 GB
For optimal performance and hands-on learning, consider the Raspberry Pi 5 Single Board Computer with 16GB RAM, which offers a compact, affordable, and powerful environment perfect for testing Linux installs.
Another excellent choice is the HPE ProLiant MicroServer Gen11 Plus, a reliable tower server known for its scalability and enterprise-grade features, ideal for those wanting a more robust physical server experience. Both products are best sellers on Amazon and highly rated by Linux enthusiasts.
Disclaimer: This post contains affiliate links, and at no additional cost to you, a small commission may be earned if you purchase through these links
CentOS 8 Minimal Installation
Download the CentOS 8 ISO file from CentOS Project website.
Attach the CentOS 8 ISO file in the CDROM and start the virtual machine.

The system is displaying a boot menu with multiple options.
Select ‘Install CentOS Linux 8.0.1905’ option and press <ENTER>.

The CentOS 8 installer is loading now.
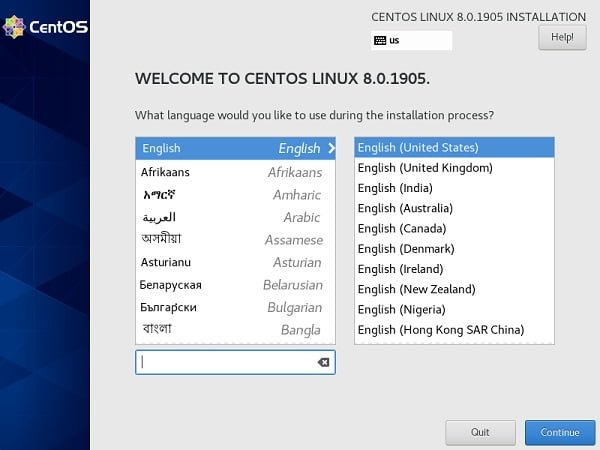
Choose the preferred Language to be used during CentOS 8 installation and click on Continue.
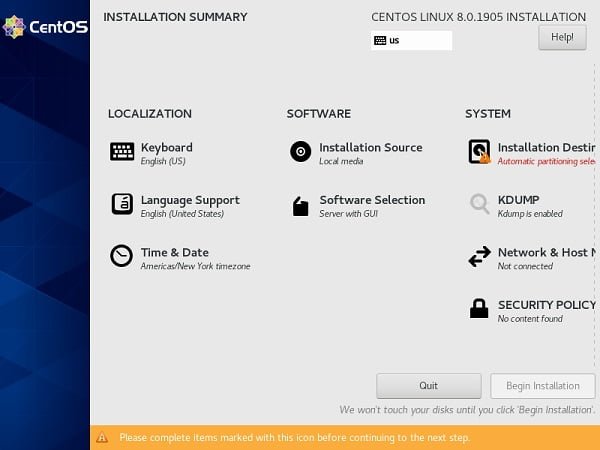
This is the Installation Summary window, we can configure many options here.
First of all click on ‘Time & Date’ to set the timezone according to your region.
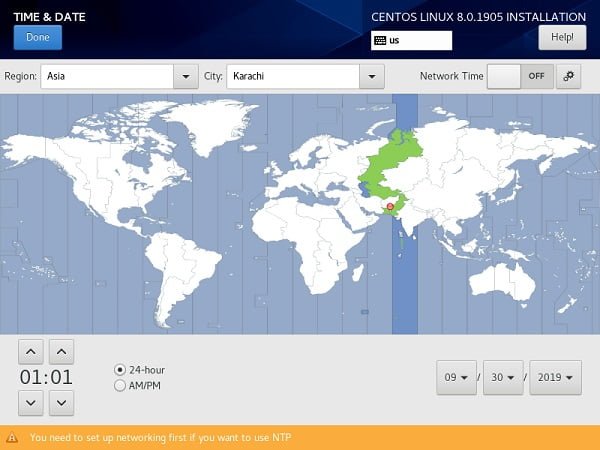
Select your relevant timezone and adjust the date and time here.
Click on Done to return to Installation Summary screen.
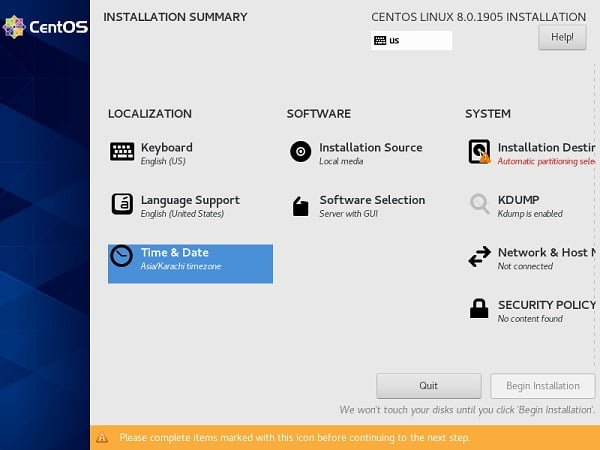
Now, click on ’Software Selection’ to select the software packages/groups to install.
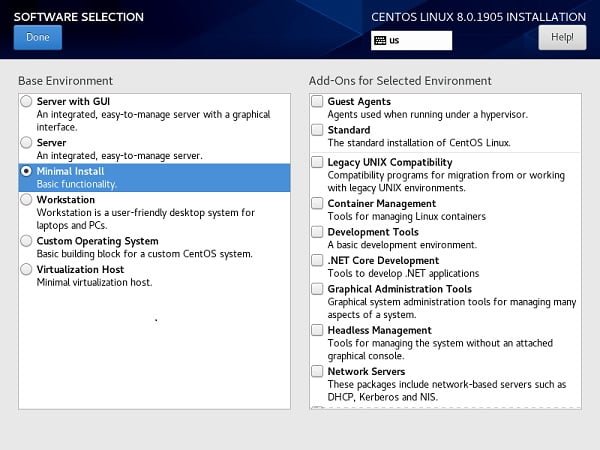
Here, select the option ‘Minimal Install’ under Base Environment section.
Click on Done to return to Installation Summary screen.
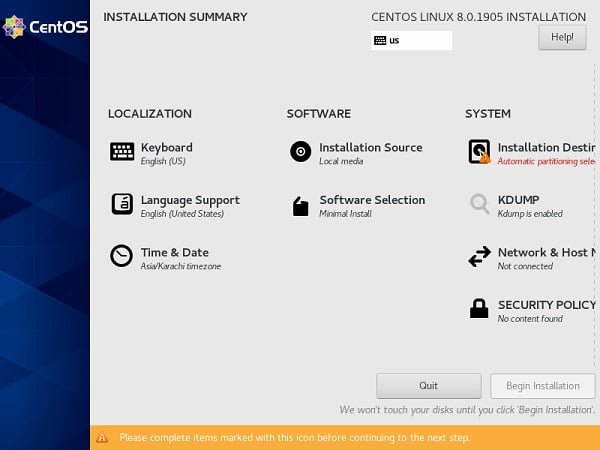
Click on the ‘Installation Destination’ to configure disks/partitions.
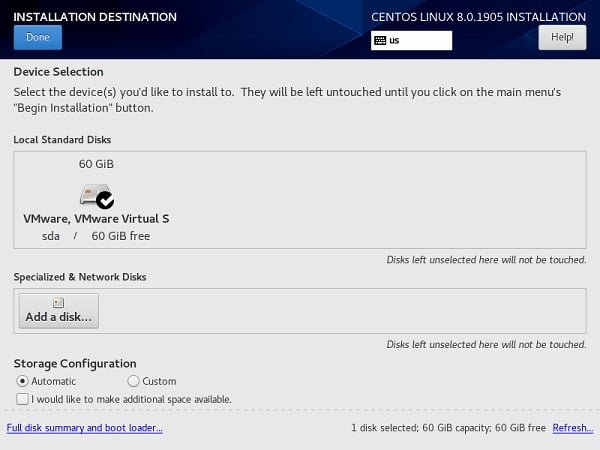
Select the Automatic Storage Configuration and click on Done.
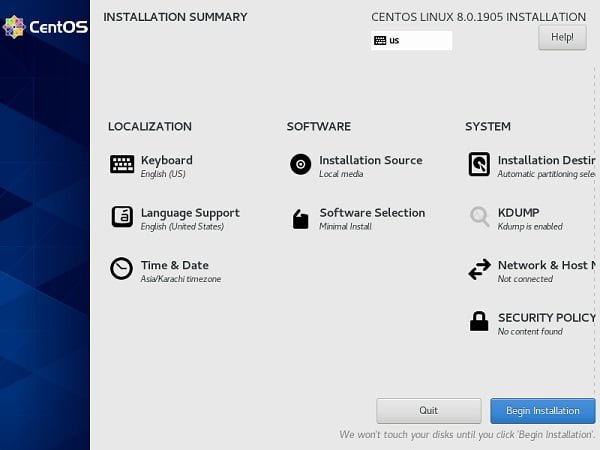
If you have enough memory for use by KDUMP then skip this step, otherwise disable the KDUMP as follows.
Click on ‘KDUMP’.
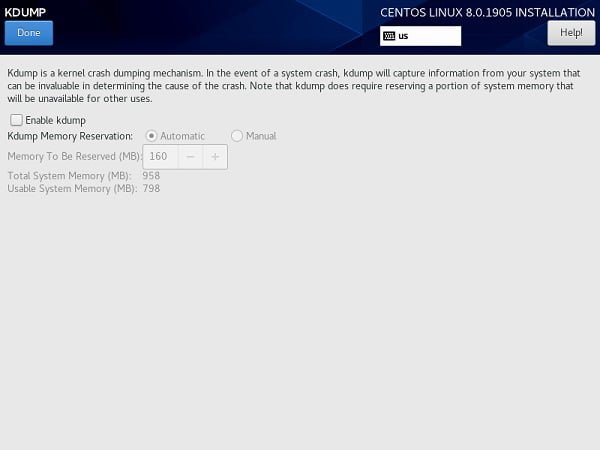
Uncheck ‘Enable kdump’ option and click on Done.
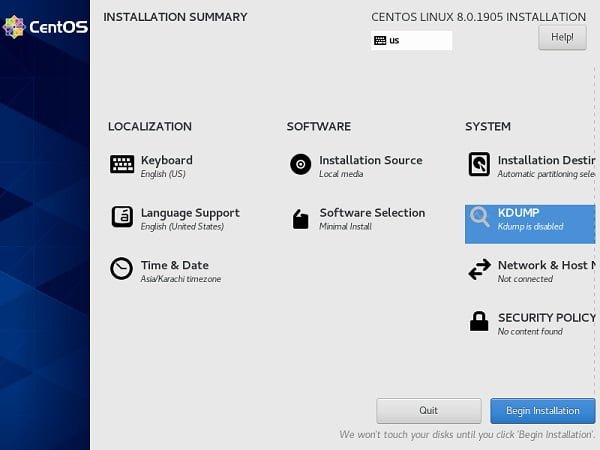
KDUMP has been disabled.
The final option that we are required to configure here is ‘Network & Host Name’.
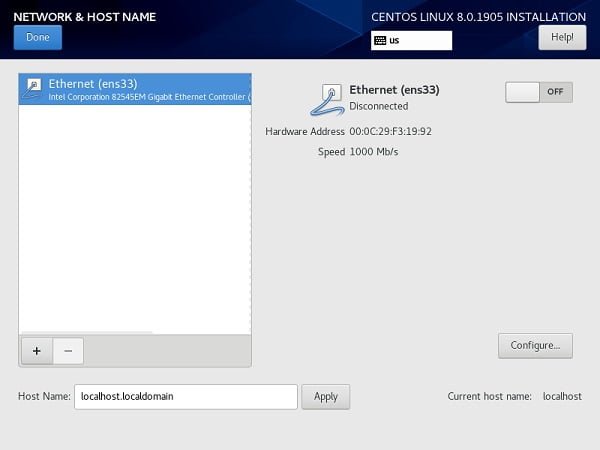
By default, the networking is not enabled for the Ethernet interface.
Enable DHCP Network configurations by click on the ON option at the right side of the screen.
Set a custom Host Name in the text box at the bottom of the screen and then click on Apply.
The final settings should be look like this.
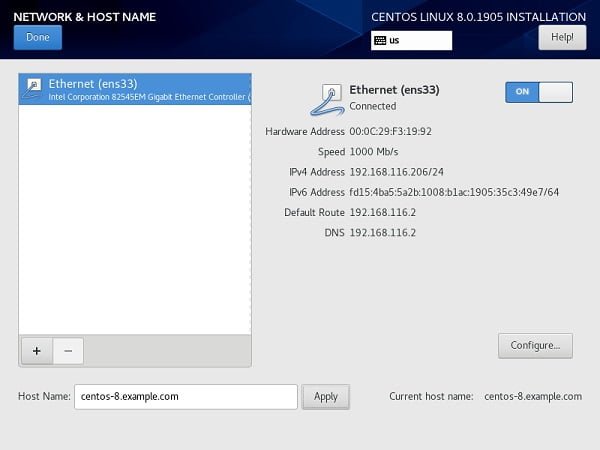
Click on Done to return to Installation Summary screen.
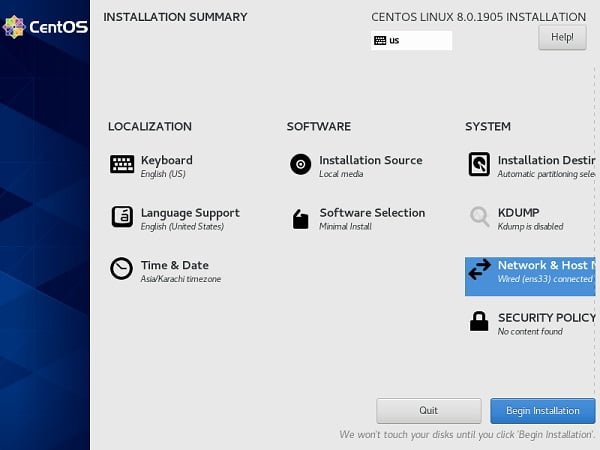
All necessary settings has been configured for CentOS 8 installation.
Click on Begin Installation to start installing CentOS 8.
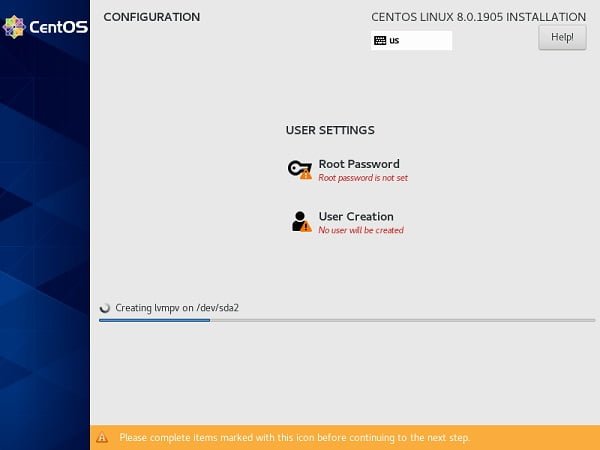
While installation is in progress, we can configure two more option thereon.
First, click on ‘Root Password’ to set a password for root user.
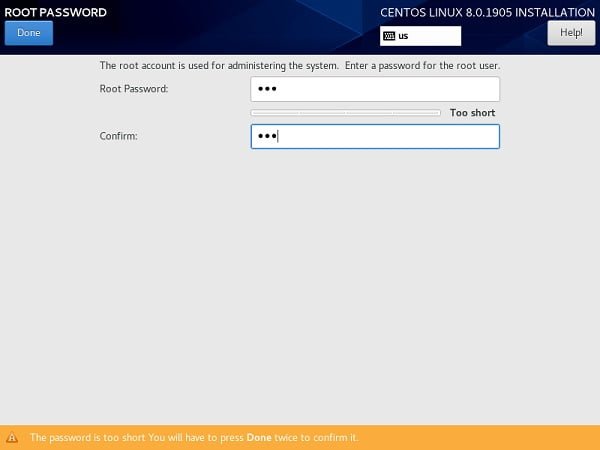
Set password for root user and click on Done.
You are required to click twice on Done, if you have set a weak password.
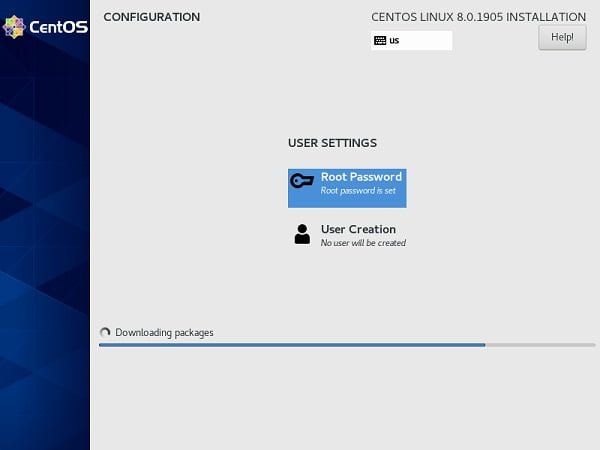
Now, click on ‘User Creation’ to create another user.
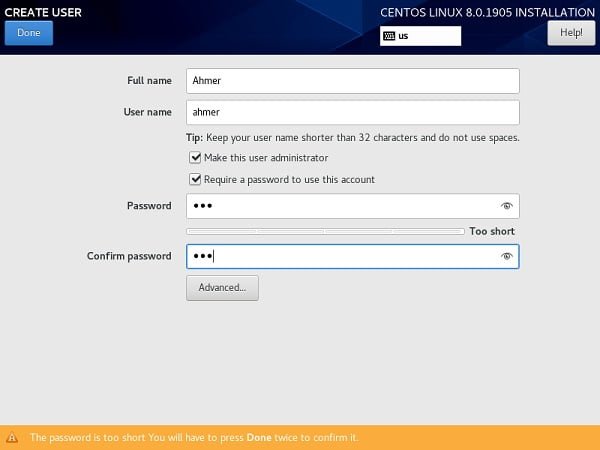
Click on Done to return to Installation Progress screen.
You are required to click twice on Done, if you have set a weak password.
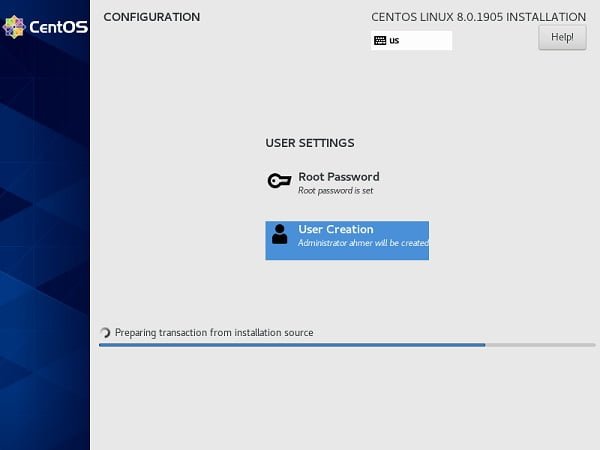
Wait for the completion of CentOS 8 installation. It won’t be take so long, because we are installing CentOS 8 with minimal option.
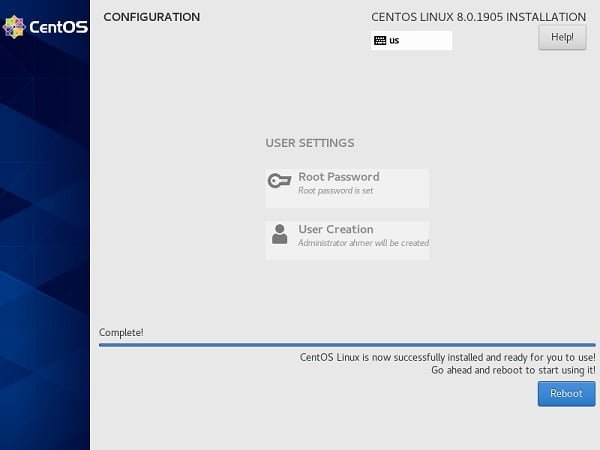
Click on Reboot to restart the system.
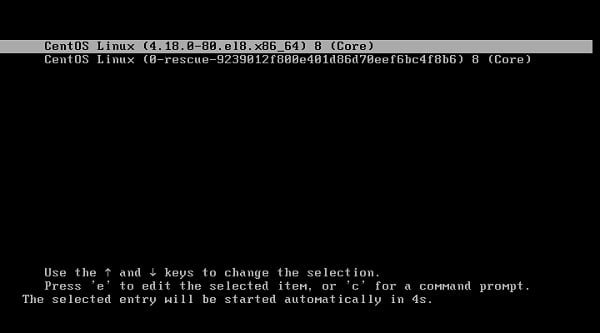
We are now at the CentOS 8 GRUB boot menu.
Select the first option and press <ENTER>.
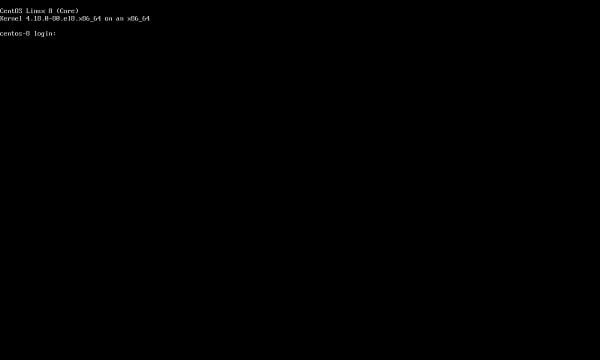
We are reached at the CLI login prompt of CentOS 8.
Frequently Asked Questions (FAQs)
1. What is CentOS 8 Minimal Installation?
CentOS 8 Minimal Installation is a lightweight version of the OS with only essential packages, ideal for servers and custom setups.
2. How do I download CentOS 8 Minimal ISO?
You can download it from the official CentOS website: https://www.centos.org/download/.
3. What are the system requirements for CentOS 8 Minimal?
- CPU: 1 GHz or faster
- RAM: 2 GB (recommended)
- Storage: 10 GB minimum
4. How do I create a bootable USB for CentOS 8?
Use the dd command in Linux:
sudo dd if=CentOS-8-x86_64-boot.iso of=/dev/sdX bs=4M status=progressReplace /dev/sdX with your USB drive identifier.
5. What are the basic post-installation steps?
Update the system:
sudo dnf update -ySet up networking by using nmcli command:
nmcli device connect eth0Install essential packages:
sudo dnf install vim net-tools wget -yFinal Thoughts
Performing a minimal installation of CentOS 8 is a great way to set up a lean and efficient server environment. Our comprehensive guide, complete with screenshots, walks you through each step of the process, ensuring a smooth and successful installation.
Searching for a skilled Linux admin? From server management to security, I ensure seamless operations for your Linux systems. Find out more on my Freelancer profile!
Let’s work together to get your CentOS 8 setup exactly how you need it. Contact me today!

Leave a Reply
You must be logged in to post a comment.