Discover how to install Icinga Web 2 on CentOS 8 with our comprehensive guide. Follow step-by-step instructions to set up and configure Icinga Web 2 for efficient system monitoring. #centlinux #linux #icinga
Table of Contents
What is Icinga Web 2?
Icinga web 2 is a PHP based web application that provides a web interface for Icinga 2 network monitoring server. Icinga Web 2 is fast, responsive, accessible and easily extensible with modules.
Icinga Web 2 is a powerful and flexible web interface for the Icinga monitoring system. It provides a user-friendly way to manage and visualize the performance and availability of your IT infrastructure. Key features of Icinga Web 2 include:
- Enhanced User Experience: Intuitive and responsive design for easy navigation and monitoring.
- Modular Architecture: Extendable with modules to add new functionalities and integrations.
- Advanced Reporting: Generate detailed reports and dashboards for better insights.
- Customization: Tailor the interface to meet specific monitoring needs with customizable views and themes.
- User Management: Manage user roles and permissions effectively.
- Real-Time Monitoring: Provides real-time status updates and notifications for quick issue resolution.
Icinga Web 2 is a valuable tool for system administrators and IT professionals to ensure their infrastructure runs smoothly and efficiently.
Icinga Web 2 provides an intuitive user interface to monitor network devices with Icinga 2. Especially there are lots of list and detail views for hosts and services. You can sort and filter depending on what you want to see.
System administrators can also control the network monitoring process itself by sending external commands to Icinga. Most such actions, like rescheduling a check, can be done with just a single click.
We have configured an Icinga 2 server on CentOS 8 in our previous post. Now we are exploring how to install Icinga Web 2 on the same CentOS 8 server.
Environment Specification
We are using a CentOS 8 (minimal) virtual machine with following specifications.
- CPU – 3.4 Ghz (2 cores)
- Memory – 2 GB
- Storage – 20 GB
- Operating System – CentOS 8.0
- Hostname – icinga-2.centlinux.com
- IP Address – 192.168.116.206 /24
Installing Icinga Web 2 on CentOS 8 requires a system with at least 2GB of RAM and a dual-core processor to manage the web interface and monitoring backend efficiently. You’ll need a functional web server environment, typically Apache or Nginx, with PHP 7 and necessary PHP extensions like mbstring, xml, and json installed.
Running this on a VPS such as Rose Hosting VPS is ideal for stable performance and remote access, allowing you to monitor your IT infrastructure reliably without taxing local resources.
[Start Your DevOps Lab with a Mini PC – Order Today!]
[Launch Your Own VPS with Rose Hosting – Click to Get Started!]
Disclaimer: This post contains affiliate links; using these links supports the blog at no extra cost to you.
Install Apache and PHP on CentOS 8
Icinga Web 2 is a PHP based web interface for Icinga 2. Therefore, we need a PHP application server to deploy it.
Connect with icinga-2.centlinux.com as root user by using a ssh client.
We are installing Apache web server and PHP by using following dnf command.
dnf install -y httpd php-fpm php-ldap php-jsonAdd a default page for Apache web server. It is mandatory, or otherwise Icinga’s HTTP service will raise an 403 Forbidden Error.
echo "HomePage" > /var/www/html/index.html
chmod 755 /var/www/html/index.html
Start and enable Apache and PHP services.
systemctl enable --now httpd.service php-fpm.serviceAllow Apache service in CentOS 8 firewall.
firewall-cmd --permanent --add-service=http
firewall-cmd --reload
Create a MySQL Database for Icinga Web 2
We have already installed MariaDB on the same Network Monitoring server in our previous post. Therefore, we can now create the Icinga Web 2 backend database on the same MySQL server.
Login to MySQL server as root user.
mysql -u root -p123Create a MySQL database for Icinga Web 2 as follows.
CREATE DATABASE icingaweb;Create a database user for Icinga Web 2 and grant complete privileges on icinga database.
GRANT ALL PRIVILEGES ON icingaweb.* TO 'icinga'@'localhost' IDENTIFIED BY 'Ahmer@1234';Reload privileges table and exit from MySQL shell.
FLUSH PRIVILEGES;
EXIT
Read Also: MySQL Cheat Sheet: DBA Edition 2025
Install Icinga Web 2 on CentOS 8
We have already added the Icinga 2 yum repository in our Linux package manager. Therefore, we can easily install Icinga Web 2 and Icinga CLI using a dnf command.
dnf install -y icingacli icingaweb2 icingaweb2-selinuxIcinga Web 2 web application runs as apache user, therefore, we need to adjust SELinux file context, so the apache user can edit Icinga Web 2 configuration files in /etc/icingaweb2 directory.
semanage fcontext -a -t httpd_sys_rw_content_t /etc/icingaweb2
restorecon -Rv /etc/icingaweb2
Output:
Relabeled /etc/icingaweb2 from system_u:object_r:etc_t:s0 to system_u:object_r:httpd_sys_rw_content_t:s0
Generate Icinga Web 2 configurations for Apache web server.
icingacli setup config webserver apacheOutput:
Alias /icingaweb2 "/usr/share/icingaweb2/public"

# Remove comments if you want to use PHP FPM and your Apache version is older than 2.4
#<IfVersion < 2.4>
#    # Forward PHP requests to FPM
#    SetEnvIf Authorization "(.*)" HTTP_AUTHORIZATION=$1
#    <LocationMatch "^/icingaweb2/(.*.php)$">
#        ProxyPassMatch "fcgi://127.0.0.1:9000//usr/share/icingaweb2/public/$1"
#    </LocationMatch>
#</IfVersion>

<Directory "/usr/share/icingaweb2/public">
    Options SymLinksIfOwnerMatch
    AllowOverride None

    DirectoryIndex index.php

    <IfModule mod_authz_core.c>
        # Apache 2.4
        <RequireAll>
            Require all granted
        </RequireAll>
    </IfModule>

    <IfModule !mod_authz_core.c>
        # Apache 2.2
        Order allow,deny
        Allow from all
    </IfModule>

    SetEnv ICINGAWEB_CONFIGDIR "/etc/icingaweb2"

    EnableSendfile Off

    <IfModule mod_rewrite.c>
        RewriteEngine on
        RewriteBase /icingaweb2/
        RewriteCond %{REQUEST_FILENAME} -s [OR]
        RewriteCond %{REQUEST_FILENAME} -l [OR]
        RewriteCond %{REQUEST_FILENAME} -d
        RewriteRule ^.*$ - [NC,L]
        RewriteRule ^.*$ index.php [NC,L]
    </IfModule>

    <IfModule !mod_rewrite.c>
        DirectoryIndex error_norewrite.html
        ErrorDocument 404 /icingaweb2/error_norewrite.html
    </IfModule>

# Remove comments if you want to use PHP FPM and your Apache version
# is greater than or equal to 2.4
#    <IfVersion >= 2.4>
#        # Forward PHP requests to FPM
#        SetEnvIf Authorization "(.*)" HTTP_AUTHORIZATION=$1
#        <FilesMatch ".php$">
#            SetHandler "proxy:fcgi://127.0.0.1:9000"
#            ErrorDocument 503 /icingaweb2/error_unavailable.html
#        </FilesMatch>
#    </IfVersion>
</Directory>
Restart Apache service to apply new configurations.
systemctl restart httpd.serviceRun Icinga Web 2 Setup
Generate a token for using on the Icinga web 2 setup.
icingacli setup token createOutput:
The newly generated setup token is: da04f0b87929cec8
Open URL http://icinga-2.centlinux.com/icingaweb2/setup in a web browser.
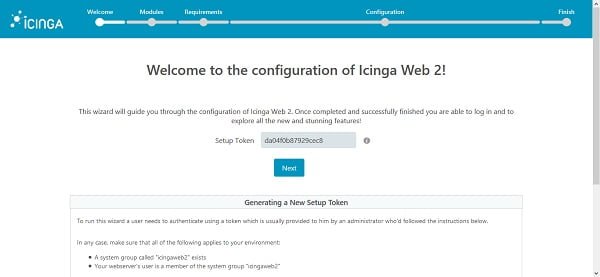
The web setup of Icinga Web 2 has been started.
Enter the token here and click on Next.
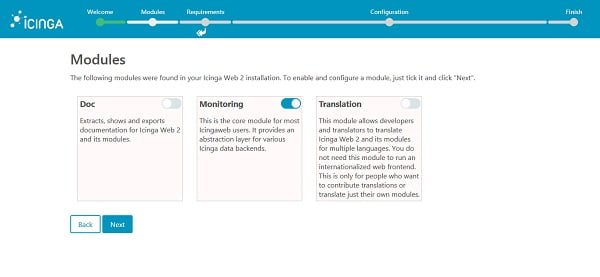
Select the module to enable and click on Next.
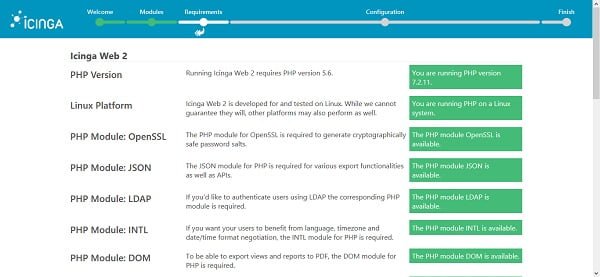
Check and rectify if there is any missing requirement.
Click on Next.
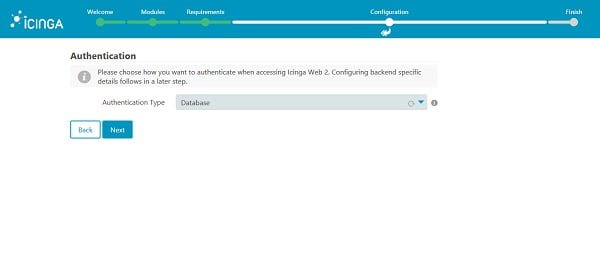
Choose your preferred authentication type. We are using “Database” authentication type.
Click on Next.
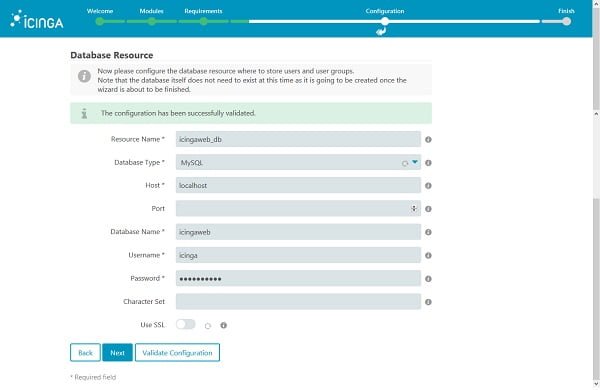
Define parameters to access our MySQL data store and click on Validate configuration.
When done, click on Next.
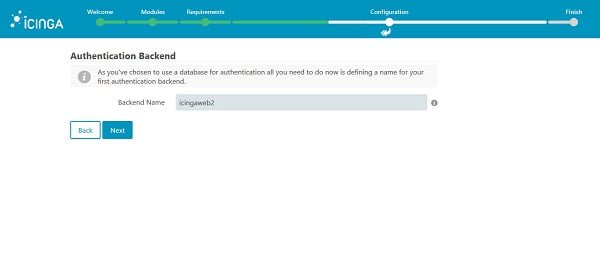
Click on Next.
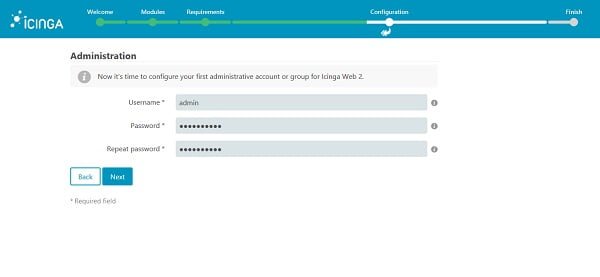
Create an admin user for Icinga Web 2 and click on Next.
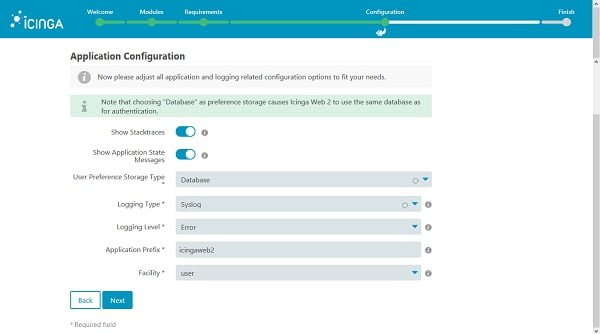
Customize settings according to your requirements and click on Next.
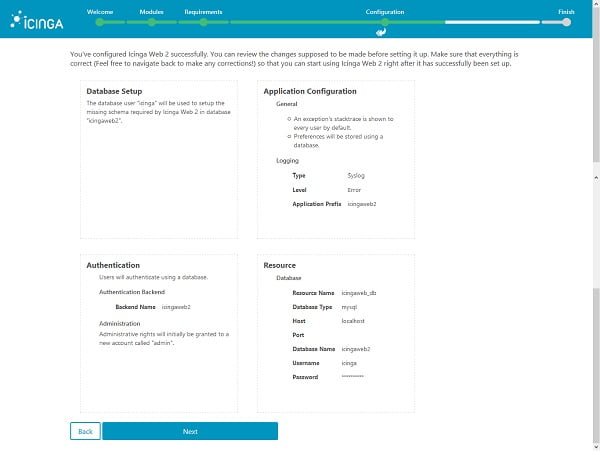
Review the configurations that we have made so far and click on Next.
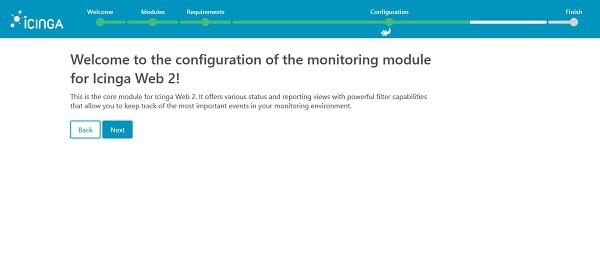
Click on Next.
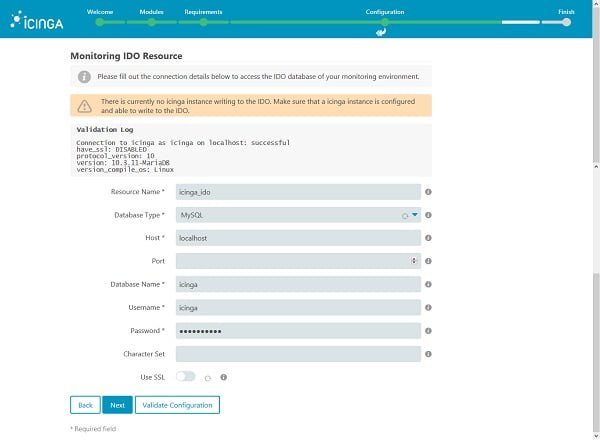
Define parameters to access our MySQL data store and click on Validate configuration.
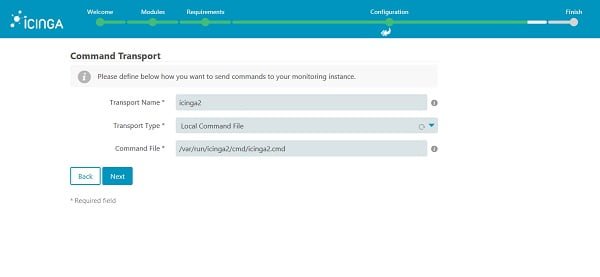
Choose “Local Command File” as Transport Type.
Click on Next.
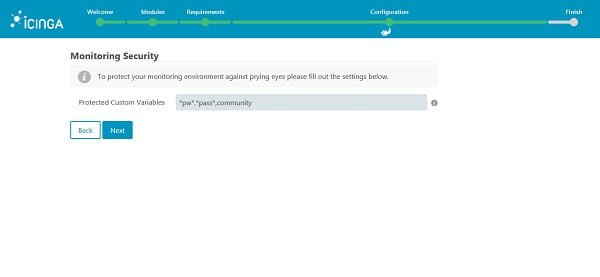
Click on Next.
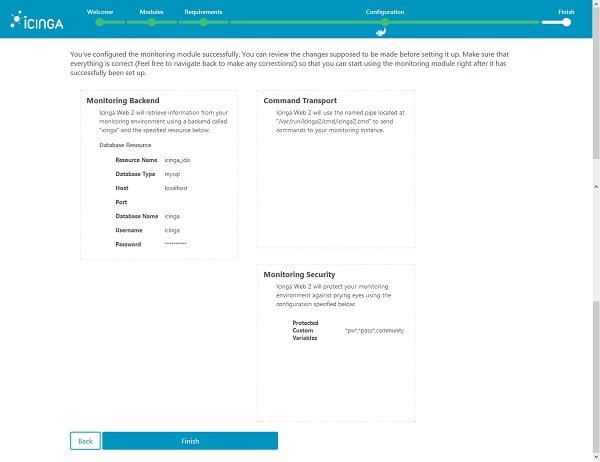
Click on Finish.
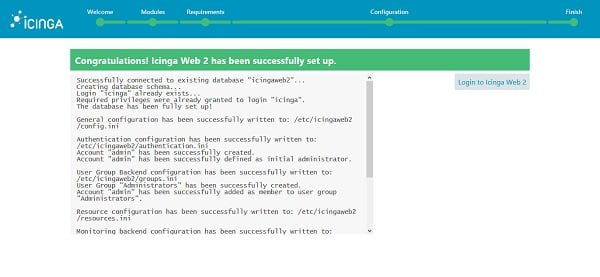
Click on Login.

Login as admin user.
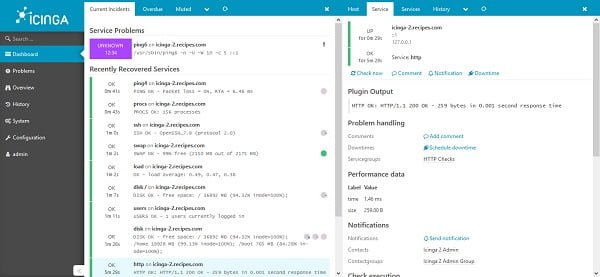
We are now at the dashboard of the Icinga Web 2.
Frequently Asked Questions (FAQs)
1. What is Icinga Web 2, and why is it used?
Icinga Web 2 is a web-based monitoring interface for Icinga 2, providing an intuitive dashboard to visualize system health, alerts, and performance metrics in real-time. It helps administrators manage and monitor their IT infrastructure efficiently.
2. What are the prerequisites for installing Icinga Web 2 on CentOS 8?
Before installing Icinga Web 2, you need a LAMP or LEMP stack (Apache/Nginx, MariaDB/MySQL, and PHP), Icinga 2 installed and configured, and SELinux and firewall rules properly adjusted.
3. How do I access the Icinga Web 2 setup wizard after installation?
Once Icinga Web 2 is installed and the web server is configured, you can access the setup wizard through your web browser by navigating to http://your-server-ip/icingaweb2, where you can complete the installation steps.
4. Do I need to create a database for Icinga Web 2?
Yes, Icinga Web 2 requires a database (MariaDB or MySQL) to store authentication and configuration data. During installation, you will need to create a database and user with the appropriate privileges.
5. How do I secure Icinga Web 2 after installation?
To secure Icinga Web 2, enable SSL/TLS encryption, configure strong authentication methods, restrict web access using firewall rules, and regularly update the software to protect against vulnerabilities.
Final Thoughts
Installing Icinga Web 2 on CentOS 8 enhances your monitoring capabilities by providing a powerful and user-friendly interface. This guide has outlined the necessary steps to get Icinga Web 2 up and running, ensuring you can efficiently monitor and manage your IT infrastructure. By following these instructions, you can leverage the full potential of Icinga Web 2 for real-time monitoring, detailed reporting, and seamless system management.
From setting up scalable AWS solutions to managing complex Linux environments, I’ve got you covered. Visit my Freelancer profile to get started.
Recommended Courses
If you’re serious about mastering IT infrastructure monitoring, the Zabbix Application and Network Monitoring by Sean Bradley course is a must-have resource. This practical training walks you through real-world scenarios to monitor servers, applications, and networks with confidence, making it ideal for system administrators, DevOps engineers, and IT professionals aiming to level up their skills. By enrolling, you’ll gain hands-on knowledge that can save countless hours in troubleshooting and system management. [Click here to check out the course]
Disclaimer: This link is an affiliate link, which means I may earn a small commission at no extra cost to you if you decide to purchase through it. This helps support my blog and allows me to continue creating useful content.

Leave a Reply
You must be logged in to post a comment.