Learn how to install WebLogic 14c on Red Hat Enterprise Linux (RHEL) 8 with this step-by-step guide. Ensure a smooth installation process with detailed instructions and troubleshooting tips. #centlinux #linux #weblogic
Table of Contents
What is Oracle WebLogic Server?
Oracle WebLogic Server is a Java EE (Java Platform, Enterprise Edition) application server developed by Oracle Corporation. It is a robust, scalable, and high-performance platform used for deploying, running, and managing enterprise Java applications. WebLogic Server is a key component of Oracle’s Fusion Middleware portfolio and is widely used in enterprise environments for building and running distributed, multi-tiered, and mission-critical applications.
Key Features of Oracle WebLogic Server
Java EE Compliance:
WebLogic Server fully supports the Java EE (now Jakarta EE) specification, providing a comprehensive set of APIs and services for developing enterprise applications, including servlets, JavaServer Pages (JSP), Enterprise JavaBeans (EJB), and more.
Scalability and Performance:
WebLogic Server is designed to handle high-volume, high-availability workloads. It supports clustering, load balancing, and failover, ensuring that applications can scale to meet growing demands.
Enterprise-Grade Security:
The server provides robust security features, including authentication, authorization, encryption, and auditing, to protect applications and data.
Management and Monitoring:
WebLogic Server includes tools like the WebLogic Server Administration Console and Oracle Enterprise Manager for managing and monitoring applications, servers, and resources. These tools provide real-time insights into performance, resource usage, and system health.
Integration Capabilities:
WebLogic Server integrates seamlessly with other Oracle products, such as Oracle Database, Oracle Coherence, and Oracle SOA Suite, as well as third-party systems and technologies.
Support for Cloud and Microservices:
WebLogic Server supports modern application architectures, including cloud-native development, containerization (e.g., Docker and Kubernetes), and microservices.
High Availability and Reliability:
Features like clustering, session replication, and transaction management ensure that applications remain available and reliable, even in the event of hardware or software failures.
Developer Productivity:
WebLogic Server provides tools and frameworks to simplify application development, testing, and deployment, including support for IDEs like Oracle JDeveloper and Eclipse.
Components of WebLogic Server
- WebLogic Server Instances: The runtime environment where applications are deployed and executed.
- Administration Server: Manages the configuration and deployment of applications across multiple server instances.
- Managed Servers: Host and run applications, managed by the Administration Server.
- Node Manager: A utility for starting, stopping, and monitoring Managed Servers.
- Clusters: Groups of Managed Servers that work together to provide scalability and high availability.
Use Cases
- Enterprise Applications: Hosting large-scale, mission-critical applications such as ERP, CRM, and financial systems.
- Web Applications: Running dynamic, data-driven web applications and services.
- Integration Platforms: Serving as a middleware layer for integrating disparate systems and services.
- Cloud-Native Applications: Supporting modern, cloud-based architectures and microservices.
Short History
Oracle WebLogic Server originated from BEA Systems, which developed the WebLogic Application Server. Oracle acquired BEA Systems in 2008, integrating WebLogic into its Fusion Middleware suite. Since then, Oracle has continued to enhance WebLogic Server, making it one of the most widely used application servers in the enterprise world.
Conclusion
Oracle WebLogic Server is a powerful, enterprise-grade platform for developing, deploying, and managing Java-based applications. Its scalability, reliability, and integration capabilities make it a preferred choice for organizations looking to build and run mission-critical applications in both traditional and modern cloud environments. Whether you’re developing web applications, microservices, or large-scale enterprise systems, WebLogic Server provides the tools and infrastructure needed to succeed.
Environment Specification
We are using a minimal Red Hat Enterprise Linux 8 virtual machine with following specifications.
- CPU – 3.4 Ghz (2 cores)
- Memory – 4 GB
- Storage – 40 GB
- Operating System – Red Hat Enterprise Linux 8.4
- Hostname – weblogic-01.centlinux.com
- IP Address – 192.168.116.238 /24
For this WebLogic 14c installation on RHEL 8, it’s ideal to use a reliable environment for testing and experimentation. Many Linux and middleware professionals prefer setting up a home lab using a Mini PC or a VPS for greater flexibility and dedicated resources. A Mini PC offers a compact, energy-efficient server setup perfect for hands-on learning and continuous testing.
[Limited Time Mini PC Offers – Click and Save!]
Alternatively, a VPS from Hostinger provides scalable cloud-based performance with easy remote access, ideal for running your RHEL 8 server and WebLogic installation without hardware constraints.
[Power Your Projects with Hostinger VPS – Join Here!]
Both options ensure a stable environment for development or evaluation before deploying in production. For convenience, you can find recommended Mini PCs and Hostinger VPS plans through the affiliate links above.
Disclaimer: Some links in this post are affiliate links, which means if you choose to purchase through them, I may earn a small commission at no additional cost to you. This helps support the blog and allows me to continue publishing helpful Linux tutorials.
Update Linux Software Packages
Use a SSH client to connect with weblogic-01.centlinux.com machine as root user.
Update cache for all installed yum repositories.
dnf makecacheUpdate Linux software packages by executing following command at bash prompt.
dnf update -yIt may be possible that, the package manager may update the Linux Kernel. If it happens then, you should reboot your CentOS / RHEL 8 operating system with new Linux Kernel.
rebootAfter reboot, verify the Linux Kernel and Operating System versions.
uname -r
cat /etc/redhat-release
Output:
4.18.0-305.el8.x86_64
Red Hat Enterprise Linux release 8.4 (Ootpa)
Install Java EE on RHEL 8
Oracle WebLogic Server 14c is certified with Java Development Kit (JDK) 8 and 11. Therefore, you can install any of them on your Java EE application server.
Open Oracle JDK 11 Download Page in a web browser. You are also required to login to their website with a Single Sign-On credential.
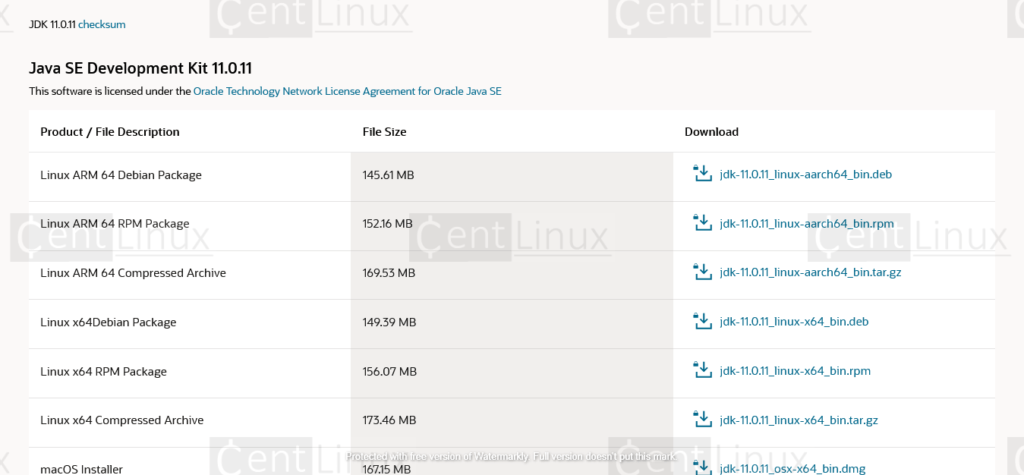
Download your preferred version of JDK installation package and transfer it to your CentOS / Red Hat Linux server.
Now, install the downloaded packages as follows.
dnf localinstall -y jdk-11.0.11_linux-x64_bin.rpmObtain the installation location of your Java software by executing following command.
rpm -ql jdk-11.0.11_linux-x64_bin.rpmSet the JAVA_HOME environment variable in /etc/profile and the current Linux shell.
echo "export JAVA_HOME=/usr/java/jdk-11.0.11" >> /etc/profile
export JAVA_HOME=/usr/java/jdk-11.0.11
Verify the active Java version on your operating system.
java -versionOutput:
java version "11.0.11" 2021-04-20 LTS
Java(TM) SE Runtime Environment 18.9 (build 11.0.11+9-LTS-194)
Java HotSpot(TM) 64-Bit Server VM 18.9 (build 11.0.11+9-LTS-194, mixed mode)
Weblogic 14c Pre-Installation Tasks
Create the necessary operating system users and groups to own WebLogic software.
groupadd -g 1001 oinstall
useradd -u 1001 -g oinstall oracle
passwd oracle
Create a directory to install WebLogic software and set necessary permissions thereon.
mkdir -p /u01/app/oracle/product/14.1.1
chown -R oracle:oinstall /u01/app
chmod -R 775 /u01
Install Weblogic 14c on Linux
Go to Weblogic Download Page by using a web browser.
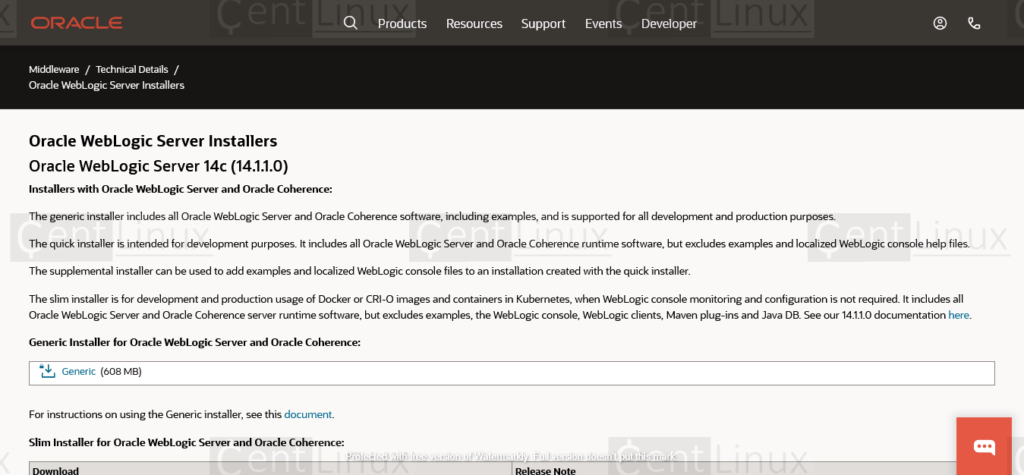
Download the Generic Installer for Oracle Weblogic 14c from above website and transfer it to your Linux server.
The downloaded package is in ZIP format, therefore, you may need the unzip utility to extract it.
Install unzip by using dnf command.
dnf install -y unzipSwitch to oracle user.
su - oracleEdit .bash_profile of oracle user in vim text editor.
vi .bash_profileAdd following environment variables in this file.
export ORACLE_BASE=/u01/app/oracle
export ORACLE_HOME=$ORACLE_BASE/product/14.1.1
export MW_HOME=$ORACLE_HOME
export WLS_HOME=$MW_HOME/wlserver
export DOMAIN_BASE=$ORACLE_HOME/user_projects/domains
export DOMAIN_HOME=$DOMAIN_BASE/base_domain
Execute the .bash_profile script to set environment variables for current Linux shell.
. ~/.bash_profileExecute unzip command to extract Weblogic Generic Installer.
unzip fmw_14.1.1.0.0_wls_lite_Disk1_1of1.zipExecute the Generic Installer JAR file by using following java command.
java -jar fmw_14.1.1.0.0_wls_lite_generic.jarOutput:
Launcher log file is /tmp/OraInstall2021-05-18_07-16-01AM/launcher2021-05-18_07-16-01AM.log.
Extracting the installer . . . . . . . . . . . . . . . . . . . . . . . . . . . . . . . . . . . . . . . . . . . . Done
Checking if CPU speed is above 300 MHz.   Actual 2394.575 MHz    Passed
Checking monitor: must be configured to display at least 256 colors.  Passed
Checking swap space: must be greater than 512 MB.   Actual 2175 MB    Passed
Checking temp space: must be greater than 300 MB.   Actual 30559 MB    Passed

Some system prerequisite checks failed.
You must fulfill these requirements before continuing.

Continue? (yes [y] / no [n]) [n]
y
You have confirmed that the product can be installed on this platform.
Continuing with the installation.


Preparing to launch the Oracle Universal Installer from /tmp/OraInstall2021-05-18_07-16-01AM
If you are installing on a Linux server with no graphical support, then you have to configure X11 forwarding by using PuTTY and XMing to get the graphical output at client console.
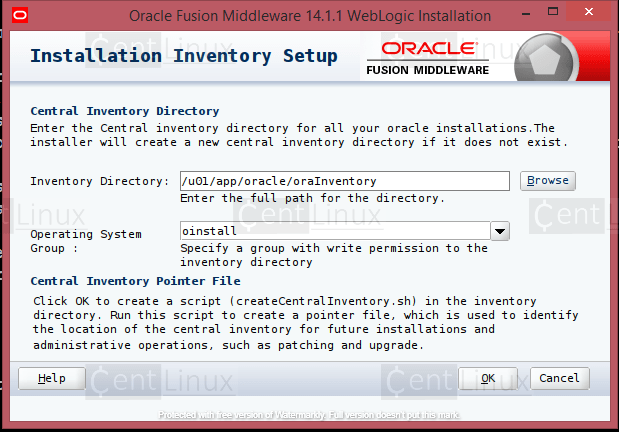
Set the OraInventory directory and click on ‘Next’ button.
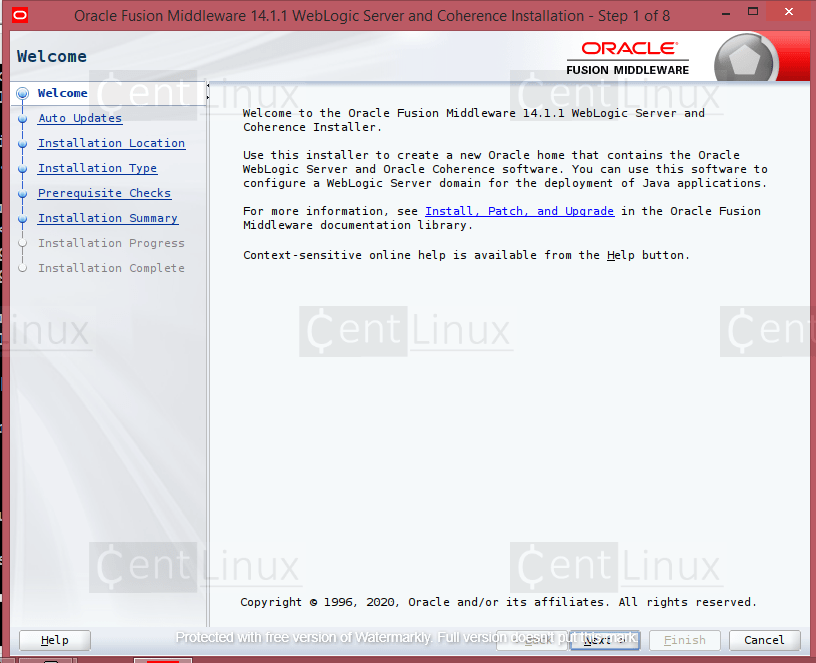
You are on the welcome page. Click on ‘Next’.
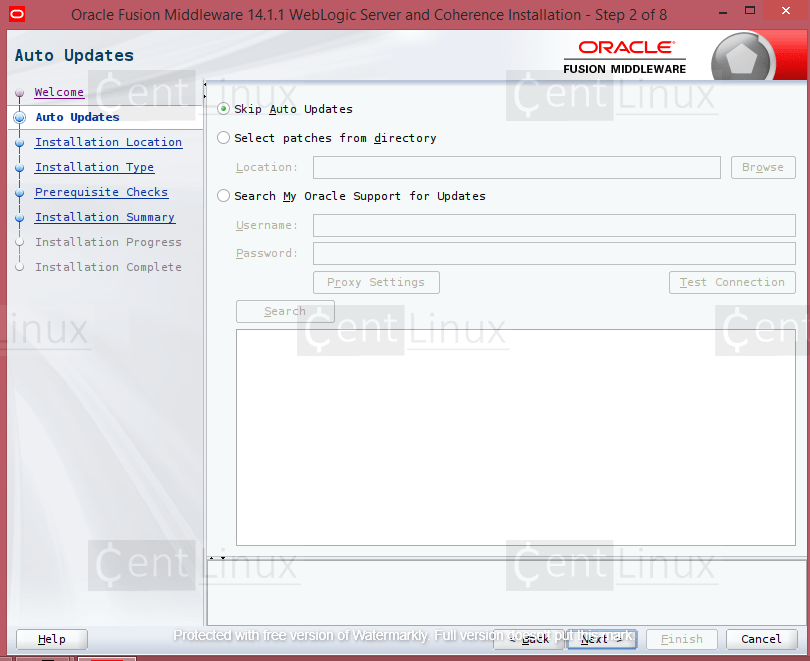
Select ‘Skip Auto Updates’ and click ‘Next’.
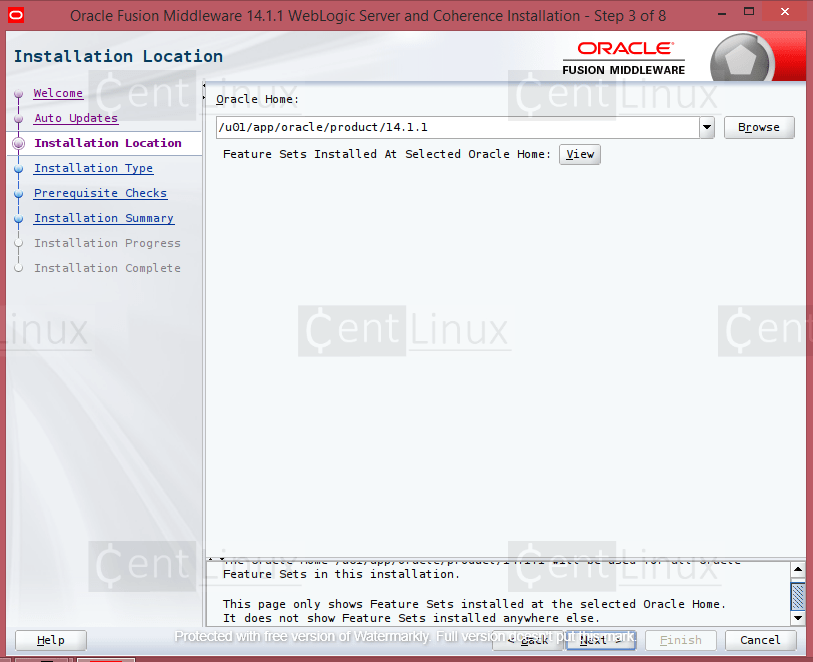
Set the Oracle Home directory here and move to ‘Next’ screen.
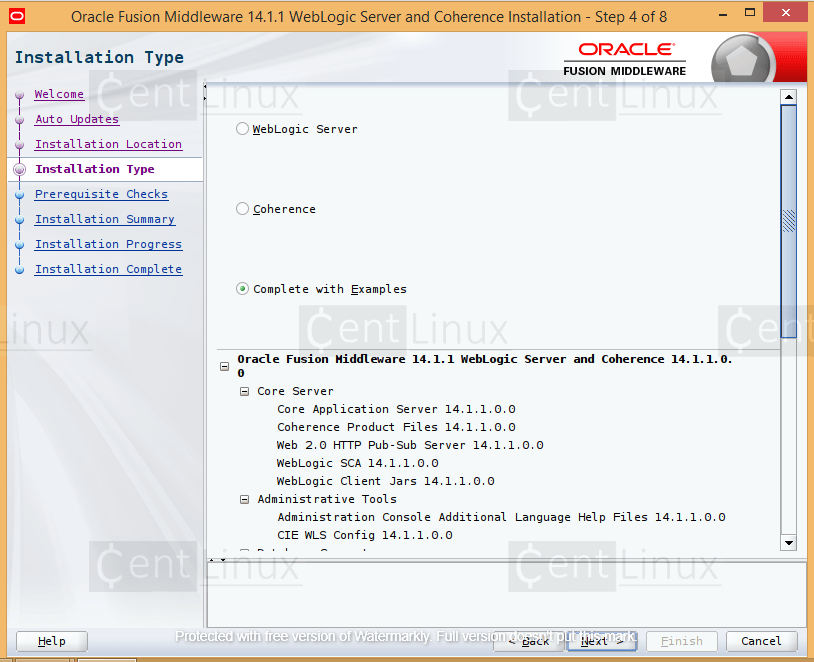
Select the components that you want to install on your application server. You can either install Weblogic Server, Coherence or both.
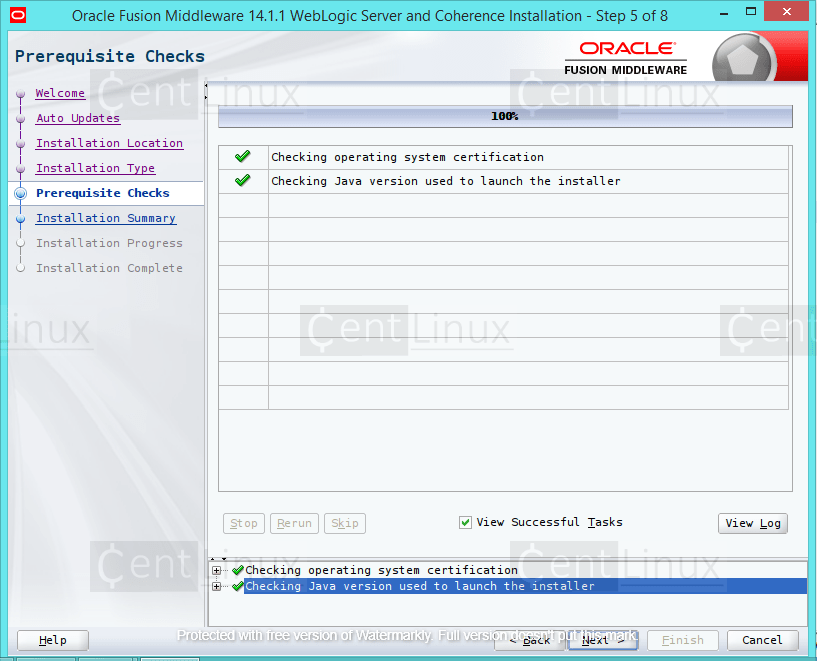
Click on ‘Next’.
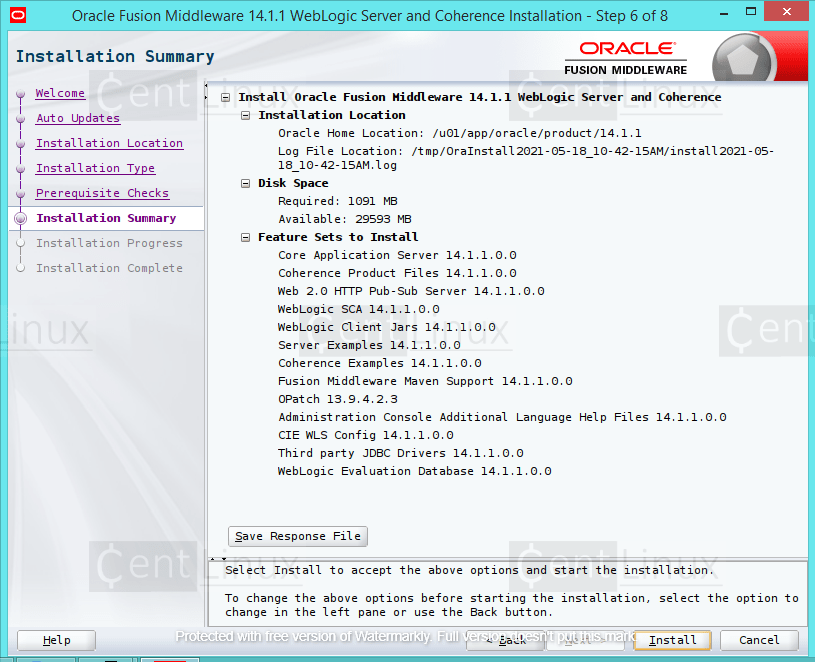
Click on ‘Install’ button.
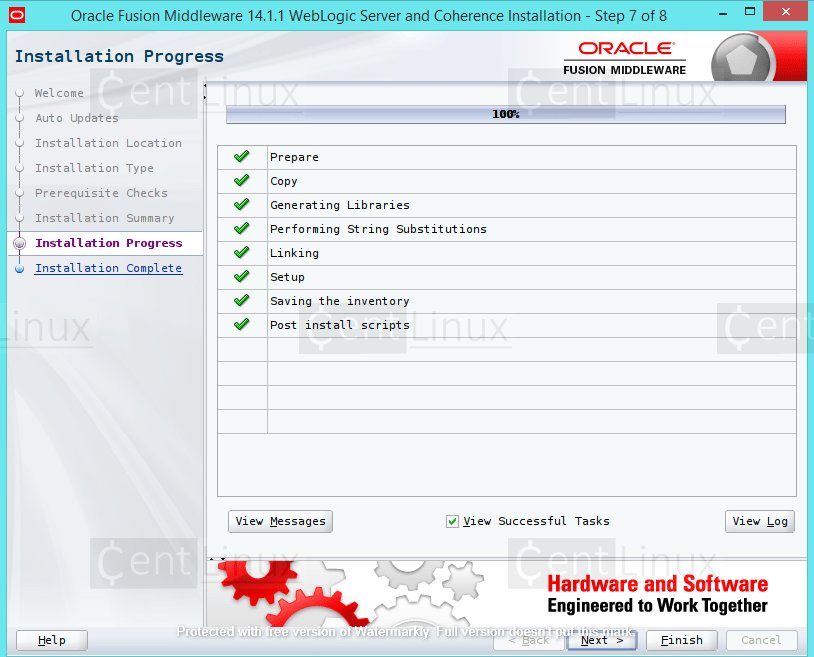
Click on ‘Next’.
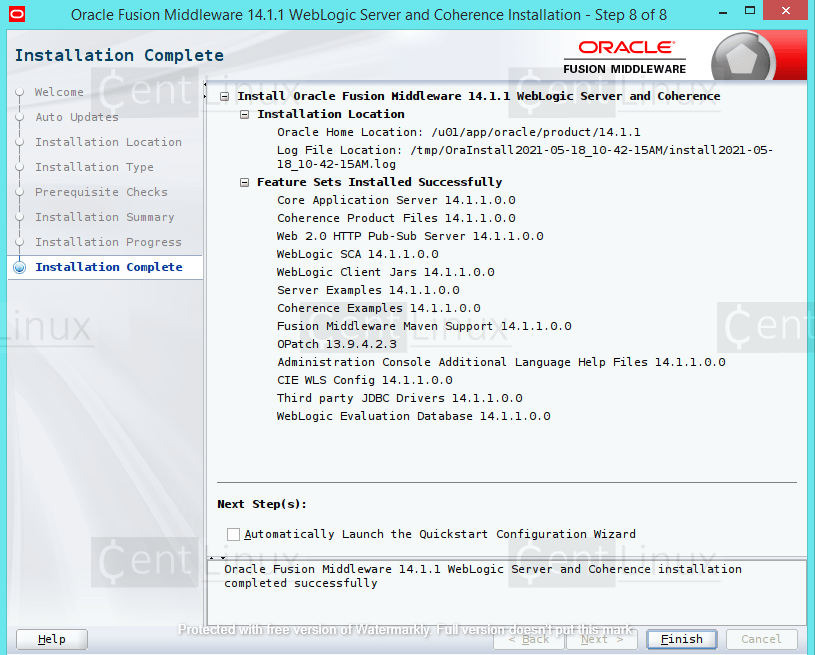
Uncheck ‘Automatically Launch the Quickstart Configuration Wizard’ and click on ‘Finish’.
Post-Installation Configurations
If you are planning to deploy a Fusion Middleware product over your WebLogic application server, then you must skip the configuration step. Because the configurations will be performed by the respective FMW product.
Otherwise, you can configure WebLogic Server by executing following script.
/u01/app/oracle/product/14.1.1/oracle_common/common/bin/config.sh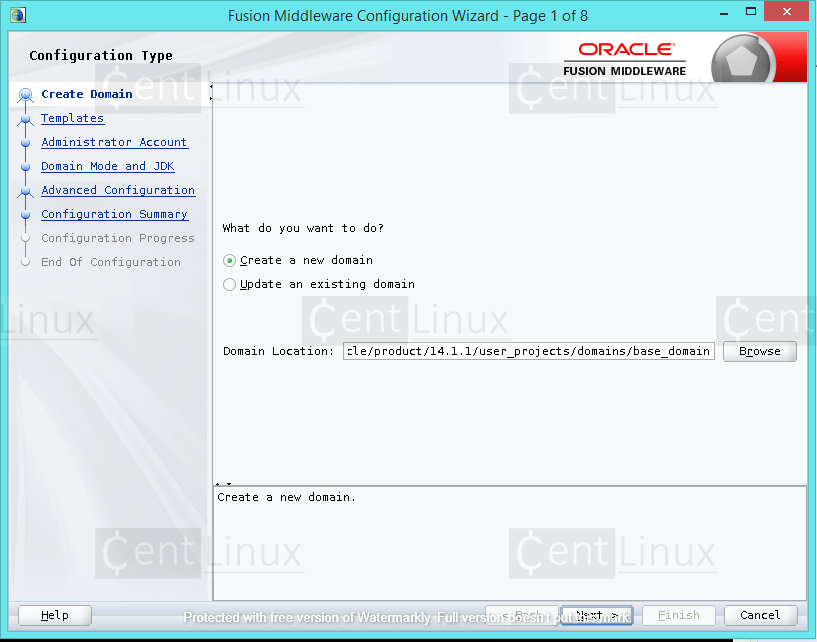
Create a Domain for your Weblogic application server.
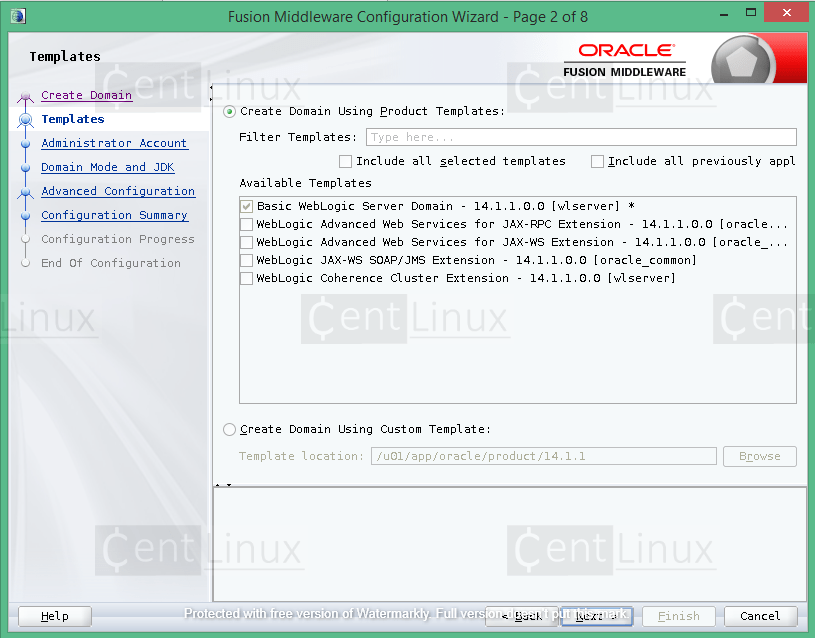
Select a template to create the domain. Click ‘Next’.
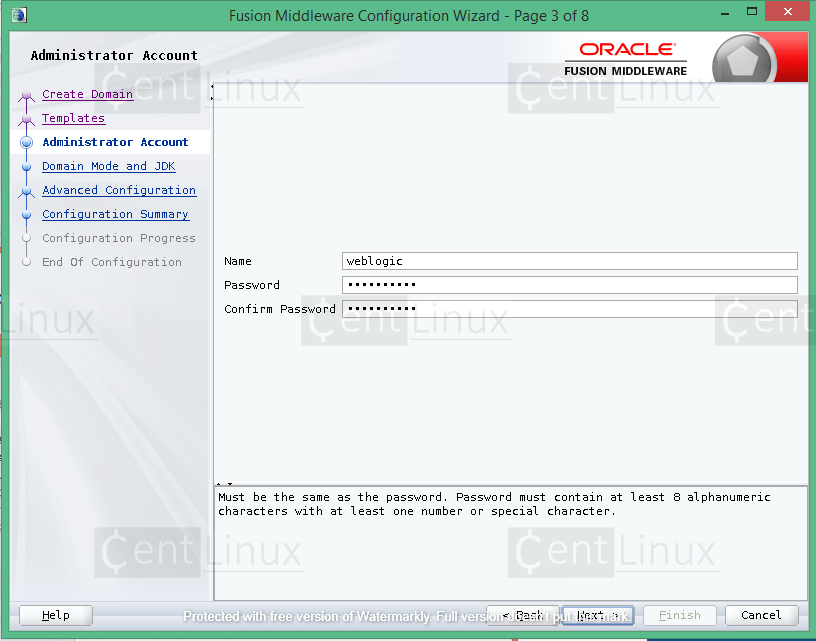
Set a strong password for Weblogic Server administrative user.
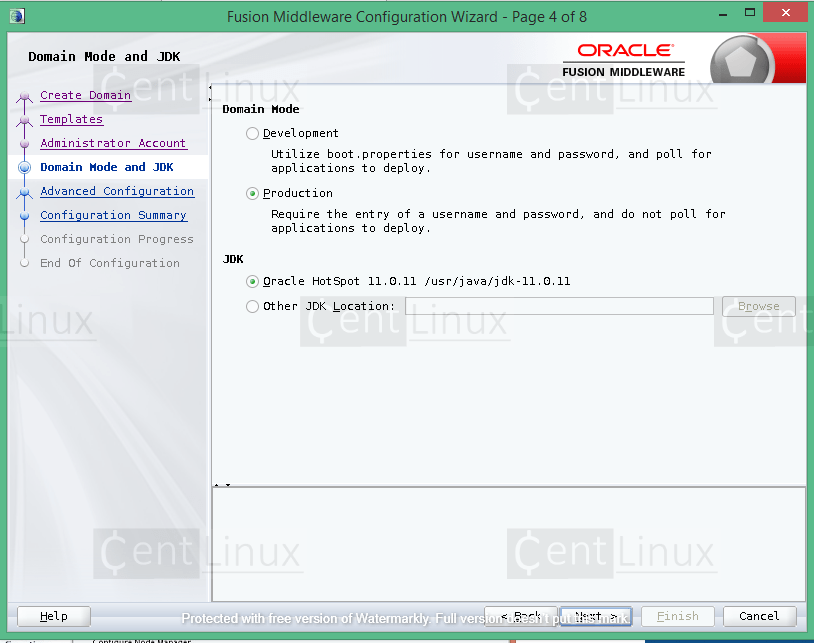
Select the Domain Mode and JDK for your Application Server.
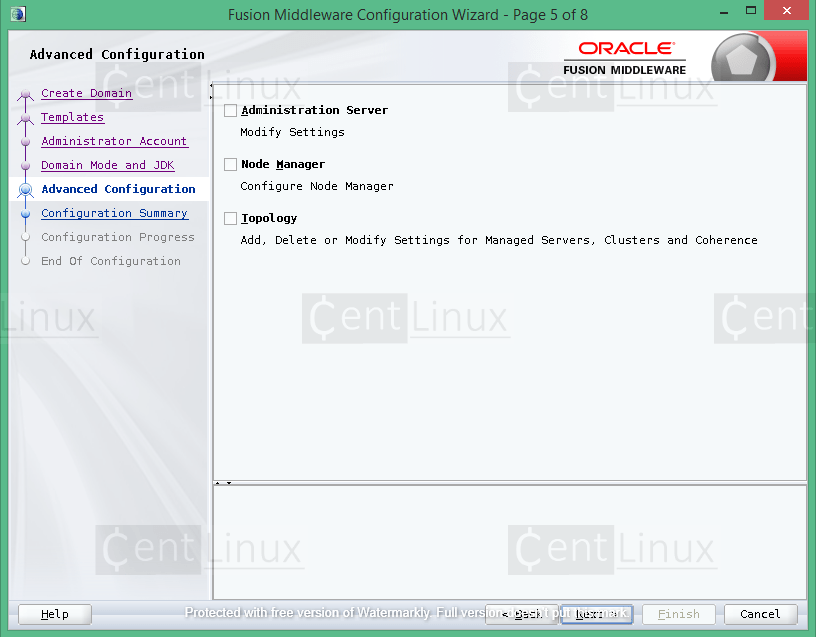
Click on ‘Next’.
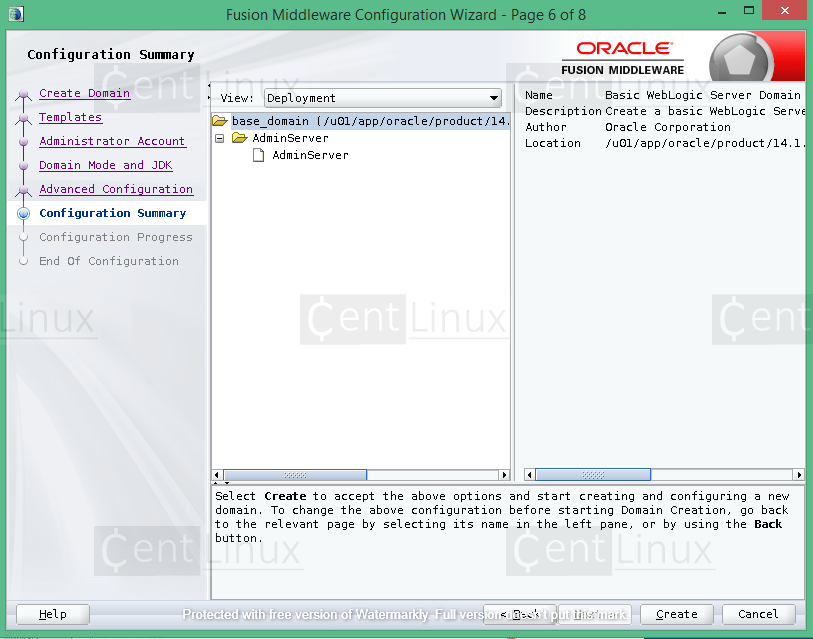
Click on ‘Create’.
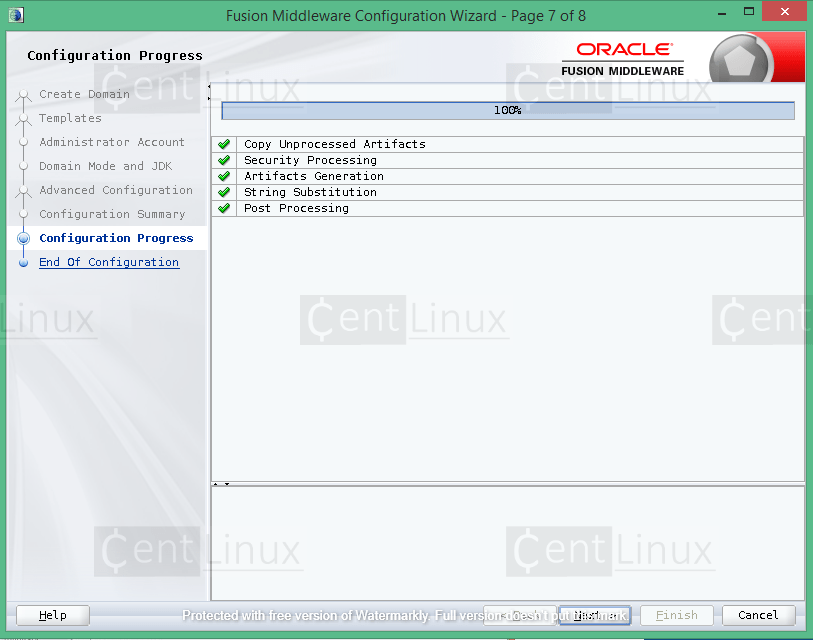
Click on ‘Next’.
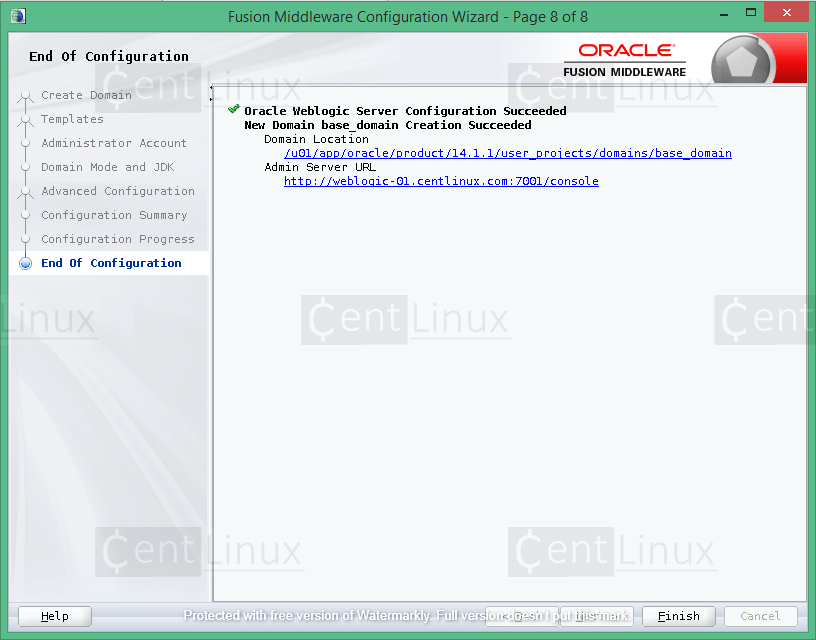
Click on ‘Finish’.
WebLogic Server has been configured successfully.
To grant access of your application server to network clients, allow the default service port of WebLogic server in Linux firewall.
firewall-cmd --permanent --add-port=7001/tcp
firewall-cmd --reload
Whenever you start the Weblogic service, it will always ask you for a username / password.
To automate it, you can define the credentials in boot.properties file.
mkdir -p $DOMAIN_HOME/servers/AdminServer/security/
echo "username=weblogic" > $DOMAIN_HOME/servers/AdminServer/security/boot.properties
echo "password=weblogic123" >> $DOMAIN_HOME/servers/AdminServer/security/boot.properties
Start the Oracle Weblogic Server 14c by executing following script.
$DOMAIN_HOME/startWebLogic.sh &Browse URL https://weblogic-01.centlinux.com:7001/console in a web browser e.g. Google Chrome.
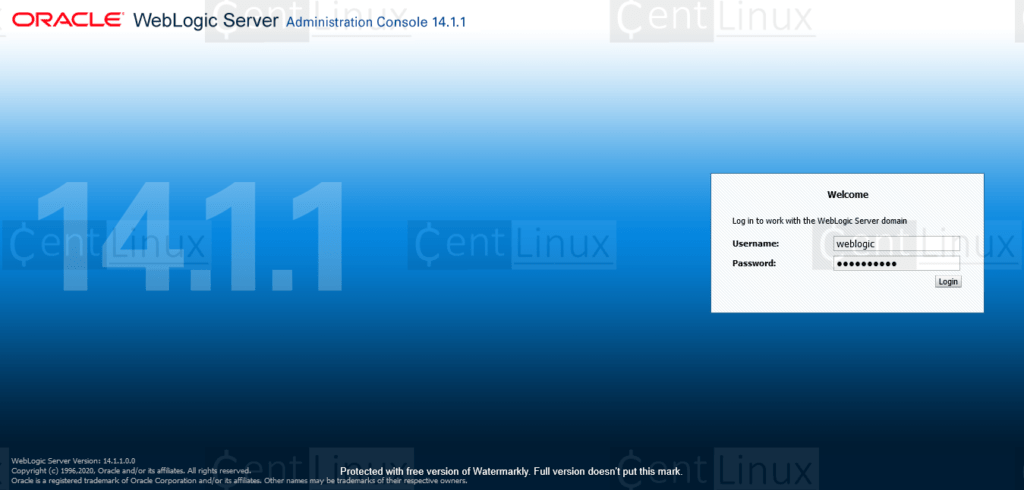
Login as Administrative user.
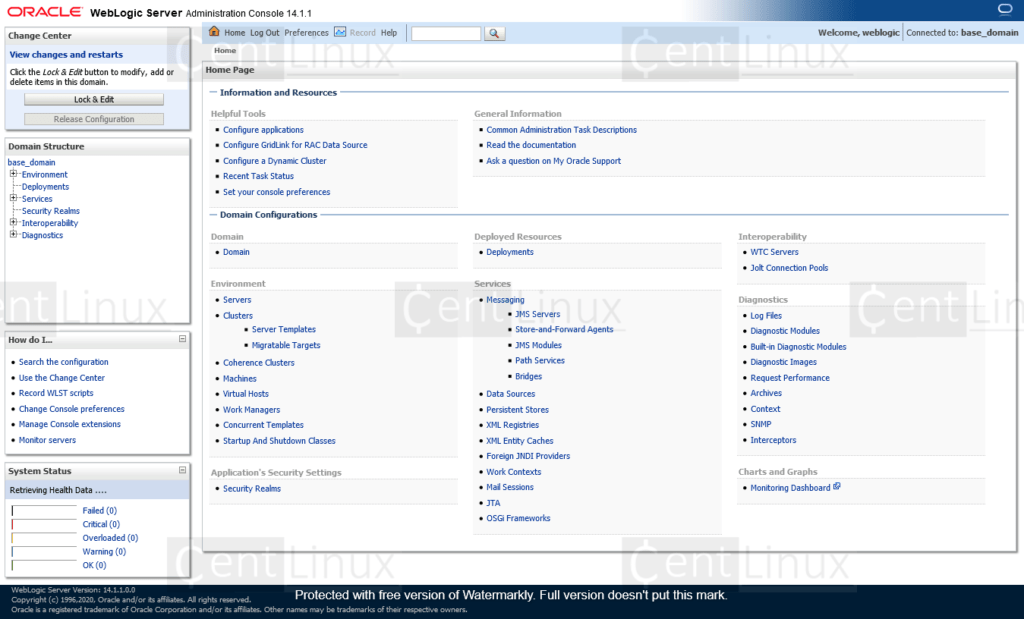
You have reached at the Weblogic Administrative Console.
Read Also: How to install Weblogic 12c on CentOS 8
Frequently Asked Questions (FAQs)
1. What are the key components of WebLogic Server?
WebLogic’s main components include:
- Admin Server (manages the domain)
- Managed Servers (run applications)
- Node Manager (handles server lifecycle)
- Domain & Cluster (logical groupings for scalability).
2. How do I start and stop WebLogic Server?
- Start: Run
startWebLogic.sh(Linux) orstartWebLogic.cmd(Windows) from the domain’sbindirectory. - Stop: Use
stopWebLogic.sh(Linux) orstopWebLogic.cmd(Windows) or stop it via the Admin Console.
3. What is the WebLogic Admin Console?
The Admin Console is a web-based GUI (typically at http://localhost:7001/console) used to configure domains, servers, deployments, and monitor WebLogic instances.
4. What is a WebLogic Domain?
A domain is a logically related group of WebLogic resources (servers, clusters, applications) managed by a central Admin Server. It includes a configuration file (config.xml).
5. How do I deploy an application in WebLogic?
You can deploy via:
- Admin Console (GUI)
- Command line (using
weblogic.Deployer) - Auto-deploy (dropping files into the
autodeploydirectory in development mode).
Final Thoughts
If you found this guide on installing Oracle WebLogic Server 14c on RHEL 8 helpful and need further assistance, consider hiring a professional. I offer comprehensive installation, configuration, and troubleshooting services for WebLogic Server and other enterprise technologies.
Whether you need cloud optimization, server management, or automation, I provide comprehensive AWS and Linux services. Hire me to elevate your systems.
Let’s ensure your enterprise applications are up and running smoothly!
Recommended Courses
If you’re serious about mastering Oracle middleware, Oracle WebLogic 12c for Administrators by Chris Parent is an invaluable resource to add to your library. This book takes a hands-on approach to installing, configuring, and managing Oracle WebLogic 12c, making it perfect for both beginners and seasoned administrators who want to sharpen their skills.
Whether you’re preparing for a certification, handling enterprise deployments, or simply aiming to boost your career opportunities, this guide provides practical insights and step-by-step instructions that you won’t find in generic documentation.
Disclaimer: This post may contain affiliate links. If you purchase through these links, I may earn a small commission at no extra cost to you. This helps support the site and allows me to keep creating useful content.

Leave a Reply
You must be logged in to post a comment.