Learn how to install WildFly on CentOS 8 with our step-by-step guide. Set up this powerful Java application server easily and efficiently on your CentOS 8 system. #centlinux #linux #wildfly
Table of Contents
What is JBoss WildFly?
JBoss WildFly, commonly referred to as just WildFly, is an open-source application server developed by Red Hat. It is designed to deploy and manage Java-based web applications and enterprise applications. Here are some key features and aspects of WildFly:
- Java EE Implementation: WildFly provides a full implementation of the Java Enterprise Edition (Java EE) specifications, allowing developers to build robust and scalable enterprise applications.
- Modularity: It uses a highly modular architecture based on the JBoss Modules system, which allows for a lightweight and flexible deployment. Only the necessary modules are loaded, improving startup times and reducing resource usage.
- High Performance: WildFly is optimized for high performance and can handle a large number of concurrent requests efficiently.
- Management and Administration: It offers a powerful management console and a command-line interface (CLI) for configuring, managing, and monitoring the server and deployed applications.
- Clustering and Scalability: WildFly supports clustering, which allows for load balancing and failover capabilities, enhancing the scalability and reliability of applications.
- Developer Tools: It integrates with various development tools and environments, such as JBoss Developer Studio (now known as Red Hat CodeReady Studio), making it easier for developers to build and deploy applications.
- Community and Enterprise Versions: WildFly is the community version of the JBoss application server. For enterprise use, Red Hat offers JBoss EAP (Enterprise Application Platform), which comes with professional support and additional features tailored for enterprise environments.
Overall, WildFly is known for its flexibility, performance, and adherence to Java EE standards, making it a popular choice for developers and organizations building Java-based applications.
WildFly vs Tomcat
WildFly and Apache Tomcat are both popular Java-based application servers, but they serve different purposes and cater to different needs. Here’s a comparison to highlight their key differences:
Purpose and Scope
- WildFly:
- Full implementation of the Java Enterprise Edition (Java EE, now Jakarta EE) specifications.
- Supports a wide range of enterprise features like EJB (Enterprise JavaBeans), JMS (Java Message Service), JPA (Java Persistence API), JAX-RS (Java API for RESTful Web Services), and more.
- Suitable for large-scale enterprise applications requiring extensive functionality.
- Tomcat:
- A lightweight servlet container that implements the Java Servlet, JavaServer Pages (JSP), and WebSocket technologies.
- Primarily used for web applications that require only the core web technologies.
- Ideal for simpler web applications or when a full-fledged application server is not needed.
Features
- WildFly:
- Modular architecture with a focus on performance and flexibility.
- Advanced management tools including a web-based console and a CLI.
- Built-in support for clustering, load balancing, and high availability.
- Tomcat:
- Simplicity and ease of use with a focus on lightweight deployments.
- Basic management tools, with a straightforward configuration process.
- Less out-of-the-box support for clustering and advanced enterprise features, but can be extended with additional components.
Performance
- WildFly:
- Optimized for high performance in enterprise environments.
- Can handle complex applications with high concurrency requirements efficiently.
- Tomcat:
- Known for its speed and efficiency in handling web applications.
- Performs well in scenarios where only servlet and JSP support is needed.
Use Cases
- WildFly:
- Enterprise-grade applications requiring a full suite of Java EE capabilities.
- Applications needing advanced transaction management, messaging, and persistence.
- Organizations that require robust management and monitoring tools.
- Tomcat:
- Lightweight web applications that do not need the full Java EE stack.
- Development and testing environments due to its simplicity and fast startup times.
- Scenarios where a lightweight and easy-to-configure server is preferred.
Community and Support
- WildFly:
- Strong community support with frequent updates and a wealth of resources.
- Backed by Red Hat, with the option to upgrade to JBoss EAP for enterprise support.
- Tomcat:
- Large and active community with extensive documentation.
- Part of the Apache Software Foundation, benefiting from a broad open-source ecosystem.
Summary
- Choose WildFly if you need a full-featured Java EE application server with extensive enterprise capabilities, advanced management tools, and support for large-scale, complex applications.
- Choose Tomcat if you need a lightweight, fast, and easy-to-use servlet container for web applications that do not require the full Java EE stack.
Recommended Books: Red Hat RHCE 8 (EX294) Cert Guide (Certification Guide) 1st Edition (PAID LINK)
Recommended Online Training: Learn Bash Shell in Linux for Beginners

Environment Specification
We are using a minimal Red Hat Enterprise Linux 8 virtual machine with following specifications.
- CPU – 3.4 Ghz (2 cores)
- Memory – 2 GB
- Storage – 20 GB
- Operating System – Red Hat Enterprise Linux 8.5
- Hostname – wildfly-01.centlinux.com
- IP Address – 192.168.116.243 /24
Read Also: How to install WildFly on CentOS 7
Update your Linux Operating System
Connect with wildfly-01.centlinux.com as root user by using a ssh client.
Build cache for enabled yum repositories on your Linux server.
# dnf makecache
Execute following command to update your Linux operating system.
# dnf update -y
If the above command updates your Linux Kernel then reboot your Linux server with the newly installed Kernel.
# reboot
After reboot, verify the version of Linux Kernel and Linux operating system.
# uname -r
4.18.0-348.7.1.el8_5.x86_64

# cat /etc/redhat-release
Red Hat Enterprise Linux release 8.5 (Ootpa)
Install WildFly Prerequisites
JBoss WildFly is written in Java programming language. Therefore, it requires Java Runtime Environment for execution.
You can easily install OpenJDK, that is available through standard yum repositories.
# dnf install -y java-11-openjdk-devel
After installation, verify that the java command is available by querying its version as follows.
# java --version
openjdk 11.0.13 2021-10-19 LTS
OpenJDK Runtime Environment 18.9 (build 11.0.13+8-LTS)
OpenJDK 64-Bit Server VM 18.9 (build 11.0.13+8-LTS, mixed mode, sharing)
You may also need wget command to download WildFly installation file. Therefore, install it now by using dnf command.
# dnf install -y wget
Create Linux User and Group
Create a Linux user and group to own WildFly software and processes.
# groupadd -r wildfly
# useradd -r -g wildfly -d /opt/wildfly -s /sbin/nologin wildfly
How to install WildFly on CentOS 8
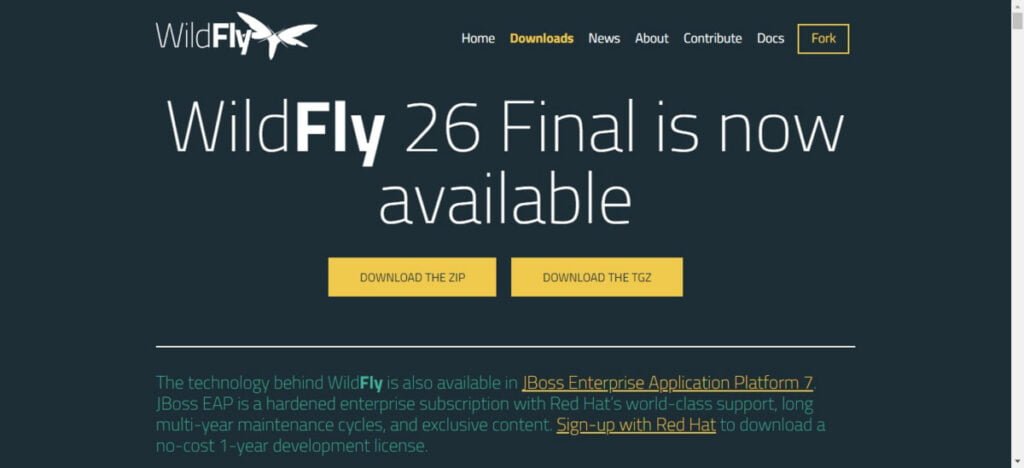
WildFly is a free and open source software. Therefore, you can download latest WildFly software from their official website.

Copy the URL of your required version of WildFly software and use it with wget command to download WildFly straight from the Linux CLI.
# wget https://github.com/wildfly/wildfly/releases/download/26.0.0.Final/wildfly-26.0.0.Final.tar.gz
--2022-01-07 22:40:20--  https://github.com/wildfly/wildfly/releases/download/26.0.0.Final/wildfly-26.0.0.Final.tar.gz
Resolving github.com (github.com)... 13.234.176.102
Connecting to github.com (github.com)|13.234.176.102|:443... connected.
HTTP request sent, awaiting response... 200 OK
Length: 217583886 (208M) [application/octet-stream]
Saving to: ‘wildfly-26.0.0.Final.tar.gz’

wildfly-26.0.0.Fina 100%[===================>] 207.50M  1.05MB/s    in 3m 23s

2022-01-07 22:43:45 (1.02 MB/s) - ‘wildfly-26.0.0.Final.tar.gz’ saved [217583886/217583886]
We have down TGZ file, howerver you can also download ZIP file of WildFly software.
Execute following tar command to extract WildFly TGZ file to the desired location.
# tar xf wildfly-26.0.0.Final.tar.gz -C /opt/
Create a soft link of WildFly software directory for convenience.
# ln -s /opt/wildfly-26.0.0.Final/ /opt/wildfly
Adjust ownership of extracted files as follows.
# chown -RH wildfly: /opt/wildfly
Create a directory for WildFly configuration files.
# mkdir -p /etc/wildfly
Configure WildFly Server
WildFly software directory contains sample configuration files. You can use these configuration files to configure a Systemd service for your JBoss WildFly server.
# cp /opt/wildfly/docs/contrib/scripts/systemd/wildfly.conf /etc/wildfly/
# cp /opt/wildfly/docs/contrib/scripts/systemd/wildfly.service /etc/systemd/system/
# cp /opt/wildfly/docs/contrib/scripts/systemd/launch.sh /opt/wildfly/bin/
Grant execution privileges on WildFly scripts.
# chmod +x /opt/wildfly/bin/*.sh
Enable and start WildFly service.
# systemctl daemon-reload
# systemctl enable --now wildfly.service
Created symlink /etc/systemd/system/multi-user.target.wants/wildfly.service → /etc/systemd/system/wildfly.service.
Configure Linux Firewall
WildFly default service port is 8080/tcp and the Management Console uses 9990/tcp.
Therefore, you are required to allow these service ports in Linux Firewall to make the WildFly services accessible across the network.
# firewall-cmd --permanent --add-port={8080,9990}/tcp
success
# firewall-cmd --reload
success
Configure WildFly Web Management Console
WildFly management console does not has a default user. Therefore, you must create an Admin user for using WildFly management console.
You can execute add-user.sh script to create a user for WildFly management console.
# /opt/wildfly/bin/add-user.sh

What type of user do you wish to add?
 a) Management User (mgmt-users.properties)
 b) Application User (application-users.properties)
(a):

Enter the details of the new user to add.
Using realm 'ManagementRealm' as discovered from the existing property files.
Username : centlinux
Password recommendations are listed below. To modify these restrictions edit the add-user.properties configuration file.
 - The password should be different from the username
 - The password should not be one of the following restricted values {root, admin, administrator}
 - The password should contain at least 8 characters, 1 alphabetic character(s), 1 digit(s), 1 non-alphanumeric symbol(s)
Password :
Re-enter Password :
What groups do you want this user to belong to? (Please enter a comma separated list, or leave blank for none)[  ]:
About to add user 'centlinux' for realm 'ManagementRealm'
Is this correct yes/no? yes
Added user 'centlinux' to file '/opt/wildfly-26.0.0.Final/standalone/configuration/mgmt-users.properties'
Added user 'centlinux' to file '/opt/wildfly-26.0.0.Final/domain/configuration/mgmt-users.properties'
Added user 'centlinux' with groups  to file '/opt/wildfly-26.0.0.Final/standalone/configuration/mgmt-groups.properties'
Added user 'centlinux' with groups  to file '/opt/wildfly-26.0.0.Final/domain/configuration/mgmt-groups.properties'
Is this new user going to be used for one AS process to connect to another AS process?
e.g. for a slave host controller connecting to the master or for a Remoting connection for server to server Jakarta Enterprise Beans calls.
yes/no? yes
To represent the user add the following to the server-identities definition <secret value="QWhtZXJAMTIzNA==" />
WildFly management console is by default configured on localhost (127.0.0.1) interface. Therefore, it is not accessible across the network.
You need to edit following configuration file to configure WildFly management console interface.
Use vim text editor to edit standalone.xml file.
# vi /opt/wildfly/standalone/configuration/standalone.xml
Locate following line in this file.
<socket-binding name="management-http" interface="management" port="${jboss.management.http.port:9990}"/>Remove interface=”management” then save and exit from vim text editor.
<socket-binding name="management-http" port="${jboss.management.http.port:9990}"/>Restart WildFly service to apply changes.
# systemctl restart wildfly.service
Open http://wildfly-01.centlinux.com:8080 in a web browser.

Click on “Administration Console” and login as the admin user that you have created in previous steps.

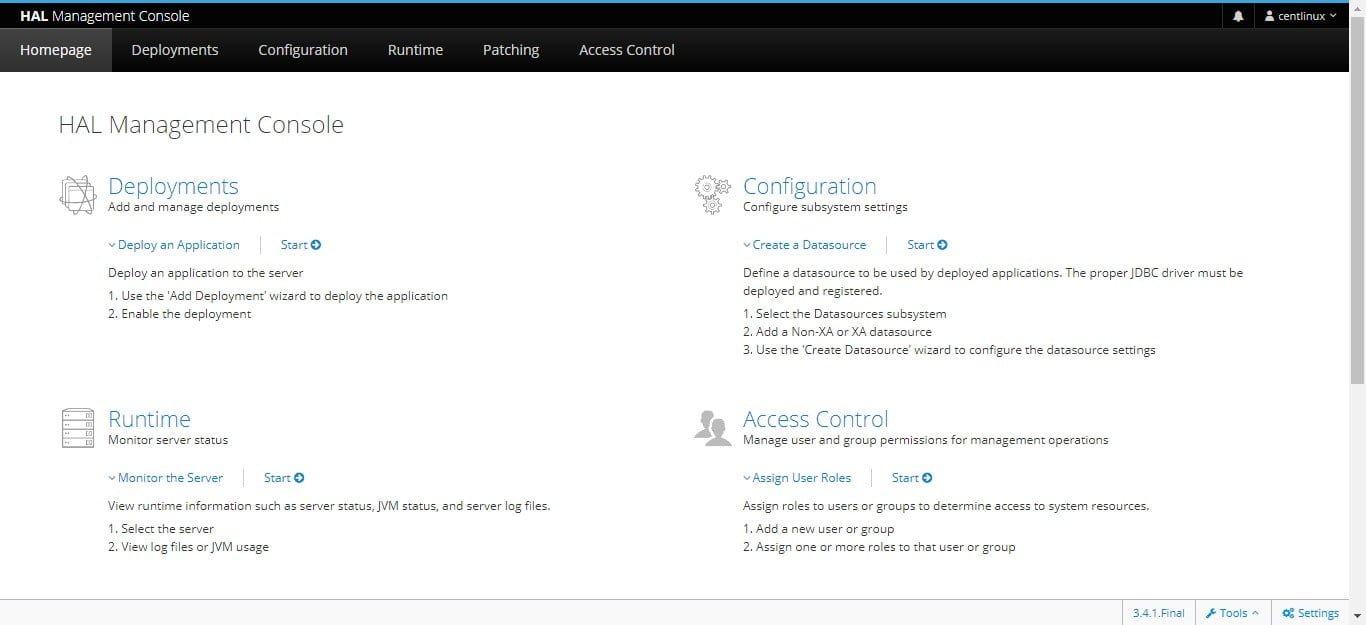
After successful login, you have reached at the dashboard of WildFly Management Console.
Final Thoughts
Installing WildFly on CentOS 8 can significantly enhance your ability to deploy and manage Java-based applications efficiently. With the right steps and guidance, the process can be straightforward and rewarding. If you need personalized assistance or a detailed guide tailored to your specific needs, I offer professional services to help you get WildFly up and running smoothly.
For expert help on installing WildFly on CentOS 8, check out my Fiverr service where I provide comprehensive support and step-by-step guidance to ensure a successful setup. Let’s make your deployment process hassle-free and efficient!