
Use Kubernetes Network Policy to Secure your Kubernetes Pods. Learn how to restrict pod-to-pod traffic, block unauthorized access, and enforce least-privilege networking with practical examples. Start securing your workloads today before leaving your cluster exposed. #CentLinux #Kubernetes #CyberSecurity
Table of Contents
How to Create a Kubernetes Network Policy to Restrict Pod-to-Pod Traffic
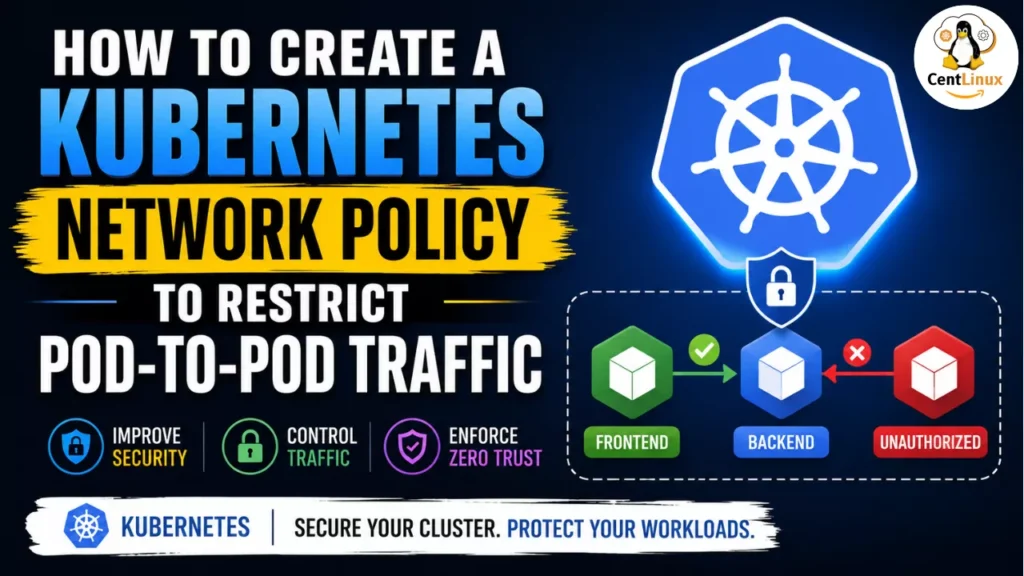
By default, Kubernetes allows unrestricted communication between all pods within a cluster. While this makes initial deployments simple, it is not a secure configuration for production environments. In real-world Kubernetes environments, I’ve found that overly permissive east-west traffic is one of the most common security gaps, allowing workloads to communicate far more freely than they should. Kubernetes Network Policies address this by enabling a zero-trust networking model, where you explicitly define which pods are allowed to communicate with each other. (Visit Kubernetes Official website for more information)
In this tutorial, you’ll create three pods, verify unrestricted connectivity, apply a Network Policy, and observe how network access changes. By the end, you’ll have a practical understanding of how Kubernetes Network Policies reduce the attack surface and improve workload isolation in a Kubernetes cluster.
Prerequisites
- A Kubernetes cluster with a CNI plugin that supports Network Policies (such as Calico, Cilium, Antrea, or Weave Net).
kubectlconfigured to access your cluster.- Basic familiarity with Kubernetes Pods and Services.
Step 1. Create a dedicated namespace
Create a separate namespace for this demonstration.
kubectl create namespace centlinuxPurpose
Using a dedicated namespace keeps the lab isolated from other workloads running in the cluster.
Verify
kubectl get nsStep 2. Switch the current context to the namespace
Instead of specifying the namespace with every command, configure the current context.
kubectl config set-context --current --namespace=centlinuxPurpose
This updates your kubeconfig so that all subsequent kubectl commands execute within the centlinux namespace.
Verify
kubectl config view --minify | grep namespaceExpected output:
namespace: centlinuxStep 3. Create the application pods
Deploy three NGINX pods with different labels.
kubectl run frontend --image=nginx:1.26 --labels=role=frontend
kubectl run backend --image=nginx:1.26 --labels=role=backend
kubectl run attacker --image=nginx:1.26 --labels=role=attacker
Purpose
Each pod represents a different application role.
- frontend – legitimate client
- backend – application server
- attacker – unauthorized client
The labels are important because Network Policies use labels to select pods.
Verify
kubectl get pods --show-labelsExample output:
NAME        READY   STATUS
frontend    1/1     Running
backend     1/1     Running
attacker    1/1     Running
Step 4. Expose the backend pod
Create a Service for the backend pod.
kubectl expose pod backend --port=80 --target-port=80Purpose
The Service provides a stable DNS name (backend) that other pods can use instead of connecting directly to the pod IP.
Verify
kubectl get svcExpected:
NAME      TYPE        CLUSTER-IP
backend   ClusterIP   ...
Step 5. Test connectivity before applying a Network Policy
From the frontend pod:
kubectl exec frontend -- curl backendFrom the attacker pod:
kubectl exec attacker -- curl backendPurpose
At this point, no Network Policies exist.
Kubernetes allows all pod-to-pod communication by default, so both requests should succeed.
Expected output:
Welcome to nginx!This confirms that both pods can access the backend service.
Step 6. Create a Network Policy
Create a file named backend-policy.yaml.
apiVersion: networking.k8s.io/v1
kind: NetworkPolicy
metadata:
  name: backend-policy
spec:
  podSelector:
    matchLabels:
      role: backend
  policyTypes:
  - Ingress
  - Egress
  ingress:
  - from:
    - podSelector:
        matchLabels:
          role: frontend
    ports:
    - port: 80
      protocol: TCP
  egress:
  - to: []
    ports:
    - port: 53
Apply it.
kubectl apply -f backend-policy.yamlAlso Read: KYAML: Complete Guide to Kubernetes YAML
Understanding the Network Policy
Pod Selector
podSelector:
  matchLabels:
    role: backend
Only the backend pod is protected by this policy.
Policy Types
policyTypes:
- Ingress
- Egress
This tells Kubernetes to enforce both:
- Incoming traffic rules
- Outgoing traffic rules
Ingress Rule
ingress:
- from:
  - podSelector:
      matchLabels:
        role: frontend
Only pods labeled:
role=frontendare allowed to communicate with the backend.
The attacker pod is not included.
Allowed Port
ports:
- port: 80
  protocol: TCP
Only HTTP traffic on TCP port 80 is permitted.
Egress Rule
egress:
- to: []
  ports:
  - port: 53
The backend pod is allowed to send traffic only on port 53 (DNS).
This ensures DNS lookups continue to function while preventing arbitrary outbound connections.
Step 7. Test connectivity again
From the frontend pod:
kubectl exec frontend -- curl backendExpected:
Welcome to nginx!The request succeeds because the frontend pod is explicitly allowed.
From the attacker pod:
kubectl exec attacker -- curl backendExpected:
curl: (28) Connection timed outor
Connection refuseddepending on the CNI implementation.
The request is blocked because the attacker pod does not match the allowed label selector.
Verify the Network Policy
List Network Policies.
kubectl get networkpolicyInspect the policy.
kubectl describe networkpolicy backend-policyThis command displays:
- Selected pods
- Allowed ingress sources
- Allowed ports
- Applied policy types
How the Traffic Flow Changes
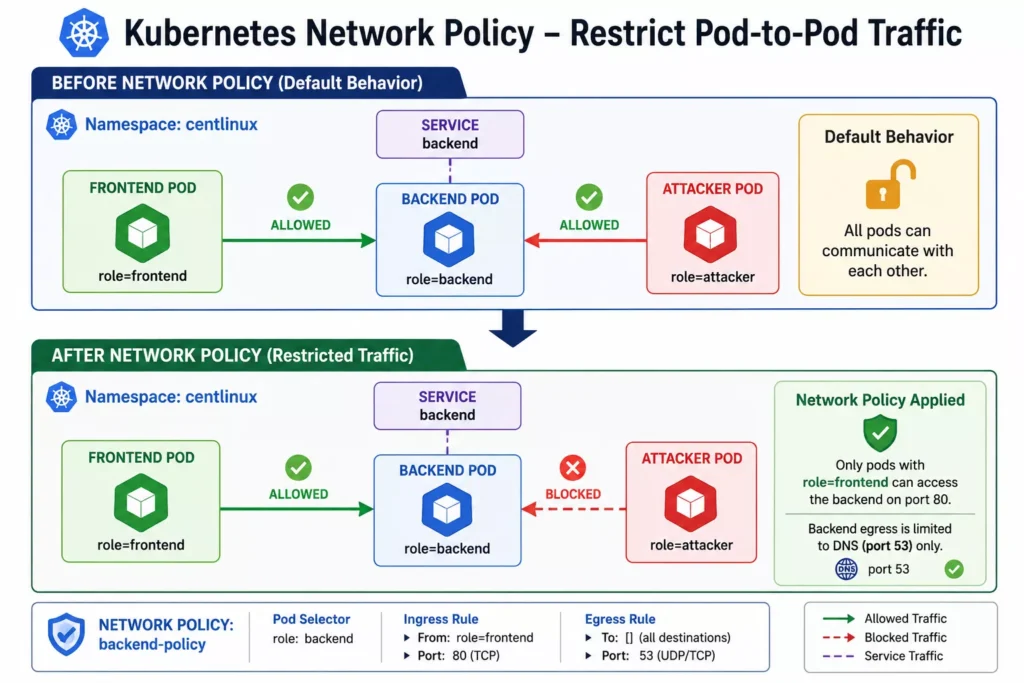
| Source Pod | Before Policy | After Policy |
|---|---|---|
| frontend → backend | Allowed | Allowed |
| attacker → backend | Allowed | Blocked |
Key Takeaways
- Kubernetes allows unrestricted pod communication unless Network Policies are enforced.
- Network Policies are label-driven, making workload segmentation simple and scalable.
- The
podSelectordetermines which pods are protected. - The
fromclause defines which pods are permitted to connect. - Once a pod is selected by an ingress policy, all other incoming traffic is denied unless explicitly allowed.
- Egress rules can restrict outbound connections, helping enforce least-privilege networking and reduce the attack surface.
By implementing Network Policies, you can isolate application tiers, protect sensitive services, and enforce secure communication paths between workloads—an essential practice for production Kubernetes clusters.
Read Also: CKA Exam Tasks: Complete Step-by-Step Solutions
Frequently Asked Questions (FAQs)
What happens if no Network Policies are applied to a Kubernetes namespace?
By default, Kubernetes allows all pods to communicate with each other. Network Policies only take effect after they are created and enforced by a compatible CNI plugin.
Do Kubernetes Network Policies work with every CNI plugin?
No. Network Policies require a CNI plugin that supports them, such as Calico, Cilium, Antrea, or Weave Net. If your CNI doesn’t implement Network Policies, creating them has no effect.
Can a Network Policy restrict both incoming and outgoing traffic?
Yes. A Network Policy can define Ingress, Egress, or both. This allows you to control which traffic a pod can receive and which external services or pods it can communicate with.
Are Kubernetes Services affected by Network Policies?
Network Policies are enforced on pods, not Services. Although clients connect through a Service, the policy ultimately determines whether traffic is allowed to reach the backend pods selected by that Service.
What is a Kubernetes Network Policy best practice for production clusters?
Follow the principle of least privilege. Start with a default-deny policy for each namespace, then explicitly allow only the required ingress and egress traffic between application components.
Recommended Courses
If you’re eager to kickstart your journey into cloud-native technologies, “Kubernetes for the Absolute Beginners – Hands-on” by Mumshad Mannambeth is the perfect course for you. Designed for complete beginners, this course breaks down complex concepts into easy-to-follow, hands-on lessons that will get you comfortable deploying, managing, and scaling applications on Kubernetes.
Whether you’re a developer, sysadmin, or IT enthusiast, this course provides the practical skills needed to confidently work with Kubernetes in real-world scenarios. By enrolling through the links in this post, you also support this website at no extra cost to you.
Disclaimer: Some of the links in this post are affiliate links. This means I may earn a small commission if you make a purchase through these links, at no additional cost to you.



Leave a Reply
You must be logged in to post a comment.