Learn how to install Plesk Web Hosting Panel on CentOS 8 with this comprehensive guide. Set up your server with ease and enhance your web hosting capabilities. #centlinux #linux #plesk
Table of Contents
What is Plesk?
Plesk is a widely-used web hosting control panel that simplifies the management of web servers and websites. It provides a user-friendly interface for managing various aspects of web hosting, including website creation, email management, domain management, file management, database administration, security settings, and more.
Key features of Plesk include:
- Web Server Management: Plesk supports various web servers such as Apache, Nginx, and Microsoft IIS, allowing users to easily configure server settings and manage virtual hosts.
- Website Management: Users can create, modify, and delete websites through a graphical interface. Plesk also offers tools for installing popular web applications like WordPress, Joomla, and Drupal.
- Email Management: Plesk enables users to set up and manage email accounts, mail forwarding, autoresponders, spam filters, and mailing lists.
- Domain Management: Users can register new domains, manage domain DNS settings, and configure domain aliases and redirects.
- File Management: Plesk provides a file manager tool for uploading, downloading, and managing files on the server.
- Database Administration: Plesk supports various database servers such as MySQL, PostgreSQL, and Microsoft SQL Server, allowing users to create, manage, and back up databases.
- Security Settings: Plesk offers security features such as SSL/TLS certificate management, firewall configuration, and intrusion detection.
Overall, Plesk simplifies the administration of web hosting servers and allows users to efficiently manage their websites and server resources through a centralized interface. It is commonly used by web hosting providers, system administrators, and website owners to streamline server management tasks and enhance productivity.
Read Also: Best Linux Hosting Provider in 2024

Plesk Pricing
Plesk, with latest version Obsidian 18.x, is available in the following license configurations:
- Plesk Web Admin Edition: Up to 10 domains. For basic management of simple websites, without the extended tools and features.
- Plesk Web Pro Edition: To manage up to 30 domains. It also includes Plesk WordPress Toolkit full-featured.
- Plesk Web Host Edition: Unlimited domains. The administrator can also create additional reseller accounts.
The license price also distinguishes whether a license can be used for a dedicated server or a virtualized server. Licenses for dedicated servers are usually slightly more expensive.
Plesk sells all three licenses for a monthly or annual price directly. All three editions can also be obtained from official license resellers. Detailed Plesk pricing is available on their official website.
Plesk vs cPanel
Plesk and cPanel are two of the most popular web hosting control panels, each offering a range of features for managing web servers and hosting accounts. Here’s a comparison between Plesk and cPanel:
Plesk
User Interface
- Plesk features a clean and modern user interface, with customizable themes and layouts.
- It offers a more streamlined and intuitive experience for both beginners and experienced users.
Supported Platforms
- Plesk supports multiple operating systems, including Linux (such as CentOS, Ubuntu) and Windows Server.
- It is known for its cross-platform compatibility, allowing users to manage both Linux and Windows-based servers.
Extension Ecosystem
- Plesk offers a wide range of extensions and add-ons through its extension catalog.
- Users can easily extend Plesk’s functionality by installing third-party extensions for additional features and integrations.
Security
- Plesk includes built-in security features such as SSL/TLS certificate management, firewall configuration, and security advisories.
- It offers security extensions for enhanced protection against malware, spam, and other threats.
Multi-Language Support
- Plesk provides multi-language support, making it accessible to users around the world.
cPanel
User Interface
- cPanel has a traditional, icon-based user interface that is familiar to many users.
- It offers a straightforward navigation structure, with separate interfaces for administrators and end-users.
Linux-Centric
- cPanel is primarily designed for Linux-based hosting environments, with support for distributions like CentOS, Red Hat Enterprise Linux, and CloudLinux.
Feature Set
- cPanel offers a comprehensive set of features for managing web hosting accounts, including website management, email hosting, domain management, file management, and database administration.
Popularity
- cPanel has been a dominant player in the web hosting industry for many years and is widely used by hosting providers and website owners worldwide.
Integration
- cPanel integrates seamlessly with popular web hosting technologies such as Apache, PHP, MySQL, and Perl.
Considerations
- Platform Preference: Choose Plesk if you require cross-platform support or need to manage Windows-based servers. Opt for cPanel if you are primarily using Linux-based servers.
- User Experience: Consider the user interface and navigation style that best suits your preferences and workflow.
- Feature Requirements: Evaluate the specific features and functionalities offered by each control panel to determine which meets your hosting needs more effectively.
In summary, both Plesk and cPanel are powerful web hosting control panels with their own strengths and features. The choice between them depends on factors such as platform preference, feature requirements, and user experience preferences.
Linux Server Specification
We are using a minimal CentOS Stream 8 virtual machine with following specifications.
- CPU – 3.4 Ghz (2 cores)
- Memory – 4 GB
- Storage – 20 GB
- Operating System – CentOS Stream release 8
- Hostname – plesk-server.centlinux.com
- IP Address – 192.168.116.206 /24
To get the best experience running the Plesk Web Hosting Panel on CentOS 8, ensure your system meets the necessary hardware and software requirements, including a minimum of 2GB RAM, 20GB disk space, and a stable internet connection.
For those looking to set up a reliable testing environment without investing in expensive dedicated servers, a Mini PC or a VPS like Bluehost’s offerings provides a convenient and cost-effective solution.
These options allow you to experiment with Linux server configurations, run Plesk smoothly, and manage your web hosting tasks with ease.
Whether you prefer the physical control of a Mini PC or the flexibility and scalability of a VPS, both are excellent platforms to start your Plesk hosting journey.
[Grab a Mini PC for your Home Lab – Shop with Us!]
[Try Bluehost VPS Now – Perfect for Linux & DevOps Enthusiasts!]
Disclaimer: This post contains affiliate links. If you purchase through these links, we may earn a small commission at no additional cost to you. This helps us maintain and improve our content.
Read Also: How to install CWP on Rocky Linux 8
Update your Linux Server
Connect with plesk-server.centlinux.com server as root user by using a ssh client.
Update your Linux operating system by executing following dnf command.
dnf update -yCheck the Linux Kernel and operating system versions.
uname -r
cat /etc/redhat-release
Output:
4.18.0-269.el8.x86_64
CentOS Stream release 8
Install Plesk Software on CentOS 8
Plesk offers different methods to install Plesk software
- 1-click Plesk Panel installation – It is a fast and hassle-free way of getting a Plesk server with default configuration up and running.
- Installing Plesk Panel using Installer Console – You can install Plesk on CentOS 8 by using the Linux interactive CLI console.
- Installing Plesk Panel using Installer GUI
- Installing Plesk Panel using ISO-images – Plesk provides ISO-images for CentOS and Ubuntu operating systems configured to automatically install it
Here, we are installing the Plesk software by using Installer Console.
Execute wget command to download Plesk Obsidian installer.
wget https://autoinstall.plesk.com/plesk-installerMake the downloaded file executable in Linux Bash.
chmod +x plesk-installerExecute the downloaded script to install and configure Parallels Plesk Panel (Obsidian) and dependent software components in one shot.
./plesk-installer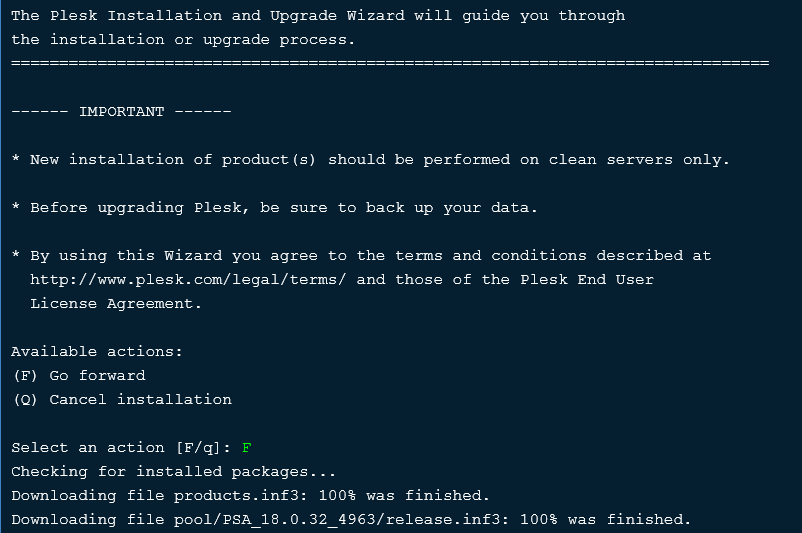
The installer script displays the link to Plesk Obsidian license. Press ‘F’ key to move forward.
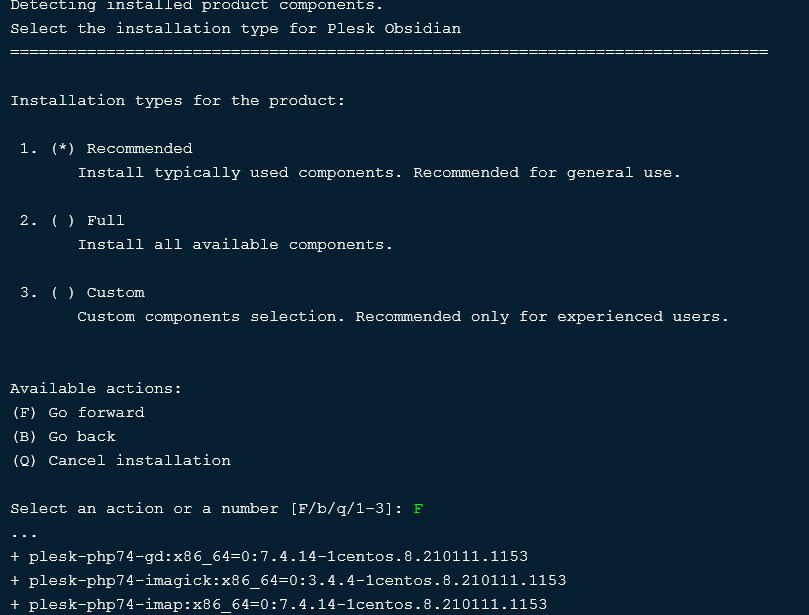
Select the Plesk Obsidian installation type. The default “Recommend” option is good for use, therefore press ‘F’ to continue.
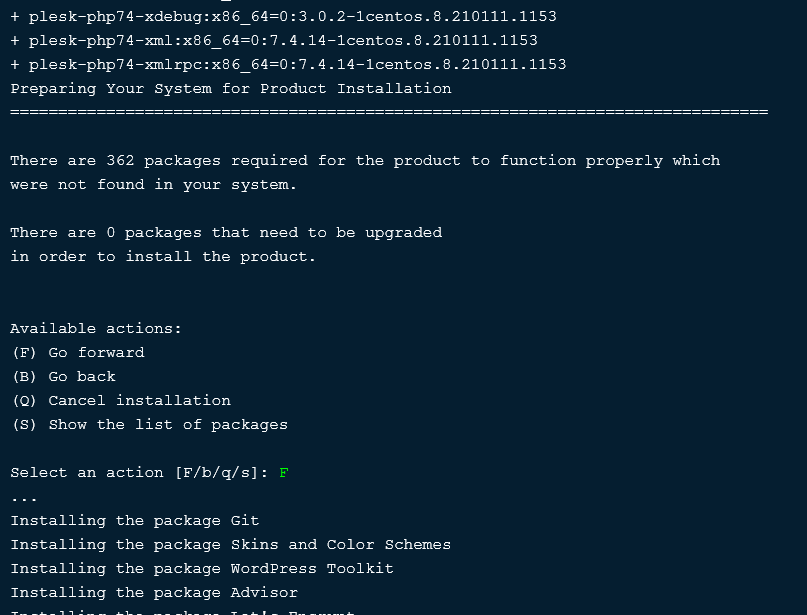
plesk-installer script list down the required software packages. Press ‘F’ to move forward.
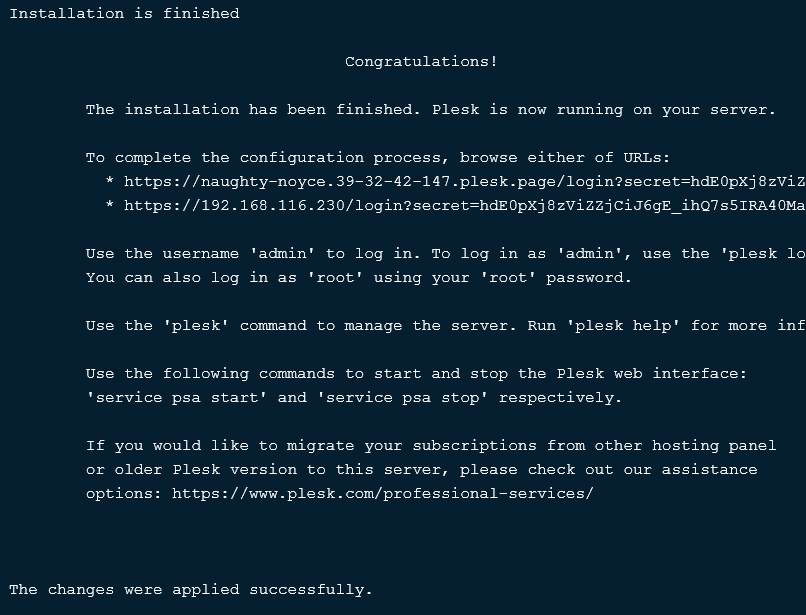
Plesk Panel (Obsidian) has been installed successfully.
Note down the URL provided by plesk-installer script. This URL will be used to access Plesk Obsidian for the first time.
On our Linux server, the PSA service experiencing problem in startup, so we check the systemd service unit for PSA and found out that the service type is not set properly by the Plesk installer.
Therefore, we edit the PSA systemd unit in vim editor.
vi /etc/systemd/system/multi-user.target.wants/psa.serviceand change type from one-shot to simple.
[Unit]
Description=Plesk Panel
Wants=sw-cp-server.service sw-engine.service
Wants=mariadb.service mysql.service
After=network.target mariadb.service mysql.service

[Service]
Type=simple
RemainAfterExit=yes
ExecStart=/bin/true

[Install]
WantedBy=multi-user.target
Start PSA service now.
systemctl daemon-reload
systemctl start psa.service
Check the status of PSA service.
systemctl status psa.serviceOutput:
â psa.service - Plesk Panel
   Loaded: loaded (/usr/lib/systemd/system/psa.service; enabled; vendor preset:>
  Drop-In: /usr/lib/systemd/system/psa.service.d
           âârespawn.conf
   Active: active (exited) since Sat 2021-01-23 20:24:47 PKT; 3s ago
  Process: 36347 ExecStart=/bin/true (code=exited, status=0/SUCCESS)
 Main PID: 36347 (code=exited, status=0/SUCCESS)
    Tasks: 0 (limit: 5804)
   Memory: 0B
   CGroup: /system.slice/psa.service

Jan 23 20:24:47 plesk-server.centlinux.com systemd[1]: Started Plesk Panel.
PSA service has been started successfully.
Configure Linux Firewall
Plesk Panel (Obsidian) runs on default HTTP port. Therefore, you need to allow it in Linux firewall.
firewall-cmd --permanent --add-service=http
firewall-cmd --reload
Accessing Plesk Web Hosting Control Panel
Use the URL provided by Plesk installer to access your Web Hosting Control Panel.

Provide contact details, set the password for admin user and select license type.
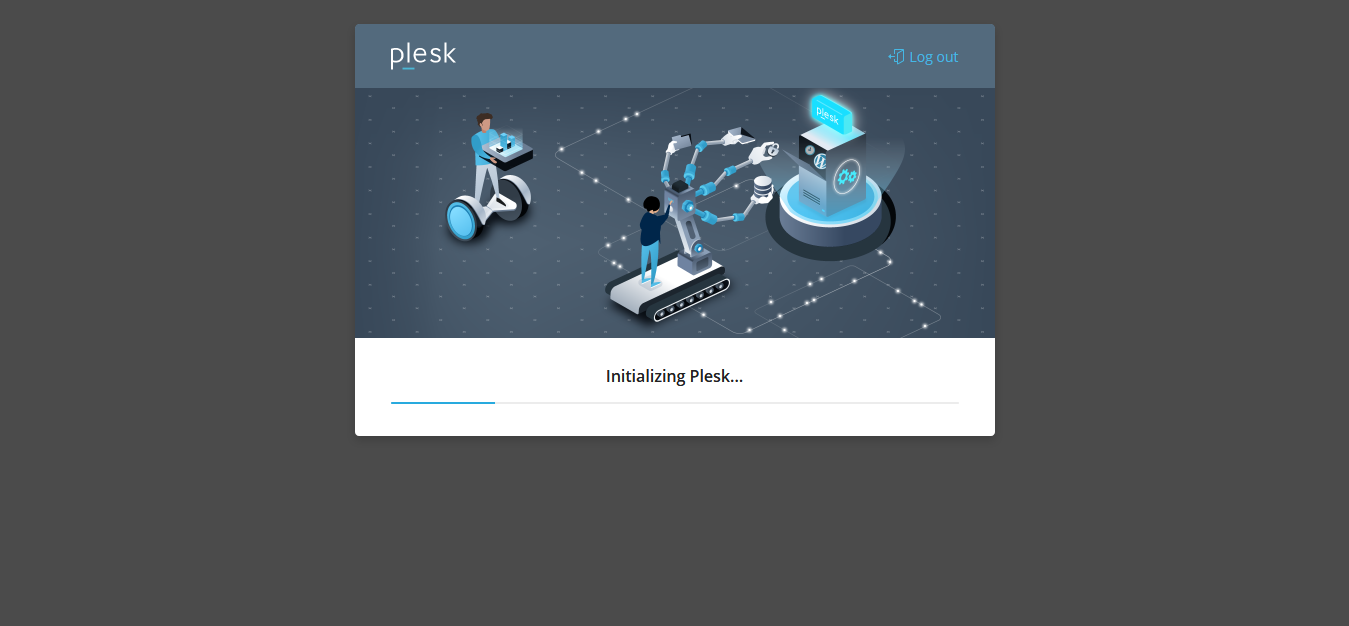
Plesk Obsidian is initializing configurations for you.
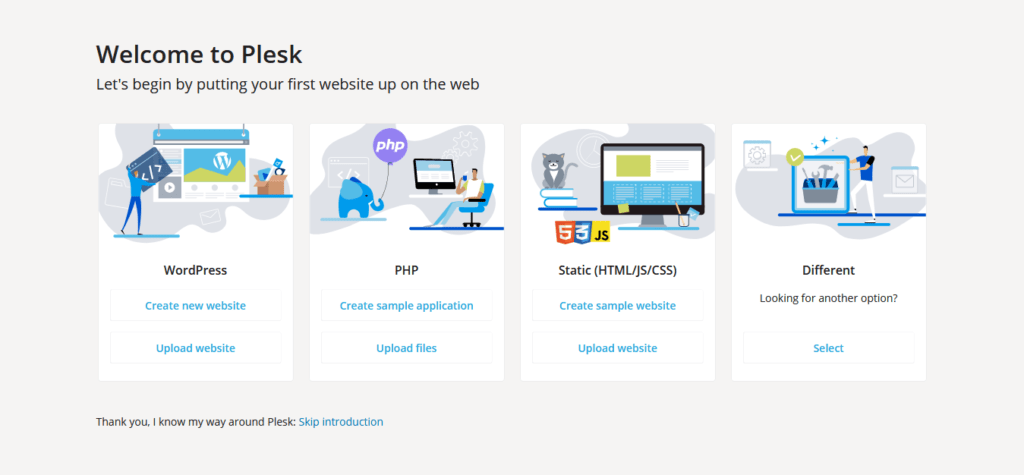
After successful configuration the Plesk Obsidian will take you to Introduction page.
You can always configure your required website later from Plesk Obsidian.
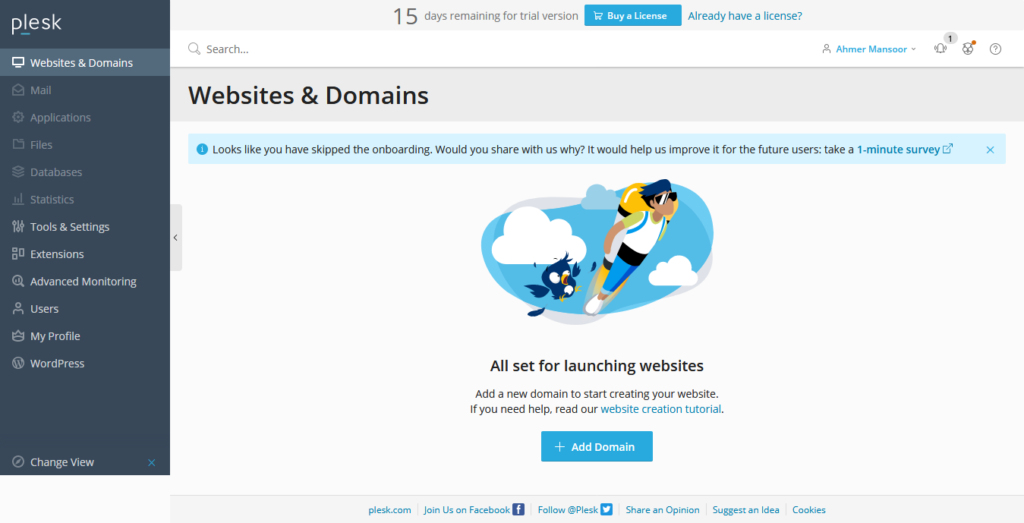
Therefore, Click on “Skip Introduction” to move forward to Obsidian dashboard.
Final Thoughts
In conclusion, installing the Plesk Web Hosting Control Panel on CentOS 8 opens up a world of possibilities for efficient server management and web hosting. With its user-friendly interface and robust features, Plesk simplifies the process of managing websites, domains, emails, and more.
Searching for a skilled Linux admin? From server management to security, I ensure seamless operations for your Linux systems. Find out more on my Freelancer profile!
I offer professional services to ensure a smooth and hassle-free setup, tailored to your specific requirements. Maximize the potential of your server with professional support for Plesk installation and configuration.
FAQs
Q1: Can I install Plesk on CentOS 8 minimal installation without a GUI?
Yes, Plesk works smoothly on CentOS 8 minimal setup since it is managed via a web interface, so a GUI on the server is not required.
Q2: Is it possible to use Plesk for managing multiple domains on CentOS 8?
Absolutely, Plesk is designed to handle multiple domains efficiently from a single panel.
Q3: Does Plesk installation on CentOS 8 require any specific firewall settings?
You need to allow HTTP (port 80), HTTPS (port 443), and Plesk management ports (8443) through your firewall for proper access.
Q4: How do I check if my CentOS 8 system meets Plesk installation requirements?
Run plesk installer or check system specs against Plesk docs, ensuring enough RAM (at least 1GB), disk space, and a supported OS version.
Q5: Will installing Plesk on CentOS 8 overwrite existing web server configurations?
Plesk may modify Apache or Nginx configurations but usually preserves existing data; it’s recommended to back up configs before installation.
Recommended Courses
If you’re looking to gain full control over your hosting environment, Mastering cPanel – Manage Hosting for Yourself and Clients by Navin Soneja is a practical online course that walks you step-by-step through cPanel administration. Whether you want to manage your own websites efficiently or provide hosting services to clients, this course covers everything from email setup and security to domain management and backups. It’s an excellent resource for beginners and freelancers aiming to expand their technical skills and income opportunities.
Disclaimer: This post contains affiliate links. If you purchase through these links, I may earn a small commission at no extra cost to you.

Leave a Reply
You must be logged in to post a comment.