Learn how to install vTiger CRM on Rocky Linux 8 with this comprehensive guide. Follow our step-by-step instructions to set up vTiger CRM, configure your environment, and enhance your customer relationship management efficiently. #centlinux #linux #crm
Table of Contents
What is vTiger CRM?
vTiger is an Indian software company headquartered in Bangalore, India. vTiger is known for its CRM (Customer Relationship Management) software that centralizes customer data and increases sales. vTiger aims at improving the retention rate by analytically generating insights for the clients which helps in nurturing customer relations.
vTiger CRM offers a comprehensive suite of enterprise applications that integrates marketing, sales, and support teams with an increased engagement to manage sales, multi-channel help desk, marketing automation tools and insights to manage the business in sync.
vTiger has over 300,000+ clientele globally, including Propel, Breezway, Lenskart and Russair. The company markets their product as “all-in-one” CRM software fragmented for customer view.(Source: Wikitia)

vTiger CRM Features
The CRM software tools provided by vTiger focus on maintaining the influx of leads alongside providing personalized analytical solutions to the customers to build up their business. The primary fields targeted by CRM software are contact management, sales management, and customer support. It has a system for managing projects and automatically tracking inventory stock against invoices created in the system. The software supports multiple languages, including French, German, and Spanish. Through browser addons, vTiger CRM can be integrated with Microsoft Outlook, Microsoft Office, and Mozilla Thunderbird. It is known for saving time administering, accelerating collaboration, expanding automation and improving insights supported by data to convert leads into business conversions.
vTiger Alternatives
There are several alternatives to vTiger CRM, each offering unique features and benefits to suit various business needs. Here are some popular options:
Salesforce:
- Description: A leading cloud-based CRM platform with extensive features and integrations.
- Strengths: Highly customizable, vast ecosystem of apps and integrations, robust analytics.
- Use Cases: Suitable for businesses of all sizes looking for a comprehensive, scalable CRM solution.
HubSpot CRM:
- Description: A free, easy-to-use CRM that integrates with HubSpot’s suite of marketing, sales, and service tools.
- Strengths: User-friendly interface, free tier with ample features, strong marketing and sales tools.
- Use Cases: Ideal for small to medium-sized businesses seeking an integrated inbound marketing and CRM solution.
Zoho CRM:
- Description: A flexible CRM platform with a wide range of features for sales, marketing, and customer support.
- Strengths: Affordable, customizable, extensive third-party integrations.
- Use Cases: Suitable for businesses looking for a cost-effective, customizable CRM solution.
SugarCRM:
- Description: An open-source CRM solution offering extensive customization options and robust features.
- Strengths: Highly customizable, strong community support, flexible deployment options.
- Use Cases: Ideal for businesses needing a highly customizable CRM that can be tailored to specific workflows.
Pipedrive:
- Description: A sales-focused CRM designed to help sales teams manage their pipelines and close deals more efficiently.
- Strengths: Intuitive interface, strong sales pipeline management, customizable dashboards.
- Use Cases: Best for sales teams seeking a straightforward, effective CRM to manage sales processes.
Microsoft Dynamics 365:
- Description: A comprehensive CRM and ERP solution that integrates seamlessly with Microsoft’s ecosystem.
- Strengths: Extensive features, strong integration with Microsoft Office and other products, AI capabilities.
- Use Cases: Suitable for enterprises looking for a robust CRM with deep integration into Microsoft products.
Freshsales (Freshworks CRM):
- Description: A CRM solution from Freshworks, designed to streamline sales processes and improve customer engagement.
- Strengths: User-friendly, good automation features, integrated phone and email.
- Use Cases: Ideal for businesses looking for an easy-to-use CRM with strong automation and communication features.
Insightly:
- Description: A CRM with project management capabilities, designed for small and medium-sized businesses.
- Strengths: Integrated project management, user-friendly interface, good for managing customer projects.
- Use Cases: Best for businesses needing both CRM and project management functionalities.
Odoo:
- Description: An open-source suite of business applications including CRM, designed to cover various business needs.
- Strengths: Highly modular, open-source, extensive community and enterprise support.
- Use Cases: Suitable for businesses looking for an integrated suite of business applications with CRM capabilities.
Each of these alternatives offers distinct advantages, so it’s important to evaluate them based on your specific business requirements and goals.
Recommended Training: Mastering Odoo Development – Technical Fundamentals from Odoo Class Videos

Environment Specification
We are using a minimal Rocky Linux 8 virtual machine with following specifications.
- CPU – 3.4 Ghz (2 cores)
- Memory – 2 GB
- Storage – 20 GB
- Operating System – Rocky Linux 8.5 (Green Obsidian)
- Hostname – vtiger-01.centlinux.com
- IP Address – 192.168.116.128 /24
Update your Rocky Linux Server
Connect with vtiger-01.centlinux.com as root user by using a ssh client.
Update cache of yum repositories in your Linux server.
dnf makecacheUpdate software packages of your Linux operating system by executing following command.
dnf update -yYou may need to reboot your operating system, if the above command updates your Linux Kernel.
rebootCheck the Linux operating system and Kernel versions.
uname -r
cat /etc/rocky-release
Output:
4.18.0-348.12.2.el8_5.x86_64
Rocky Linux release 8.5 (Green Obsidian)
Apple Early 2020 MacBook Air with 1.1GHz Intel Core i3 13-inch 8GB RAM 256GB SSD Storage Space Gray (Renewed)
$315.00 (as of July 7, 2025 20:00 GMT +00:00 – More infoProduct prices and availability are accurate as of the date/time indicated and are subject to change. Any price and availability information displayed on [relevant Amazon Site(s), as applicable] at the time of purchase will apply to the purchase of this product.)Install Apache Web Server
vTiger CRM is developed in PHP programming language.
Therefore, it requires a LAMP (Linux, Apache, MySQL & PHP) or LEMP (Linux, Nginx, MySQL & PHP) server for deployment. You can install your favorite Web Server for vTiger CRM.
Here, we are installing Apache because it’s configurations are simple, straight forward and it fulfills the requirement of this installation guide.
Execute dnf command to install Apache web server.
dnf install -y httpdEnable and start Apache web service.
systemctl enable --now httpd.serviceAllow the Apache default service port 80/tcp in Linux firewall.
firewall-cmd --permanent --add-service=http
firewall-cmd --reload
Check the version of Apache by executing following command.
httpd -vOutput:
Server version: Apache/2.4.37 (rocky)
Server built:   Jan 25 2022 16:26:44
Install MariaDB Database Server
vTiger CRM requires MySQL RDBMS to create it’s database repository.
We are installing the MariaDB database server, the most popular variant of MySQL, on our Linux server. But you can use MySQL or Percona as well.
dnf install -y mariadb-serverEnable and start MariaDB database service.
systemctl enable --now mariadb.serviceConfigure initial security settings for your MariaDB server by executing following command at Linux Bash prompt.
mysql_secure_installationOutput:
NOTE: RUNNING ALL PARTS OF THIS SCRIPT IS RECOMMENDED FOR ALL MariaDB
      SERVERS IN PRODUCTION USE!  PLEASE READ EACH STEP CAREFULLY!

In order to log into MariaDB to secure it, we'll need the current
password for the root user.  If you've just installed MariaDB, and
you haven't set the root password yet, the password will be blank,
so you should just press enter here.

Enter current password for root (enter for none):
OK, successfully used password, moving on...

Setting the root password ensures that nobody can log into the MariaDB
root user without the proper authorisation.

Set root password? [Y/n] Y
New password:
Re-enter new password:
Password updated successfully!
Reloading privilege tables..
 ... Success!


By default, a MariaDB installation has an anonymous user, allowing anyone
to log into MariaDB without having to have a user account created for
them.  This is intended only for testing, and to make the installation
go a bit smoother.  You should remove them before moving into a
production environment.

Remove anonymous users? [Y/n] Y
 ... Success!

Normally, root should only be allowed to connect from 'localhost'.  This
ensures that someone cannot guess at the root password from the network.

Disallow root login remotely? [Y/n] Y
 ... Success!

By default, MariaDB comes with a database named 'test' that anyone can
access.  This is also intended only for testing, and should be removed
before moving into a production environment.

Remove test database and access to it? [Y/n] Y
 - Dropping test database...
 ... Success!
 - Removing privileges on test database...
 ... Success!

Reloading the privilege tables will ensure that all changes made so far
will take effect immediately.

Reload privilege tables now? [Y/n] Y
 ... Success!

Cleaning up...

All done!  If you've completed all of the above steps, your MariaDB
installation should now be secure.

Thanks for using MariaDB!
Login to MariaDB server as root user by using mysql command.
mysql -u root -pCreate a Database and User for vTiger CRM with necessary privileges as follows.
CREATE DATABASE vtigerdb DEFAULT CHARSET utf8;
CREATE USER vtiger@localhost IDENTIFIED BY '123';
GRANT ALL PRIVILEGES ON vtigerdb.* TO vtiger@localhost;
FLUSH PRIVILEGES;
EXIT
Edit MariaDB configuration file by using vim text editor.
vi /etc/my.cnf.d/mariadb-server.cnfAs mentioned in vTigerCRM manual, add following directive under [mysqld] section.
sql_mode=ERROR_FOR_DIVISION_BY_ZERO,NO_ENGINE_SUBSTITUTIONRestart MariaDB service to apply changes.
systemctl restart mariadb.serviceMastering Embedded Linux Programming: Create fast and reliable embedded solutions with Linux 5.4 and the Yocto Project 3.1 (Dunfell)
$33.96 (as of July 7, 2025 20:55 GMT +00:00 – More infoProduct prices and availability are accurate as of the date/time indicated and are subject to change. Any price and availability information displayed on [relevant Amazon Site(s), as applicable] at the time of purchase will apply to the purchase of this product.)Install PHP on Rocky Linux 8
vTiger CRM requires PHP 7.2 or later (with a couple of extension).
PHP 7.2 is available in standard yum repositories, but it lacks some of the required extensions.
Therefore, we are installing Remi Yum Repository, so you can install PHP along with all required extensions.
dnf install -y https://rpms.remirepo.net/enterprise/remi-release-8.rpmRebuild cache for yum repositories.
dnf makecacheOutput:
Rocky Linux 8 - AppStream                       2.0 kB/s | 4.8 kB     00:02
Rocky Linux 8 - BaseOS                          1.1 kB/s | 4.3 kB     00:03
Rocky Linux 8 - Extras                          1.7 kB/s | 3.5 kB     00:01
Extra Packages for Enterprise Linux 8 - x86_64  745 kB/s |  11 MB     00:15
Extra Packages for Enterprise Linux Modular 8 - 126 kB/s | 979 kB     00:07
Remi's Modular repository for Enterprise Linux  3.0 MB/s | 3.1 kB     00:00
Importing GPG key 0x5F11735A:
 Userid     : "Remi's RPM repository <remi@remirepo.net>"
 Fingerprint: 6B38 FEA7 231F 87F5 2B9C A9D8 5550 9759 5F11 735A
 From       : /etc/pki/rpm-gpg/RPM-GPG-KEY-remi.el8
Is this ok [y/N]: y
Remi's Modular repository for Enterprise Linux  256 kB/s | 970 kB     00:03
Safe Remi's RPM repository for Enterprise Linux 472  B/s | 833  B     00:01
Safe Remi's RPM repository for Enterprise Linux 3.0 MB/s | 3.1 kB     00:00
Importing GPG key 0x5F11735A:
 Userid     : "Remi's RPM repository <remi@remirepo.net>"
 Fingerprint: 6B38 FEA7 231F 87F5 2B9C A9D8 5550 9759 5F11 735A
 From       : /etc/pki/rpm-gpg/RPM-GPG-KEY-remi.el8
Is this ok [y/N]: y
Safe Remi's RPM repository for Enterprise Linux 395 kB/s | 2.1 MB     00:05
Metadata cache created.
Install PHP 7.4 module on your Rocky Linux server by using following command.
dnf module -y install php:remi-7.4Install required PHP extensions as follows.
dnf install -y php php-common php-mysql php-xml php-imap php-mbstring php-mcrypt php-gdEdit PHP configuration file in vim text editor.
vi /etc/php.iniFind and set following directives as required by vTiger CRM.
memory_limit = 256M
upload_max_filesize = 64M
short_open_tag = Off
max_execution_time = 60
log_errors = Off
display_errors = Off
error_reporting = E_ERROR & ~E_NOTICE & ~E_STRICT & ~E_DEPRECATED
How to install vTiger CRM on Rocky Linux 8?
You are required the git command to clone vTiger open source software from GitHub.
Therefore, execute dnf command to install git on your Linux machine.
dnf install -y gitNow, by using git command, create a clone from GitHub within Apache document root directory.
cd /var/www/html/
git clone https://code.vtiger.com/vtiger/vtigercrm.git
Output:
Cloning into 'vtigercrm'...
remote: Counting objects: 38995, done.
remote: Compressing objects: 100% (16874/16874), done.
remote: Total 38995 (delta 22595), reused 35596 (delta 20526)
Receiving objects: 100% (38995/38995), 150.82 MiB | 858.00 KiB/s, done.
Resolving deltas: 100% (22595/22595), done.
Updating files: 100% (11096/11096), done.
Adjust the file ownership for downloaded vTiger software.
chown apache:apache -R /var/www/html/vtigercrmSet required Apache configuration by executing following command at Linux Bash prompt.
sed -i "s/Options Indexes FollowSymLinks/Options FollowSymLinks/" /etc/httpd/conf/httpd.confRestart Apache web servvice to apply changes.
systemctl restart httpd.serviceUsually Linux System administrators prefers to disable SELinux, while installing vTiger CRM software.
But it is definitely a bad practice, because by disabling SELinux you removed a complete Security Layer of your Linux server.
We prefer to set the necessary SELinux File Contexts to workaround it.
You need semanage command to configure SELinux policy, therefore, execute following command to install it.
dnf install -y policycoreutils-python-utilsAdd a SELinux File Context for vTiger by using semanage command and then apply the policy to the directory with the help of restorecon command.
semanage fcontext -a -t httpd_sys_rw_content_t '/var/www/html/vtigercrm(/.*)?'
restorecon -RF /var/www/html/vtigercrm
Access vTiger Web Installer
vTiger web application has been deployed successfully. Now invoke the web installer by opening the URL: http://vtiger-01.centlinux.com/vtigercrm/ in a web browser.
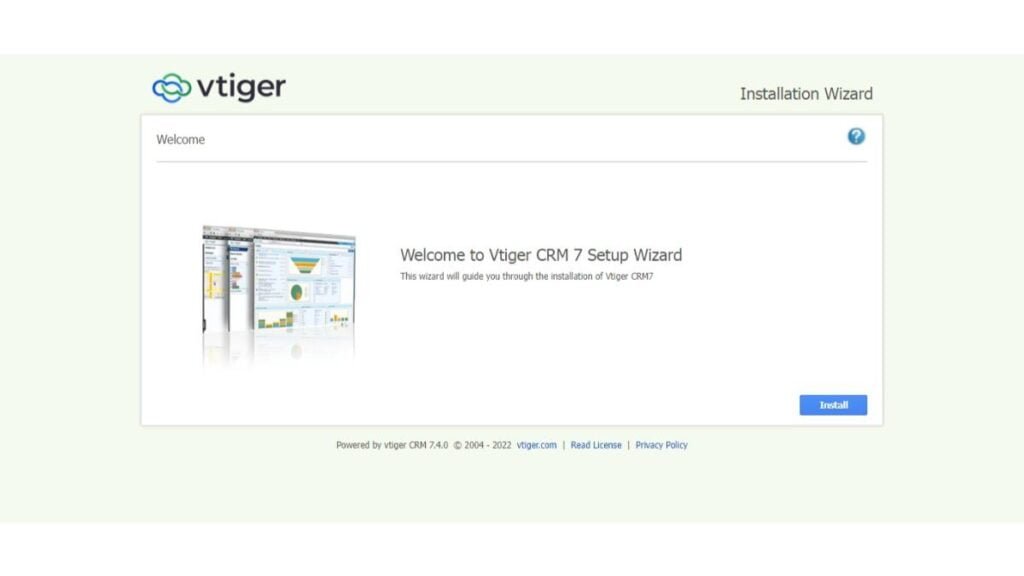
Click on “Install”.

Click on “I Agree”.
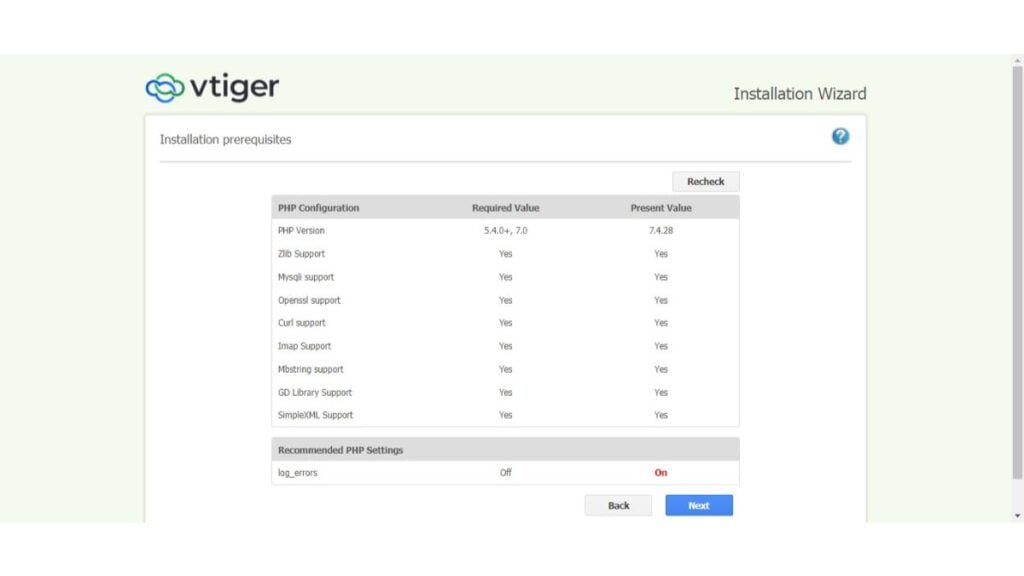
Ignore the “log_errors” warning and Click on “Next”.
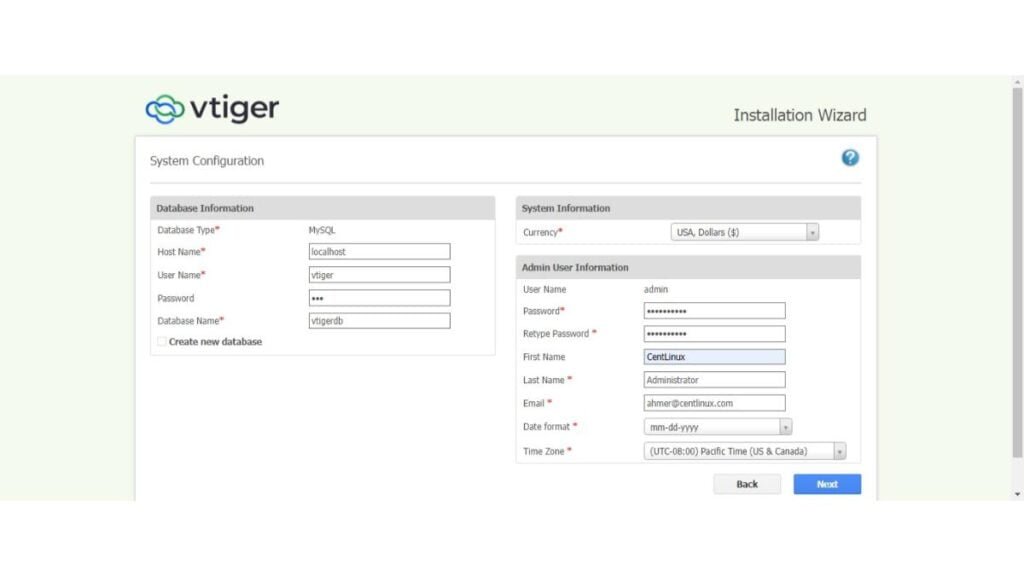
Provide the vTiger system configurations as mentioned in the above screenshot.
Click on “Next”.
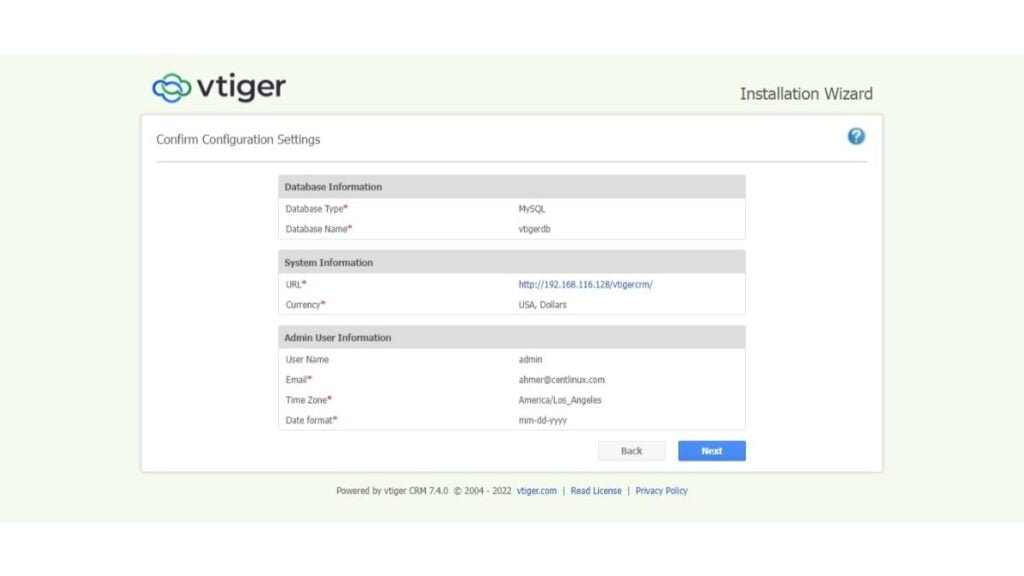
Confirm System configuration by clicking on “Next”.
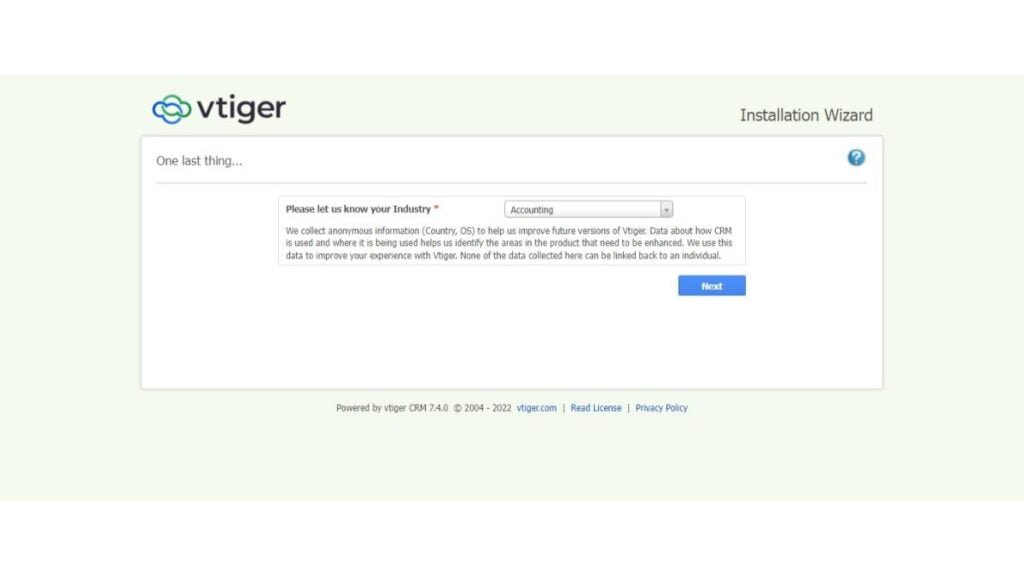
Choose your Industry from the dropdown menu and click on “Next”.
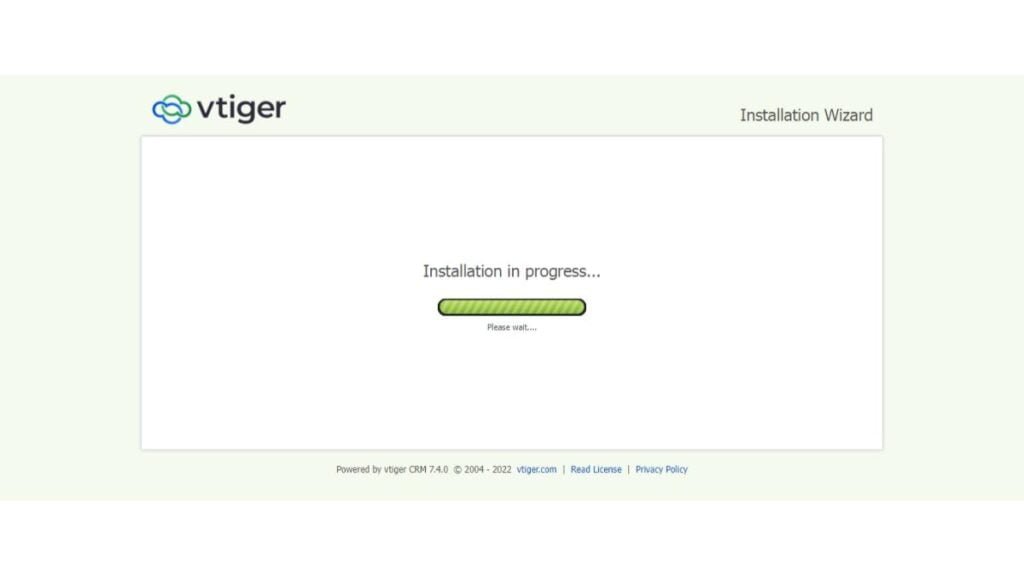
vTiger installation is in Progress now.
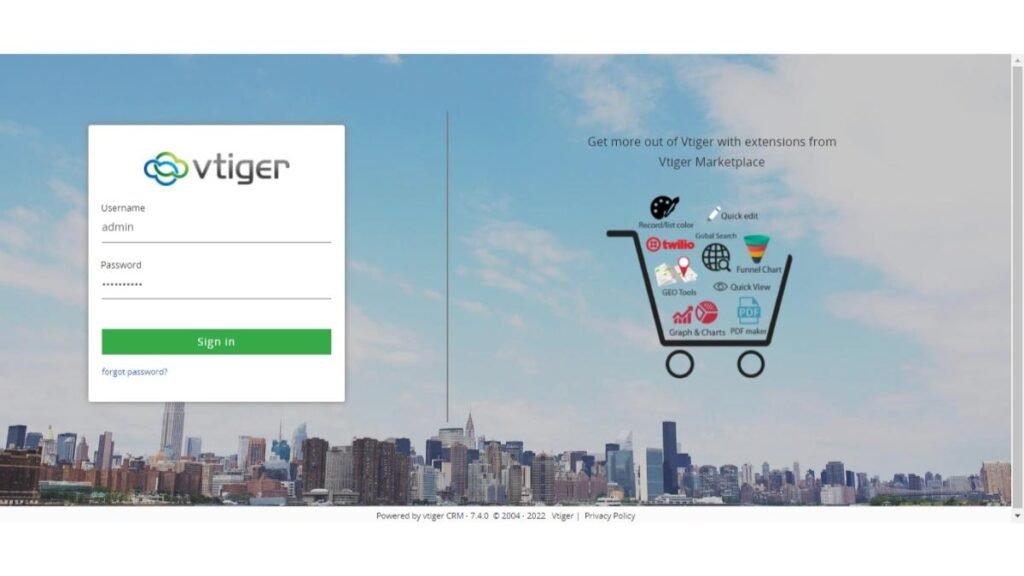
After installation you have reached at the vTiger login screen.
Login as admin user.

Select the features that you want to enable in your vTiger Application.
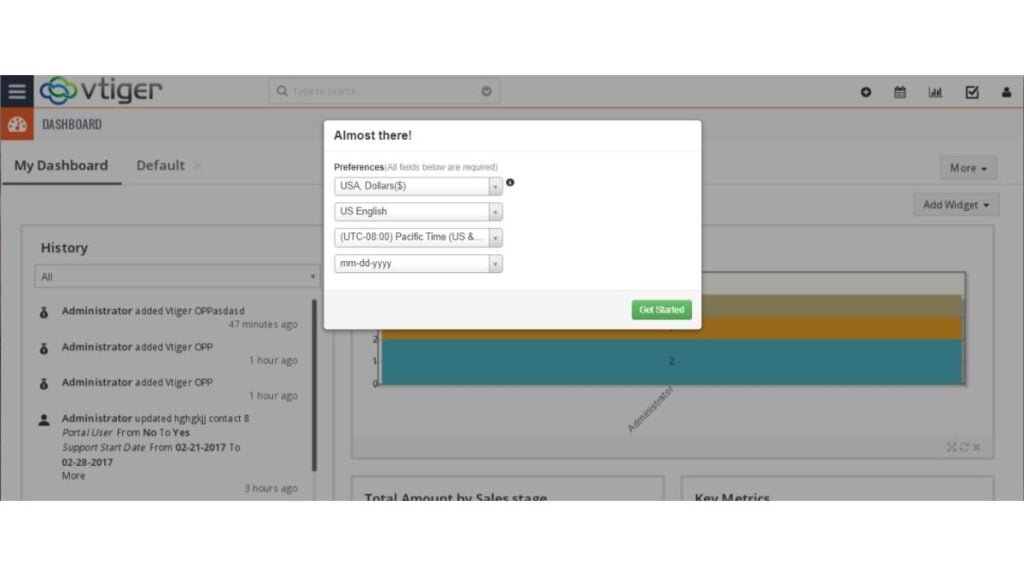
Select the currency / timezone preferences and click on “Get Started”.
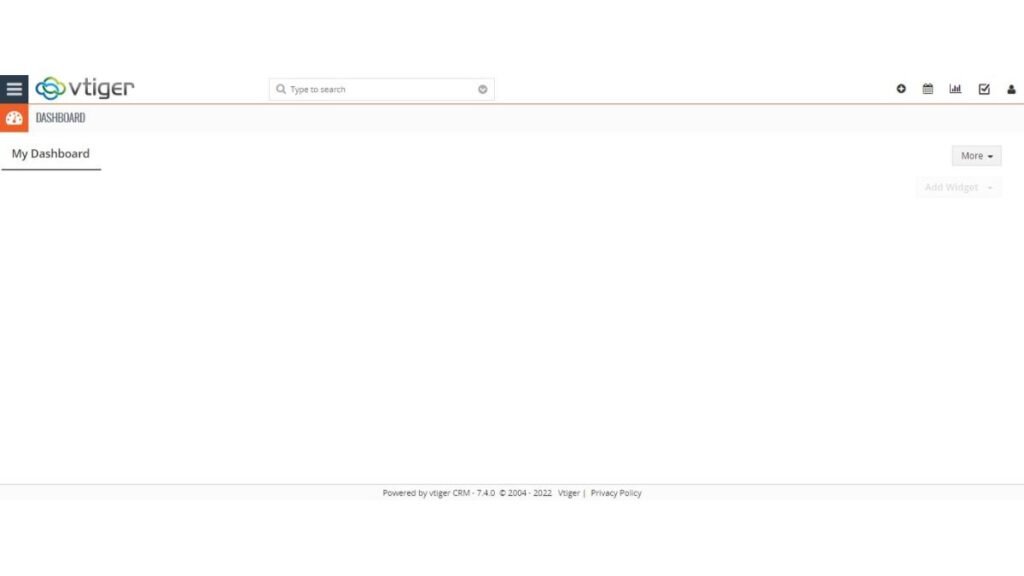
You have reached at the vTiger Dashboard.
Gtheos 2.4GHz Wireless Gaming Headset for PS5, PS4 Fortnite & Call of Duty/FPS Gamers, PC, Nintendo Switch, Bluetooth 5.3 Gaming Headphones with Noise Canceling Mic, Stereo Sound, 40+Hr Battery -White
$29.99 (as of July 7, 2025 23:16 GMT +00:00 – More infoProduct prices and availability are accurate as of the date/time indicated and are subject to change. Any price and availability information displayed on [relevant Amazon Site(s), as applicable] at the time of purchase will apply to the purchase of this product.)Frequently Asked Questions (FAQs)
1. What are the system requirements for installing Vtiger CRM?
Vtiger CRM requires a web server (Apache/Nginx), PHP (7.3 or higher), MySQL (5.7+ or MariaDB 10.2+), and at least 2GB RAM for smooth operation.
2. Is Vtiger CRM free to use?
Vtiger offers both a free open-source version (self-hosted) and paid cloud-based plans with extra features and support.
3. How do I import contacts into Vtiger CRM?
You can import contacts via CSV/Excel files by going to Menu → Contacts → Import. Ensure the file follows Vtiger’s required format.
4. Does Vtiger CRM have a mobile app?
Yes, Vtiger provides iOS and Android apps for managing leads, contacts, and tasks on the go.
5. Can I integrate Vtiger CRM with other tools?
Yes, Vtiger supports integrations with Gmail, Outlook, Mailchimp, WhatsApp, PayPal, and more via extensions and APIs.
Final Thoughts
Installing vTiger CRM on Rocky Linux 8 can significantly enhance your customer relationship management capabilities. By following this guide, you should now have a fully operational vTiger CRM setup. If you need any further assistance or custom configurations, I offer professional services to help you optimize your CRM system.
Struggling with AWS or Linux server issues? I specialize in configuration, troubleshooting, and security to keep your systems performing at their best. Check out my Fiverr profile for details.


Leave a Reply
You must be logged in to post a comment.