Learn how to install WildFly on CentOS 7 with our step-by-step guide. Follow our comprehensive instructions to set up and configure WildFly, ensuring a smooth installation process on your CentOS 7 system. #centlinux #linux #jboss
Table of Contents
What is WildFly?
WildFly, formerly known as JBoss AS (Application Server), is the free and open-source Java EE Application Server supported by JBoss community. Red Hat also developed a commercial version of WildFly, named as JBoss EAP (Enterprise Application Platform). JBoss EAP is also open-source, but Red Hat charges to provide a support subscription.
WildFly has full stack support for Java EE and it is a certified Java EE conatiner. Currently, an stable version 16 of WildFly is available. In this article, we will install WildFly on CentOS 7, Configure WildFly Administration Console for Remote Access and at the end Deploy a Java Application on WildFly Server.

Linux Server Specification
We have a minimally installed CentOS 7 server with following specifications.
- Hostname – wildfly-01.example.com
- IP Address – 192.168.116.168/24
- Operating System – CentOS 7.6
- WildFly version – 16.0.0
Read Also: How to install WildFly on CentOS 8
To ensure a smooth and efficient WildFly setup on CentOS 7, it’s highly recommended to use reliable hardware tailored for server environments. The Raspberry Pi 4 Model B (8GB RAM) is an excellent choice for those wanting an affordable, compact, and energy-efficient server platform perfect for development and light production workloads.
For more demanding deployments, the KAMRUI Essenx E2(Upgraded GK3Plus) Mini PC offers robust performance with powerful processing capability in a small footprint, ideal for running Java application servers like WildFly. Both products combine reliability and versatility, making them top picks for CentOS and WildFly enthusiasts.
Disclaimer: As an Amazon Associate, we earn from qualifying purchases at no extra cost to you.
Install OpenJDK on CentOS 7
Connect with wildfly-01.example.com using ssh as root user.
WildFly is a Java based application platform, therefore it requires a JDK (Java Development Kit) to be installed on the server.
WildFly 16 requires Java EE 8 or above, therefore, we are installing OpenJDK 8 using yum command.
yum install -y java-1.8.0-openjdkSet Java related enironment variables.
echo "export JAVA_HOME=/usr/lib/jvm/jre-1.8.0-openjdk-1.8.0.212.b04-0.el7_6.x86_64" >> /etc/profile
. /etc/profile
env | grep JAVA_HOME
JAVA_HOME=/usr/lib/jvm/jre-1.8.0-openjdk-1.8.0.212.b04-0.el7_6.x86_64
Ensure Java installation by checking the version.
java -versionOutput:
openjdk version "1.8.0_212"
OpenJDK Runtime Environment (build 1.8.0_212-b04)
OpenJDK 64-Bit Server VM (build 25.212-b04, mixed mode)
OpenJDK 8 has been installed on CentOS 7 server.
Install WildFly on CentOS 7
Create a user to own WildFly software.
useradd -r -d /opt/wildfly -s /sbin/nologin wildflyWe have create a system user wildfly without login privileges and with a custom home directory.
Latest or previous releases of WildFly are available on their website. We are downloading Java EE Full & Web Distribution (16.0.0.Final) in TGZ format.
cd /tmp
curl -O https://download.jboss.org/wildfly/16.0.0.Final/wildfly-16.0.0.Final.tar.gz
Extract TGZ file in /opt directory to install WildFly on CentOS 7.
tar xf wildfly-16.0.0.Final.tar.gz -C /opt/Create a symbolic link /opt/wildfly for WildFly installation directory. You will find this symbolic link quiet useful, if you want to upgrade / downgrade WildFly to a different version.
ln -s /opt/wildfly-16.0.0.Final/ /opt/wildflyChange owner of the /opt/wildfly directory to wildfly user.
chown -RH wildfly:wildfly /opt/wildflyCreate a Systemd service for WildFly
Create WildFly configurations in /etc directory.
mkdir /etc/wildfly
cp /opt/wildfly/docs/contrib/scripts/systemd/wildfly.conf /etc/wildfly/
Check WildFly configurations.
cat /etc/wildfly/wildfly.confOutput:
# The configuration you want to run
WILDFLY_CONFIG=standalone.xml

# The mode you want to run
WILDFLY_MODE=standalone

# The address to bind to
WILDFLY_BIND=0.0.0.0
By default, WildFly runs in Standalone mode with only required technologies. You can customize configurations according to your requirements. For more information please refer to WildFly 16 documentation.
Copy the launch.sh script in /opt/wildfly/bin directory. This file is required to start WildFly as a service.
cp /opt/wildfly/docs/contrib/scripts/systemd/launch.sh /opt/wildfly/bin/Copy WildFly service unit in Systemd configuration directory.
cp /opt/wildfly/docs/contrib/scripts/systemd/wildfly.service /usr/lib/systemd/system/Create the directory to hold PIDfile for WildFly service.
mkdir /var/run/wildfly/
chown -R wildfly:wildfly /var/run/wildfly/
Enable and start WildFly service.
systemctl enable wildfly.service
systemctl start wildfly.service
Configure Linux Firewall
Allow WildFly service port in Linux firewall.
firewall-cmd --permanent --add-port=8080/tcp
firewall-cmd --reload
Browse URL http://wildfly-01.example.com:8080/ in a client’s browser.

It shows that WildFly has been installed successfully on our CentOS 7 server and its service is running on designated port.
Configure WildFly Administration Console for Remote Access
By default, WildFly Administration Console is running on localhost. If we want to access it across the network, then we have to configure it accordingly.
To login to WildFly Administration console, we need an Admin user. Therefore, create an Admin user with following script.
/opt/wildfly/bin/add-user.shOutput:
What type of user do you wish to add?
 a) Management User (mgmt-users.properties)
 b) Application User (application-users.properties)
(a): a

Enter the details of the new user to add.
Using realm 'ManagementRealm' as discovered from the existing property files.
Username : ahmer
Password recommendations are listed below. To modify these restrictions edit the add-user.properties configuration file.
 - The password should be different from the username
 - The password should not be one of the following restricted values {root, admin, administrator}
 - The password should contain at least 8 characters, 1 alphabetic character(s), 1 digit(s), 1 non-alphanumeric symbol(s)
Password :
Re-enter Password :
What groups do you want this user to belong to? (Please enter a comma separated list, or leave blank for none)[  ]:
About to add user 'ahmer' for realm 'ManagementRealm'
Is this correct yes/no? yes
Added user 'ahmer' to file '/opt/wildfly-16.0.0.Final/standalone/configuration/mgmt-users.properties'
Added user 'ahmer' to file '/opt/wildfly-16.0.0.Final/domain/configuration/mgmt-users.properties'
Added user 'ahmer' with groups  to file '/opt/wildfly-16.0.0.Final/standalone/configuration/mgmt-groups.properties'
Added user 'ahmer' with groups  to file '/opt/wildfly-16.0.0.Final/domain/configuration/mgmt-groups.properties'
Is this new user going to be used for one AS process to connect to another AS process?
e.g. for a slave host controller connecting to the master or for a Remoting connection for server to server EJB calls.
yes/no? yes
To represent the user add the following to the server-identities definition <secret value="QWhtZXJAMTIzNA==" />
Create a environment variable in /etc/wildfly/wildfly.conf.
cat >> /etc/wildfly/wildfly.conf << EOF
# the address to bind console to
WILDFLY_CONSOLE_BIND=0.0.0.0
EOF
Edit /opt/wildfly/bin/launch.sh script.
vi /opt/wildfly/bin/launch.shand update it as follows
#!/bin/bash

if [ "x$WILDFLY_HOME" = "x" ]; then
    WILDFLY_HOME="/opt/wildfly"
fi

if [[ "$1" == "domain" ]]; then
    $WILDFLY_HOME/bin/domain.sh -c $2 -b $3 -bmanagement $4
else
    $WILDFLY_HOME/bin/standalone.sh -c $2 -b $3 -bmanagement $4
fi
Save and exit.
Finally edit WildFly service.
vi /usr/lib/systemd/system/wildfly.serviceand edit the settings as follows.
[Unit]
Description=The WildFly Application Server
After=syslog.target network.target
Before=httpd.service

[Service]
Environment=LAUNCH_JBOSS_IN_BACKGROUND=1
EnvironmentFile=-/etc/wildfly/wildfly.conf
User=wildfly
LimitNOFILE=102642
PIDFile=/var/run/wildfly/wildfly.pid
ExecStart=/opt/wildfly/bin/launch.sh $WILDFLY_MODE $WILDFLY_CONFIG $WILDFLY_BIND $WILDFLY_CONSOLE_BIND
StandardOutput=null

[Install]
WantedBy=multi-user.target
Restart WildFly service.
systemctl daemon-reload
systemctl restart wildfly.service
Allow service port of WildFly Administration Console in Linux firewall.
firewall-cmd --permanent --add-port=9990/tcp
firewall-cmd --reload
Browse URL http://wildfly-01.example.com:9990/console from a client’s browser, to access WildFly Administration Console.

Login using the admin user, that we have created above.

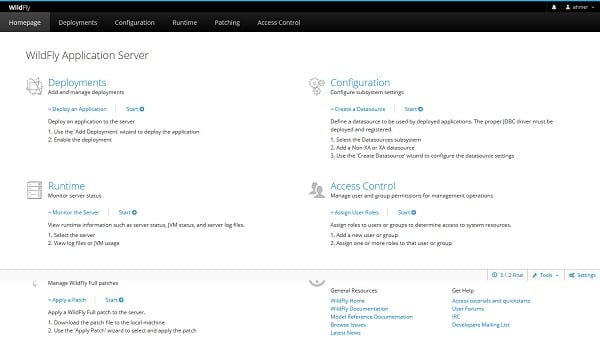
We are now reached at the Dashboard of the WildFly Administration Console.
Deploy a Java Application in WildFly Server
Download a Helloworld Java Application from GitHub.
cd /opt/wildfly/standalone/deployments/
curl -O https://raw.githubusercontent.com/aeimer/java-example-helloworld-war/master/dist/helloworld.war
Check files in deployments directory..
lsOutput:
helloworld.war helloworld.war.deployed README.txt
If there is a file name *.deployed, it means that the Java application has been deployed successfully. Otherwise you may find *.failed file here.
For more details you can check WildFly server logs.
tail /opt/wildfly/standalone/log/server.log | grep helloworldOutput:
2019-05-18 14:49:35,438 INFO  [org.jboss.as.server.deployment] (MSC service thread 1-1) WFLYSRV0027: Starting deployment of "helloworld.war" (runtime-name: "helloworld.war")
2019-05-18 14:49:38,831 INFO  [org.wildfly.extension.undertow] (ServerService Thread Pool -- 77) WFLYUT0021: Registered web context: '/helloworld' for server 'default-server'
2019-05-18 14:49:39,016 INFO  [org.jboss.as.server] (DeploymentScanner-threads - 2) WFLYSRV0010: Deployed "helloworld.war" (runtime-name : "helloworld.war")
Browse URL http://wildfly-01.example.com:8080/helloworld/ from a client’s browser.

Our HelloWorld Java application has been deployed on WildFly server.
We have successfully install WildFly on CentOS 7, configured Administration Console and deployed a Java App on WildFly server.
Final Thoughts
Installing WildFly on CentOS 7 sets up a powerful and lightweight application server for deploying Java-based enterprise applications. In this guide, we covered downloading WildFly, configuring the server environment, setting up management interfaces, and starting the service.
With WildFly now successfully installed, you have a robust platform ready to support modern, high-performance applications. To keep your environment secure and efficient, remember to apply regular updates, fine-tune server settings, and monitor system resources based on your deployment needs.
Struggling with AWS or Linux server issues? I specialize in configuration, troubleshooting, and security to keep your systems performing at their best. Check out my Freelancer profile for details.
Recommended Courses
If you’re serious about mastering Java in 2025, the Java Masterclass 2025: 130+ Hours of Expert Lessons by Tim Buchalka, Edwin Einsen, and Igor Popovic is a must-have resource. This comprehensive course takes you from beginner to advanced concepts with real-world coding exercises, practical projects, and deep insights from industry experts.
Whether you’re preparing for a programming career, upgrading your skills for the job market, or simply passionate about software development, this course offers everything you need in one place. Don’t miss out on the chance to future-proof your skills and stay ahead in the ever-evolving world of Java.
Disclaimer: This post contains affiliate links. If you purchase through these links, I may earn a small commission at no extra cost to you, which helps support the site and keeps valuable content coming your way.

6 responses to “How to install WildFly on CentOS 7”
when I apply the following command the following error appears
/opt/wildfly/bin/add-user.sh
line 75: /usr/lib/jvm/jre-1.8.0-openjdk-1.8.0.212.b04-0.el7_6.x86_64/bin/java: The file or directory
Please verify that you have set JAVA_PATH variable correctly.
I was getting the same error then i checked the installed Java version by using command "java -version" and found different version "1.8.0_181" than used in this tutorail.
Then I checked the path of JAVA_PATH "/usr/lib/jvm/jre-1.8.0-openjdk-1.8.0.181-7.b13.el7.x86_64" and modified accordingly, and now its working fine.
Good.
Dear Sir, is it possible to have multiple deployment folders in jboss. I have a requirement to run multiple projects in the same server. I should able to restart each deployments separately after modification without disturbing other war deployments.
The question has been answered here.