Learn how to create an OpenLDAP Address Book in CentOS 7 with our step-by-step guide. Set up and manage a centralized directory of contacts for efficient access and organization.. #centlinux #linux #openldap
Table of Contents
What is OpenLDAP Address Book?
OpenLDAP Address Book is a central database where users can search for email addresses, telephone numbers, addresses, etc. In this post, we will create a Global Address book with OpenLDAP 2.4 Server and access it through Mozilla Thunderbird.
We have already configured a LDAP Server. Therefore, I am skipping the steps of configuring a LDAP Server. However, if you missed it then please follow my previous post “Configure Remote Authentication Server using OpenLDAP 2.4”.

Linux Server Specification
The Same Server that I used in my previous posts “Configure Remote Authentication Server using OpenLDAP 2.4” and “OpenLDAP Administration using phpLDAPAdmin”.
Recommended Training: The Linux Command Line Bootcamp: Beginner To Power User from Colt Steele

Create OpenLDAP Address Book
Checkout the current structure of our LDAP Directory via phpLDAPAdmin console i.e. http://ldapserver.itlab.com/phpldapadmin

We must add the inetorgperson schema to our LDAP Directory, because we require its objectclasses for our Addressbook entries.
Note: Since I am working on a already configured LDAP Server, therefore I am not adding other core schemas. However, if you are configuring the LDAP Server from scratch, then you must add the cosine schema as well.
ldapadd -Y EXTERNAL -H ldapi:/// -D "cn=config" -f /etc/openldap/schema/inetorgperson.ldifOutput:
SASL/EXTERNAL authentication started
SASL username: gidNumber=0+uidNumber=0,cn=peercred,cn=external,cn=auth
SASL SSF: 0
adding new entry "cn=inetorgperson,cn=schema,cn=config"
Let’s create the organizationUnit and add some entries therein.
cd ~/ldap
cat > addressbook.ldif << EOF
dn: ou=AddressBook,dc=itlab,dc=com
objectClass: organizationalUnit
ou: AddressBook

dn: cn=Ahmer M,ou=AddressBook,dc=itlab,dc=com
cn: Ahmer M
gn: Ahmer
sn: M
mail: ahmer@itlab.com
objectClass: top
objectClass: inetOrgPerson

dn: cn=Muhammad Ali,ou=AddressBook,dc=itlab,dc=com
cn: Muhammad Ali
gn: Muhammad
sn: Ali
mail: m_ali@itlab.com
objectClass: top
objectClass: inetOrgPerson

dn: cn=Waseem Hussain,ou=AddressBook,dc=itlab,dc=com
cn: Waseem Hussain
gn: Waseem
sn: Hussain
mail: waseem@itlab.com
objectClass: top
objectClass: inetOrgPerson

dn: cn=Ashfaq Khan,ou=AddressBook,dc=itlab,dc=com
cn: Ashfaq Khan
gn: Ashfaq
sn: Khan
mail: ashfaq@itlab.com
objectClass: top
objectClass: inetOrgPerson
EOF
Now add addressbook.ldif in LDAP Address Book.
ldapadd -x -W -D "cn=ldapadm,dc=itlab,dc=com" -f addressbook.ldifOutput:
adding new entry "ou=AddressBook,dc=itlab,dc=com"
adding new entry "cn=Ahmer Mansoor,ou=AddressBook,dc=itlab,dc=com"
adding new entry "cn=Muhammad Ali,ou=AddressBook,dc=itlab,dc=com"
adding new entry "cn=Waseem Hussain,ou=AddressBook,dc=itlab,dc=com"
adding new entry "cn=Ashfaq Khan,ou=AddressBook,dc=itlab,dc=com"
Now, take a look at our LDAP Directory.

We can add as much entries as we like in the same way. However, for the sake of demonstration, I am adding only 4 entries.
Apple 2025 MacBook Air 13-inch Laptop with M4 chip: Built for Apple Intelligence, 13.6-inch Liquid Retina Display, 16GB Unified Memory, 256GB SSD Storage, 12MP Center Stage Camera, Touch ID; Starlight
$849.00 (as of July 6, 2025 20:48 GMT +00:00 – More infoProduct prices and availability are accurate as of the date/time indicated and are subject to change. Any price and availability information displayed on [relevant Amazon Site(s), as applicable] at the time of purchase will apply to the purchase of this product.)Configure Mozilla Thunderbird
Now our Global Addressbook is configured successfully. Let’s use it in an email client. I am demonstrating it using Mozilla Thunderbird.

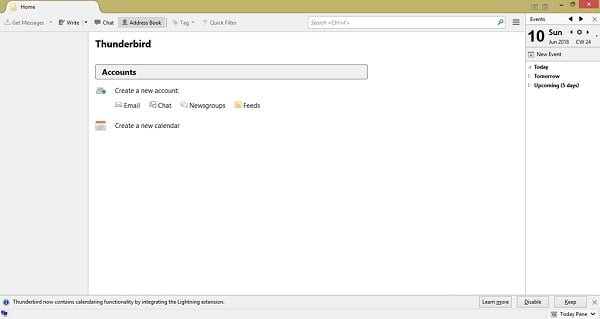
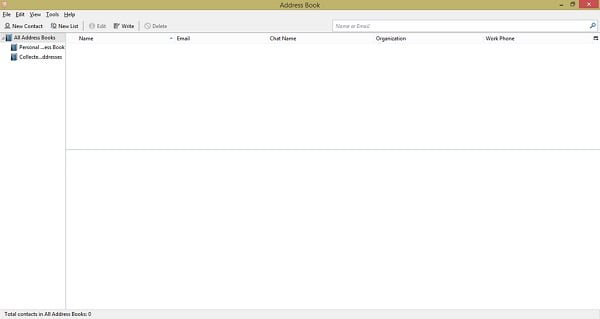
Because it is out of scope to configure an email account, therefore, I am skipping it. Click on Address book button at toolbar.

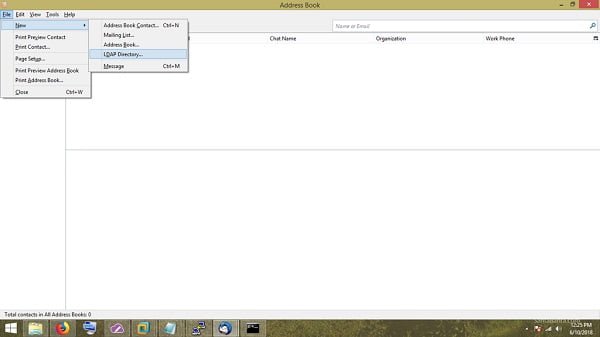
Go to File > New > LDAP Directory.

Add our LDAP Directory as follows:

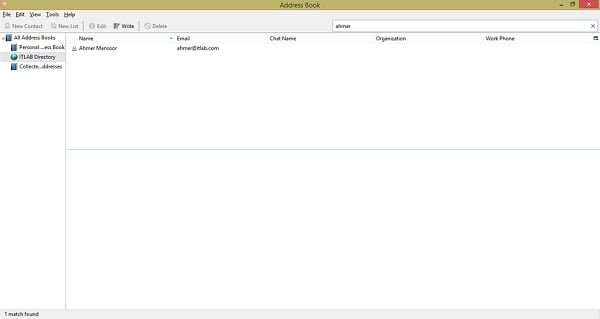
Now, our Global Addressbook has been added in Thunderbird.


Our OpenLDAP Global Address book has been configured successfully.
Linux Kernel Programming: Developing kernel architecture and device drivers for character, block, USB, and network interfaces (English Edition)
$39.95 (as of July 7, 2025 20:49 GMT +00:00 – More infoProduct prices and availability are accurate as of the date/time indicated and are subject to change. Any price and availability information displayed on [relevant Amazon Site(s), as applicable] at the time of purchase will apply to the purchase of this product.)Conclusion
Creating an OpenLDAP Address Book in CentOS 7 centralizes your contacts for streamlined access and management. By following this guide, you should now have an organized directory ready to enhance your workflow.
Need expert AWS and Linux system administration? From cloud architecture to server optimization, I provide reliable and efficient solutions tailored to your needs. Hire me on Fiverr today!
Simplify contact management with your OpenLDAP Address Book on CentOS 7 today!


Leave a Reply
You must be logged in to post a comment.