Learn how to install DVWA (Damn Vulnerable Web Application) on Rocky Linux 8 with our detailed guide. Perfect for practicing web security and vulnerability testing. #centlinux #linux #dvwa
Table of Contents
What is DVWA?
Damn Vulnerable Web Application (DVWA) is a PHP/MySQL web application that is damn vulnerable. Its main goal is to be an aid for security professionals to test their skills and tools in a legal environment, help web developers better understand the processes of securing web applications and to aid both students &teachers to learn about web application security in a controlled class room environment.
The aim of DVWA is to practice some of the most common web vulnerabilities, with various levels of difficulty, with a simple straightforward interface. Please note, there are both documented and undocumented vulnerabilities with this software. This is intentional. You are encouraged to try and discover as many issues as possible.
Damn Vulnerable Web Application (DVWA) is free software: you can redistribute it and/or modify it under the terms of the GNU General Public License as published by the Free Software Foundation, either version 3 of the License, or (at your option) any later version. (Source: https://github.com/digininja/DVWA)
Environment Specification
We are deploying a minimal Rocky Linux 8 virtual machine, which is configured with the following system specifications. This setup ensures that the server is lightweight, optimized for performance, and free from unnecessary software or services, providing a streamlined environment for the tasks at hand. The minimal installation approach helps maintain a secure, efficient, and customizable platform, perfect for server-based applications or for further customization as required. Below are the specific hardware and software details of this virtual machine setup.
- CPU – 3.4 Ghz (2 cores)
- Memory – 2 GB
- Storage – 20 GB
- Operating System – Rocky Linux 8.6 (Green Obsidian)
- Hostname – dvwa-01.centlinux.com
- IP Address – 192.168.116.128 /24
Update Linux Software Packages
Connect with dvwa-01.centlinux.com as root user, by the help of a ssh client.
Execute following command at Linux bash to refresh yum cache.
dnf makecacheUpdate your Linux software packages by executing following dnf command.
dnf update -yIf the previous command updates your Linux Kernel, then you have to restart your Linux operating system before moving forward.
rebootAfter reboot, verify the Linux Operating System and Kernel versions as follows.
cat /etc/rocky-release
uname -r
Output:
Rocky Linux release 8.6 (Green Obsidian)
4.18.0-372.13.1.el8_6.x86_64
65W Charger Compatible with Microsoft Surface Pro 11, 10, 9, 8, 7+, 7, 6, 5, 4, 3, X, Power Adapter for Windows Surface Laptop 7/6/5/4/3/2/1, Go Tablet, Book 3/2/1, Support 44W, 36W, LED, 10FT
6% OffInstall DVWA Prerequisites
DVWA – Damn Vulnerable Web Application is PHP based web application.
Therefore, you are required a LAMP Server or LEMP server to deploy it.
Here, we are installing a LAMP Stack Server. Alternatively, you can install a LEMP Stack server for DVWA web application.
Execute the following Linux command to install Apache web server, MariaDB database server, PHP and relevant modules on your DVWA server.
dnf install git wget httpd php php-mysqlnd php-pdo php-cli php-gd mariadb-server -yEdit PHP configuration file by using vim text editor.
vi /etc/php.iniLocate and set following PHP directives in this file.
display_errors = Off
allow_url_fopen = On
allow_url_include = On
Enable and start PHP, Apache and MariaDB services.
systemctl enable --now php-fpm httpd mariadbCremo Sensitive Shave Cream, Astonishingly Superior Ultra-Slick Shaving Cream for Men, Fights Nicks, Cuts and Razor Burn, 6 Fl Oz
20% OffConfigure MariaDB Server for DVWA Software
You need to configure initial settings of your MySQL database server as follows.
mysql_secure_installationOutput:
NOTE: RUNNING ALL PARTS OF THIS SCRIPT IS RECOMMENDED FOR ALL MariaDB
      SERVERS IN PRODUCTION USE!  PLEASE READ EACH STEP CAREFULLY!

In order to log into MariaDB to secure it, we'll need the current
password for the root user.  If you've just installed MariaDB, and
you haven't set the root password yet, the password will be blank,
so you should just press enter here.

Enter current password for root (enter for none):
OK, successfully used password, moving on...

Setting the root password ensures that nobody can log into the MariaDB
root user without the proper authorisation.

Set root password? [Y/n] Y
New password:
Re-enter new password:
Password updated successfully!
Reloading privilege tables..
 ... Success!


By default, a MariaDB installation has an anonymous user, allowing anyone
to log into MariaDB without having to have a user account created for
them.  This is intended only for testing, and to make the installation
go a bit smoother.  You should remove them before moving into a
production environment.

Remove anonymous users? [Y/n] Y
 ... Success!

Normally, root should only be allowed to connect from 'localhost'.  This
ensures that someone cannot guess at the root password from the network.

Disallow root login remotely? [Y/n] Y
 ... Success!

By default, MariaDB comes with a database named 'test' that anyone can
access.  This is also intended only for testing, and should be removed
before moving into a production environment.

Remove test database and access to it? [Y/n] Y
 - Dropping test database...
 ... Success!
 - Removing privileges on test database...
 ... Success!

Reloading the privilege tables will ensure that all changes made so far
will take effect immediately.

Reload privilege tables now? [Y/n] Y
 ... Success!

Cleaning up...

All done!  If you've completed all of the above steps, your MariaDB
installation should now be secure.

Thanks for using MariaDB!
Login to your MariaDB database server as root user.
mysql -u root -pExecute following set of SQL commands to create a database and user for DVWA web application.
create database dvwa;
grant all on dvwa.* to dvwauser@localhost identified by 'Str0ngP@ssw0rd';
flush privileges;
exit
Install DVWA on Rocky Linux 8
Process to install DVWA on Rocky Linux 8 is pretty straight forward.
DVWA is PHP based, so you can clone it’s Source from Git and place it into Apache Document Root for immediate deployment.
Execute git command to clone DVWA project into /var/www/html directory.
git clone https://github.com/digininja/DVWA.git /var/www/html/Output:
Cloning into '/var/www/html'...
remote: Enumerating objects: 3926, done.
remote: Counting objects: 100% (35/35), done.
remote: Compressing objects: 100% (19/19), done.
remote: Total 3926 (delta 15), reused 31 (delta 15), pack-reused 3891
Receiving objects: 100% (3926/3926), 1.74 MiB | 1.10 MiB/s, done.
Resolving deltas: 100% (1833/1833), done.
Now create a copy of DVWA configuration file and edit it in vim text editor.
cd /var/www/html/config/
cp config.inc.php.dist config.inc.php
vi /var/www/html/config/config.inc.php
Locate and set following directives therein.
$DBMS = 'MySQL';

$_DVWA[ 'db_server' ]   = '127.0.0.1';
$_DVWA[ 'db_database' ] = 'dvwa';
$_DVWA[ 'db_user' ]     = 'dvwauser';
$_DVWA[ 'db_password' ] = 'Str0ngP@ssw0rd';
$_DVWA[ 'db_port'] = '3306';

$_DVWA[ 'recaptcha_public_key' ]  = '2RwaiQfbAAAAAEZlwAfH88bpdk1n06gf_Qb2Czgf';
$_DVWA[ 'recaptcha_private_key' ] = '2RwaiQfbAAAAAMVHAi4wFAIt9150QqbgbOkSBRY6';
You can generate ReCaptcha keys from Google ReCaptcha website.
Grant ownership of DVWA software files to apache user.
chown -R apache:apache /var/www/htmlSet following SELinux Boolean as required by Damn Vulnerable Web Application.
setsebool -P httpd_unified 1
setsebool -P httpd_can_network_connect 1
setsebool -P httpd_can_network_connect_db 1
Configure Linux firewall and allow HTTP service.
firewall-cmd --permanent --add-service=http
firewall-cmd --reload
Clear List
$0.00 (as of September 17, 2025 19:07 GMT +00:00 – More infoProduct prices and availability are accurate as of the date/time indicated and are subject to change. Any price and availability information displayed on [relevant Amazon Site(s), as applicable] at the time of purchase will apply to the purchase of this product.)Access DVWA Login Page
Open URL http://dvwa-01.centlinuxn.com in a web browser.
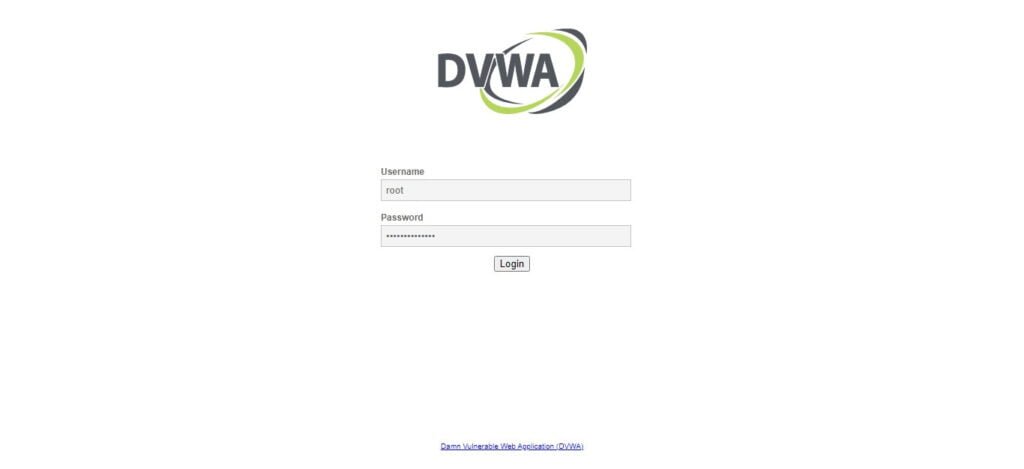
Login as MySQL root user.
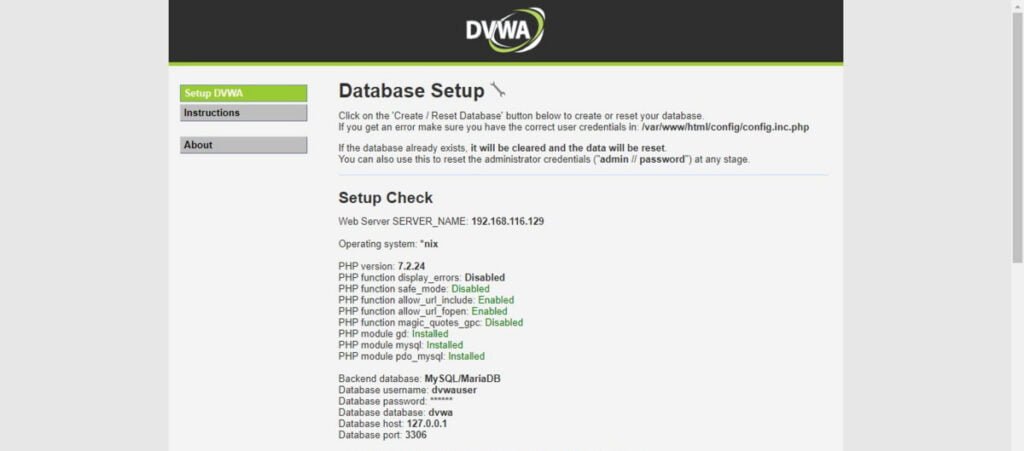
If you have performed the previous steps accurately, then You don’t have to setup anything here.
Click on <Create / Reset Database> to create DVWA database objects.
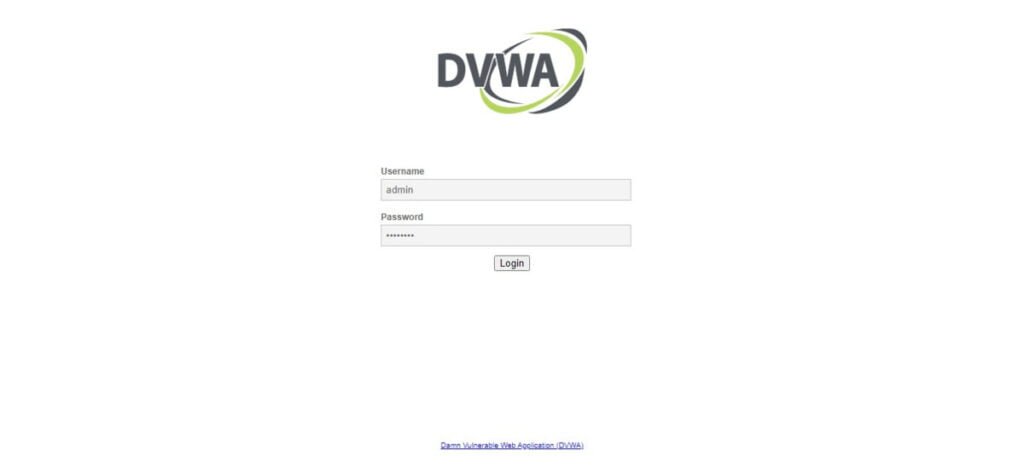
You can use default username/password i.e. admin/password for DVWA Login.
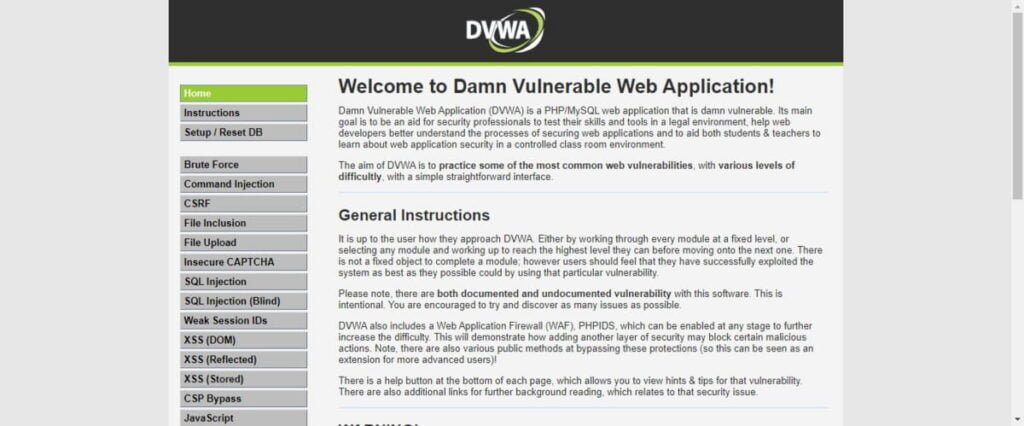
After successful login, You will reach at the Dashboard of Damn Vulnerable Web Application.
Master cybersecurity and pass the CompTIA Security+ (SY0-701) exam with confidence—enroll in our complete course and practice exam today!

Frequently Asked Questions (FAQs)
1. Why does DVWA use a login page, and what are the default credentials?
The login page simulates real-world authentication flaws. Default credentials:
- Username:
admin - Password:
password
(Note: Always change these in a lab environment to prevent unauthorized access.)
2. How can I troubleshoot “Connection Failed” errors in DVWA?
Common fixes include:
- Ensuring Apache/MySQL services are running (if using XAMPP).
- Checking the
config.inc.phpfile for correct database credentials. - Verifying DVWA’s directory permissions (e.g.,
/htdocs/dvwa/).
3. What security levels does DVWA offer?
Four levels: Low, Medium, High, and Impossible, each with progressively stricter defenses.
4. Is DVWA safe to use?
Only in isolated environments (e.g., localhost/VMs). Never expose it to the internet due to its vulnerabilities.
5. What common vulnerabilities can I practice in DVWA?
Includes SQLi, XSS, CSRF, Brute Force, and File Upload exploits.
Final Thoughts
In this guide, we have successfully walked through the steps to install DVWA (Damn Vulnerable Web Application) on Rocky Linux 8. DVWA is a popular web application designed to help security enthusiasts, penetration testers, and developers practice and improve their skills in web application security.
By following the outlined instructions, you’ve learned how to set up the necessary prerequisites, including the Apache web server, PHP, and MySQL, to host DVWA on your server. Additionally, we walked through the process of downloading and configuring DVWA, ensuring that the web application is accessible and properly secured for local testing.
With DVWA installed, you can now begin exploring various security vulnerabilities such as SQL injection, Cross-Site Scripting (XSS), and Command Injection, all within a safe environment. This setup will prove valuable for learning, practicing, and testing security techniques without compromising live systems.
Always remember to deploy DVWA in a controlled and isolated environment to avoid exposure to external threats, as it is intentionally vulnerable. Happy learning and testing!
Looking for a Linux server expert? I provide top-tier administration, performance tuning, and security solutions for your Linux systems. Explore my Freelancer profile for details!


Leave a Reply
Please log in to post a comment.